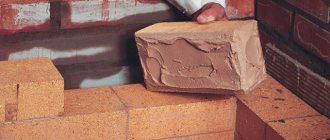
Brickwork
I am glad to welcome you, dear reader! Today we’ll talk about how to prepare the right clay solution for a stove or fireplace.
Those who have dealt with the laying of a brick structure are well aware of the procedure for preparing the mortar, which should be prepared not anyhow, but according to all the rules of stove art. A real stove maker can immediately determine whether a mortar for laying stoves is good or bad. To do this, the master just needs to rub it between his fingers.
But it is difficult for a beginner to understand this “competent issue”. And he gets the impression that “brick glue” can be prepared by mixing clay, sand and cement. All this is true, but... The solution for the oven must be prepared correctly.
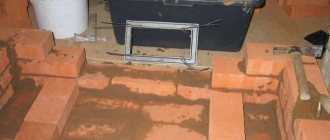
Features of laying bricks for the stove
Before moving on to the topic of solutions for creating a furnace, it is worth understanding what this work consists of. Firstly, the oven, like any “structure”, consists of a base. Or rather the foundation. It must be strong enough, because the stove is supported on it.
At the same time, the temperature in it can be either 0 C or +1000 C. And if you imagine that cold air enters through the pipe, it will become clear that a simple cement mortar will not withstand the foundation of the device. Next, the stove consists of a firebox and a chimney.
- Creating these three elements is quite labor-intensive work. At the same time, you need a lot of bricks, as well as mortar to hold them together.
- Today this is not a problem; the market offers a large number of ready-made mortars for laying a furnace.
- But they are not that cheap. And as noted above, you need quite a lot of solution.
Therefore, experts in this field (stove makers) advise preparing such mixtures yourself. In their opinion it is not that difficult. The only thing you need to study is the terminology that refers to the substances included in the solution.
Materials and tools
So, what do we need to mix a good solution? First, the tools. With their help, we will knead, sow, lay... Secondly, we need the materials themselves, that is, what we will knead, sow and lay.
Tools: a shovel - for preparing sand and clay, a trowel - mix and use for work, a sieve with a mesh size of 1-2 mm, container (trough, bathtub, tank), a couple of basins, a bucket, a drill or a hammer drill with a mixer attachment.
Necessary materials: clay - the base of the solution, sand - the main filler, cement - the binding component, lime , asbestos , gypsum - auxiliary and additional components (usually not used), clean water .
Terminology
Sand art uses only three terms to name the solution. It is heat resistant in nature. Those. a solution that can withstand fairly high temperatures. When the oven cools, this mixture does not crack and remains in its original form.
Heat-resistant solution refers to a mass that can withstand temperature fluctuations. It is characterized by a smaller amount of thermal deformation compared to the first option.
The refractory solution took away the advantages of the two above substances. At the same time, the appearance of the stove remains the original design, despite the passage of smoke through the chimney and firebox. Based on this, we can draw a conclusion about the solution that is most suitable for laying a stove. Namely, about the heat-resistant and fire-resistant mixture.
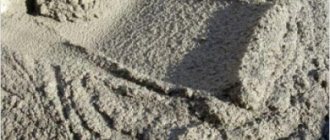
Sand-clay mixture and its preparation
What mortar is needed for masonry? Clay mixtures are especially good for laying stoves because in case of a mistake, everything can be dismantled without loss. The main characteristic of a clay solution is its fat content. Poor and fatty mixtures will make the masonry unusable when dry, so a normal fat content of the clay is required. To find out the degree of fat content, you can use one of the following methods:
- In a ten-liter bucket, dilute enough clay to obtain a creamy consistency. Next, dip a wooden stick into the mixture, stir the solution and pull it out. The amount of clay remaining on the reed is estimated. Up to 0.1 cm - the composition is skinny, it needs to be drained, over 0.22 cm - fatty, it needs to be emaciated. The ideal figure is 0.2 cm.
- Prepare 6 different portions of clay with sand and water, bring to a consistency where the mixture does not stick to your fingers. Make the same number of balls and cakes. Let it dry for a couple of days. Afterwards, the non-cracked models are thrown one by one onto a hard surface; those that, upon impact, retained their integrity and did not crack, are made of clay of normal fat content.
When the “correct” clay is found or brought to the required normality, water and sand are prepared, which are pre-sifted.
Water must be taken with the lowest mineralization index. If it is hard, cracks may form when the solution dries. Eight-degree water hardness is suitable for the stove solution. You can neutralize excess salts using 100% ordinary soap. 1 g can remove 10 ml of unnecessary impurities.
There are several methods to mix the solution correctly. In the first case, the clay is soaked for 24 hours in water. The mixture should be creamy. After the required time, the liquid is drained, purified sand and water are added. Do this in several passes, after thorough mixing. Sand is added until no puddles of clay liquid appear.
It is better to buy river sand, because the characteristics are much better than sand produced in a quarry. River sand often does not require additional cleaning, since it does not contain additional clay, stones and other unnecessary materials. Also, such sand has a round, smoothed shape, so its use helps in creating the most even surfaces.
According to the second method, parts of chamotte sand and refractory clay are combined and diluted with water.
Another method, for clean, normal-fat clay, is to add prepared fine-grained sand and a quarter of purified water.
The proportions in each specific case and for each laying may be different. To impart greater binding capacity, up to 250 g of salt or 750 g of cement can be added to the solution.
Foundation mortar
Before making the base for the brick oven, concrete (slab) is placed under it. It is this that ensures that the foundation does not require an expensive solution. A quite familiar one made of cement and lime will do. It is recommended to take red bricks and a whole format.
Furnace structure
A brick sauna stove is a three-dimensional structure, sections of which function under different conditions. The level of temperature and moisture in the base differs significantly from the same parameter at the chimney and firebox.
During constant operation, the temperature difference can reach from 0 to 12000 C. The firebox and chimney are actively exposed to flue gases, and the chimney, at the same time, also reflects the pressure of winds, rains, and frosts.
The surrounding world and people have not yet come up with a binding composition that can adequately withstand destructive factors. Lime and cement cannot resist a large temperature difference; the clay either becomes limp or allows gaseous combustion products to enter the room.
In this regard, for high-quality masonry of the furnace you will need at least 3 compositions. In addition, you need to be able to prepare them correctly: simply mixing cement-sand mortar into a bucket is not the solution.
Many may say that you can simply purchase ready-made dry stove mixture at a hardware store. Why not, but only if finances allow. You need to understand that for 100 bricks you will need about 3 buckets of mortar, and this is significantly less than the required volume. And taking into account that 1 package of the mixture is quite expensive, you will have to spend an impressive amount on laying the entire stove. To save money you should:
- Find out where in the surrounding area you can find natural raw materials for making masonry mixture;
- If necessary, purchase additional components;
- Understand the correct mixing proportions;
- Prepare all the necessary elements;
- Knead the masonry mixture.
Furnace solution
Or, as it is also called, for the body of the furnace. Which is represented by red brick masonry. For example, brand M 150. It is in the body of the stove that the firebox is located. The body can withstand temperatures of more than +600 C.
But, as practice has shown, the temperature there is less than the indicated figure. But the influence of carbon monoxide and acid sludge is greater. Therefore, clay mortar is chosen for laying the body of the furnace.
As for the firebox, the temperature there is higher than + 1200 C. Therefore, to create it, they use a solution of clay and fireclay, which has a fire-resistant effect.
What parameters are affected by the mixture for laying bricks?
A mixture of poor quality or inappropriate for operating conditions can cause very unpleasant consequences. The stove will either have to be constantly repaired, or completely redone taking into account the mistakes made.
The quality of the solution affects the safe operation of the furnace
How does a poor-quality masonry mixture manifest itself?
Cracks in masonry joints. They are most quickly detected in places of maximum heating. The presence of cracks indicates that the strength of the furnace has decreased significantly.
Smoke enters the room. A very dangerous phenomenon that requires immediate elimination. In winter, the stove is not dismantled; cracks have to be periodically sealed with mortar throughout the season. After a few days it falls out and the process needs to be repeated.
The bricks are shaking. Such consequences are found near the firebox doors. Heavy cast iron structures are connected to bricks. If they are not strong enough, then the doors will wobble a lot when opening/closing.
With such a problem, you can hold on to the heat, but you need to use the firebox very carefully and carefully.
If you use a low-quality solution, you will subsequently have to repair cracks in the slab
Pipe solution
Lime mass is all that is needed for laying the chimney. Which in turn is divided into three parts:
- Source. Clay and red brick are used for masonry. Since the temperature does not exceed + 400 C;
- Fluff. The peculiarity is the strength of the structure. Therefore, the mortar is used from limestone, and the brick is solid brick. The element itself is a ceiling from the house to the pipe;
- Smoke pipe and fluff. The chimney is located above the roof, so it is affected by both the high temperature of the smoke emitted and weather conditions. In this case, red brick and lime mass are used. The fluff is placed according to the same principle as a chimney.
Construction of a brick chimney
You must undertake the construction of a chimney from bricks, being thoroughly prepared for this process.
Brick selection
In most situations, the building raw material for constructing a chimney is ordinary red brick. But since there is an opinion that simple material will not withstand high temperatures, some lay out the chimney from refractory bricks, the price of which is much higher.
Builders claim that the use of refractory bricks is justified in cases where it is necessary to build an overmount chimney. It will be exposed to gases with the highest temperature.
The myth that ordinary red brick is not suitable for building a kiln can be debunked. Ordinary bricks are not at risk even at temperatures above 800˚C. And it doesn't get that hot inside the chimney.
Simple bricks will not be a cause for frustration if you take their choice seriously. It is worth taking only material with smooth side walls. Bricks with an uneven surface will make the interior of the chimney even rougher, which will lead to significant contamination of the pipe with combustion products.
Irregularities that appear on bricks during the process of laying and creating joints must be eliminated with a sponge moistened with water.
Sand-lime brick is definitely not suitable for the construction of a chimney. This construction raw material, when heated, releases toxins into the environment, which is why it can be used exclusively for finishing the outside of a house.
When purchasing bricks, it is important to examine the edges on several pieces. They should be completely even. A good brick is one that is distinguished by an ideal parallelepiped shape, sufficient strength and uniform firing.
It is better to lay the chimney from bricks measuring 25x12x6.5 cm.
Brick for chimney over roof
It is strongly recommended to cover the chimney in the area where it exits the roof with facing bricks. True, there are opponents of this rule, who believe that the material used for cladding will collapse almost immediately, which cannot happen with other construction raw materials - clinker bricks.
The part of the chimney above the roof can be created from rough bricks and then covered with clinker material. But there is another option: immediately assemble the “top” of the pipe from clinker construction raw materials - about 50 bricks.
Calculation of brick pipe parameters
It is impossible to build a pipe without deciding on the cross-sectional size inside the structure. This parameter is very important because it affects the stove’s ability to get rid of fuel combustion products. The width of the smoke channel always depends on the power of the furnace equipment.
To find out what the internal cross-section of the pipe should be without resorting to complex calculations, you can use one of three standard sizes:
Another significant parameter for the smoke channel is height. When calculating the length of the pipe, take into account where the pipe exits onto the roof (in relation to the ridge).
A chimney, one and a half meters or less away from the ridge, should rise 50 cm above the roofing material. When the interval between the highest point of the roof and the chimney is 2 or even 3 meters, the height of the smoke duct above the roof is made equal to this distance.
If the chimney is located more than three meters from the ridge, the pipe size is selected so that an angle of 10˚ is formed between the upper edge of the structure and the ridge.
Mortar for smoke duct made of bricks
The mortar used to glue the chimney bricks together is a composition of water, sand and clay. Thanks to these components, the mixture becomes similar to brick in terms of linear expansion. This means that the solution will protect the masonry from the appearance of defects.
The clay used as one of the components of the solution must be clean. There are no other requirements for it, so it’s okay if the natural material taken is fatty or scanty.
Sometimes the clay for preparing the solution does not need to be mixed with sand. We are talking about a situation where the found clay is already saturated with sand in a ratio of 1:3 or 1:4.
If the clay portion is too large, the solution will become covered with cracks when it hardens. And an insufficient amount of this component in the special mixture leads to its crumbling in a dry state.
You can find out whether the content of components in the solution is optimal using a simple method: knead the composition with your fingers. If there are no deviations from the requirements, then the mixture will feel neither slippery nor rough, like a piece of sandpaper.
Sand has different requirements. It’s good if its grains have a large diameter - 1 mm. Raw materials of this size feel rough to the touch. Pulverized sand mined in the floodplain of a stream or river should never be used.
Preparation of the composition
The solution for creating a chimney from bricks is prepared as follows:
For fear of making a mistake with the quantity of mortar components, you can purchase a ready-made masonry mixture of sand and clay in dry form. The main thing is that the purchased composition is fireproof, otherwise it will not be suitable for laying bricks.
Making a brick smoke channel
Most stoves are suitable for a pipe with a cross-section of 25x12 cm. A smoke channel with these dimensions is created from bricks, which must be specially divided into 2 parts. The bricks are sold in this form. But if you wish, you can cut them yourself using a grinder with a mounted diamond blade.
When laying bricks, the mortar must be applied in a layer no more than 1 cm thick. A thicker layer may crack during expansion under the influence of heat.
It makes no sense to build a relatively complex brick chimney for a metal stove. For such equipment, it is better to find an ordinary iron pipe.
To assemble a smoke channel from bricks, certain tasks are performed:
If you doubt your ability to lay a chimney out of bricks, you can resort to test assembly of the smoke channel. This involves doing the work on the ground without using mortar.
Photo gallery: brick chimneys
Video: example of building a brick chimney
Lining a brick pipe
Lining is a method of restoring the tightness of a chimney by inserting a stainless steel pipe inside it. The need for such an operation arises for certain reasons.
The meaning of the chimney liner
In any case, you will have to deal with deterioration in the operation of the chimney, because the internal walls of the channel become contaminated with soot over time. It forms quickly and in large quantities if the temperature inside the chimney constantly changes and the combustion products contain chemicals.
Brick structures are most likely to become clogged with fuel combustion products. This is due to the roughness of the inner surface of the brick chimney.
A smoke channel clogged with soot stops functioning normally, causing backdraft to occur - a phenomenon due to which gases go not up, but down - straight into the house. To normalize draft, they resort to lining the chimney, which allows you to transform the uneven walls inside the chimney into a perfectly smooth surface. In addition, after sealing the channel becomes more airtight, easy to clean and retains heat better.
The most correct sleeve option is a pipe with an oval or round cross-section. A product of a different shape will allow soot to accumulate in the corners.
Instructions for lining the chimney
Lining a smoke brick channel involves performing the following actions:
Video: chimney lining
A little about solutions
Based on the above, you can see expressions such as fireclay, clay, lime, cement, or compounds of some substances from this list. But not everyone knows what properties these mixtures have. Therefore, this will be discussed in more detail below.
Fireclay mixture
Many people classify this mixture as minerals. But this is not entirely true, of course there are minerals there, as well as other elements.
- Fireclay mixture is used for laying the firebox. The mass consists of minerals (garnet, zirconium, etc.) and clay.
- Use it only after complete burning. Even if there is no liquid left in the fireclay.
- The technology involves obtaining a mass with lumps. Fireclay bricks or mortar for laying this material are made from it.
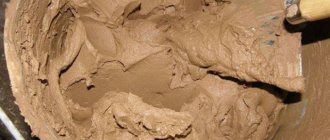
Clay mortar
The cheapest material that can be found in nature for next to nothing. The only thing is that it is difficult to knead. Withstands temperatures up to + 1100 C. Resists fire and has maximum gas density. Suitable for indoor ovens.
Mortar
Here, it is necessary to clarify that it is not pure lime that is used, but slaked lime. Otherwise, you may get cracks in the oven. According to other characteristics, fire resistance and heat resistance are below average, and strength exceeds clay mortar. Used for stoves built outdoors.
Cement and limestone mortar
The mass has low gas density. At the same time, when laying the foundation, it shows its best qualities in terms of its strength.
Chamotte and clay solution
This mass is used for combustion. Withstands more than + 1200 C. It has the properties of a clay solution.
Mortar of cement and chamotte
Here, it is necessary to clarify that the mass is made from high-quality, and therefore far from cheap, substances. As for other characteristics. The mortar is similar in strength to a mass of cement and limestone.
In terms of heat resistance, cement and fireclay are equal to a solution of clay and cement. But the fire resistance is higher than that of other solutions presented above.
This article showed what solutions are used for laying the stove. And she gave advice on what mass for masonry you can save on. Where is it better to overpay to get a stove that will serve for many years.
Starting materials for furnace solution
A few words need to be said about the materials that are used to make masonry mortars for stoves, since they also need to be selected wisely. These materials include fireclay and quartz sand, clay, lime and cement.
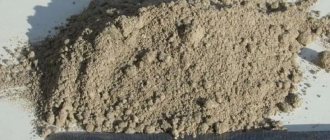
Fireclay sand
Fireclay is a fireclay that has undergone a high-temperature firing process, during which moisture was completely removed from it, and the material was brought to a sintering state.
Fireclay sand
Fireclay sand is made from broken fireclay bricks, crushed by crushing. This material makes the solution more resistant to high temperatures, so it is often used instead of sand or as an additive to the mixture intended for the combustion chamber, which, accordingly, is lined with heat-resistant fireclay bricks.
You won’t need too much fireclay sand, so you shouldn’t skimp on it. It can be purchased ready-made in specialized stores.
Clay
Clay is a micro-grained mineral that has a number of advantages such as plasticity, strength, water resistance, high adhesion, and gas tightness. All these properties can be reduced to one quality - fat content, since it is based on this that the material is selected. Clay with medium fat content is ideal for making oven mortar. If the mineral is too oily, then when moisture evaporates from it, the surface will crack into a fine mesh. Well, when using skinny clay, the solution will not have the proper plasticity and reliability.
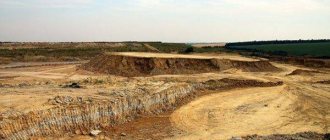
High-quality clay can be found in open quarries or on steep river banks
Clay can be easily found in the vicinity of a suburban area, since it is, as a rule, widespread in any area. Good material usually lies at a fairly great depth, so it is better to look for it on steep river banks or in quarries, where you can see its numerous exposed layers.
Selection of clay by fat content
The layers contain clay with different compositions, so in one quarry or on a cliff you can find minerals with different fat contents. In this regard, when selecting material for making masonry mortar, you need to take samples from several layers, keeping in mind that the higher the layer is, the fatter the clay in it.
However, if clay that is too fat or lean is found or purchased, its composition can be adjusted. For example, a fatty mineral can be brought to the desired state by adding a little more sand, and a lean mineral can be mixed with fattier clay, purchased in small quantities specifically for this purpose.
The fat content of clay can be determined immediately at the place where it is found. To do this, take a handful of dry mineral, moisten it with water and knead it to a plastic state. Already in your hand you can feel how high the fat content of the raw material is - so if the clay takes on the consistency of plasticine, this means that the material is fatty. If, after wetting and kneading, the lump continues to crumble, it means that the clay is thin and will have to be fattened.
You can test the quality of clay at home, and these results will be more reliable than the conclusions after simply squeezing a lump of mineral in your hand. There are several ways for such control:
- Take 0.5 liters of clay, to which 100÷150 ml of water is added. Then the entire mass is thoroughly kneaded with your hands until smooth - it should not stick to your palms. From the resulting “dough” two balls with a diameter of 45–50 mm are rolled, and one of them is crushed into a flat cake. Then they are dried at room conditions for two to three days.
If after this time cracks appear on the experimental samples, it means that the clay is too oily and you need to add a little more sand to it than indicated in the recipe for making the solution.
If no cracks are found, and a ball thrown onto the floor from a height of one meter does not break into pieces, then the clay is suitable for masonry stove mortar.
- The second way to check is to knead 2÷3 liters of clay with water using a paddle. If the mass sticks to the tool with almost its entire volume, it means that the clay is oily and requires an additional portion of sand, larger than what is indicated in the recipe.
Clay that remains on the paddle in separate clumps when mixed is considered suitable for masonry mortar.
- The third verification method can be called the most accurate. It consists of mixing 0.5 liters of clay with water to form a dough. Next, a ball measuring 45÷50 mm is rolled out of this mass. Then it is placed between two smooth planks and gently squeezed until cracks begin to form on it, which has turned into a flat cake.
Testing clay mortar samples for fat content
When using this testing method, the fat content of the raw material is determined by observing what thickness cracks appear on the cake, and what form they take.
- So, if the clay is thin, then even with a slight compression the ball will crumble into separate parts.
— If a clay ball cracks when compressed by ⅓ of its diameter, then the clay has a normal fat content and is perfect for making oven mortar.
— Very oily clay, when compressed by ½ of the original diameter, forms only thin cracks.
By carrying out such tests, you can immediately bring the experimental mass to the desired state by adding sand or richer clay to it. It is recommended to write down the proportions of the best options. Once the optimal ratio of materials is determined, it will be much easier to formulate any amount of solution.
Clay cleaning
After the clay has been selected, it must be cleaned, since after this process the physical and mechanical properties of the raw materials will improve, which means that the masonry itself will be of higher quality both in terms of technical and aesthetic characteristics. The cleaning process can be carried out in two ways:
- Dry clay is crushed and sifted through a sieve with cells no larger than 2÷2.5 mm. However, such cleaning is not very convenient, since clay is not as free-flowing as sand and will quickly clog the cells.
- Better cleaning will be achieved if the clay is first soaked and then rubbed in a swollen state through a sieve over which a mesh with cells of 2.5–3 mm is stretched.
The process of soaking clay can also be classified as preparatory work, and in any case cannot be done without it. If cleaning is done dry, then soaking occurs after this operation is completed. In the same case, when the clay is cleaned by rubbing, soaking occurs before cleaning, and a little water is added to the wet rubbed clay as needed.
When soaking dry sifted clay, it is poured into a container with a layer 150÷200 mm thick and then filled with water, which should completely cover the surface of the material.
The next layer of the same thickness is laid on top and also filled with water, then clay and water again, and so on until the container is filled almost to the top. The soaked clay is left to swell for a day, and then the entire contents of the container are mixed with a shovel. Next, additional water is added to this mass, and the soaking process is extended for another 24 hours. After this, the clay should be thoroughly mixed again, and now it will be ready for preparing masonry mortar.
Sand
On steep banks, between layers of clay, you can find a layer of sand suitable for stove mortar. For example, white quartz sand is perfect for laying any area of the furnace, but yellowish sand will be unsuitable for the combustion chamber. If you extract sand yourself, then you need to know that it requires some preparation using a large amount of water. If this material is purchased, then you need to buy washed river sand. But even in this case, you will have to work on the material.
Even ordinary sand for stove mortar will require careful preparation
Washing the sand is mandatory, especially in cases where it was mined independently. The process is carried out in the following sequence:
- The first step is to sift the sand through a metal sieve with cells no larger than 1÷1.5 mm. Thus, a homogeneous mass is obtained, cleared of large fractions and plant debris. However, even sifted, but unprocessed and unwashed sand is saturated with organic matter, from which it must be freed, since over time it can lead to the destruction of the masonry.
On an industrial scale, sand is cleaned of organic matter by heating it to high temperatures, at which it dries well. At home, sand can be cleaned by washing, but this cleaning option will be possible if a water supply is connected to the house, since a lot of water will be required, and it must be supplied under sufficient pressure. The productivity of such cleaning is low, but in a couple of days it is quite possible to wash sand for laying one stove.
Homemade device for cleaning sand by washing
- To carry out the flushing operation, you will need to make a special simple device consisting of a galvanized pipe with a diameter of 200÷250 mm and a height of 600÷750 mm. A large container will not be suitable, since there is simply not enough pressure in the water supply system for the sand placed in it. The lower part of the pipe is made cone-shaped with a special spout for attaching a water hose to it, the second end of which is connected to the water supply system. A drain is made at the top of the pipe through which dirty water will drain.
- The container is suspended and filled with sand to ⅓ of its volume. Then the water is turned on under low pressure, with the expectation that it can lift the washed sand. The sandy mass should seem to swirl, but not go down the drain along with the dirty water.
Rinsing each portion is carried out for approximately 7–10 minutes, until clear water begins to flow into the drain.
During such washing, not only organic matter is removed from the sand, but also other impurities undesirable for the furnace solution.
Then, clean sand is removed from the washing container and laid out on a spread material to dry, and the next portion is laid for processing.
Cement
Cement is an inorganic binder that, when mixed with water, forms a plastic mass. When hardened, the mixture using cement becomes hard, but quite brittle. Therefore, to gain greater strength, cement is mixed with sand, and sometimes, to increase ductility, lime is added to it.
For laying some sections of the furnace you will need a solution using Portland cement M400
The cement has a digital marking, which indicates the compressive strength of the prototype cement fill; it can vary from 200 to 600 kg/cm². Cement grade M400 is suitable for stove masonry and foundation construction.
The composition of cement usually includes additional ingredients - finely ground gypsum and clinker, which is obtained from the raw material mass of clay and limestone by firing before sintering. These components give cement the qualities necessary for masonry work - high adhesion, ductility, strength, etc.
Prices for cement M400
cement M400
Lime
Lime is a white mineral substance obtained by burning limestone. Its chemical composition is calcium oxide.
The addition of quicklime gives the solutions additional plasticity
Slaked lime is used as an additive to mortars, which makes them more plastic and allows them to harden evenly.
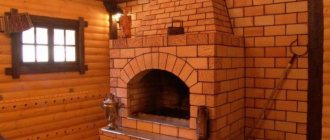
Photo of the correct mortar for laying the stove
Popular brands
When purchasing a plaster composition, it is important to pay attention to the following:
- permissible operating temperature limit;
- whether the composition is intended for indoor or outdoor work;
- environmental friendliness of components;
- hardening time;
- resistance to moisture, sudden heating or cooling.
The integrity of the packaging, date of manufacture, and compliance with storage conditions are important.
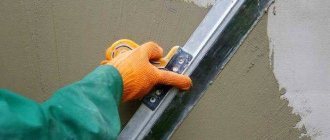
Heat-resistant plaster for stoves and fireplaces
The following types of brands are the most popular.
PECHFORM PC400 W
Heat-resistant variety. Suitable for lining the flood zone, areas near the hob, side walls of the stove, fireplace.
The maximum permissible operating temperature is 400 degrees. There is no need to additionally putty the surface on top.
Can be used for outdoor and indoor work.
Surface material for application:
- brickwork;
- concrete;
- limestone;
- composite slabs.
5 minutes after mixing the solution it is ready for use and remains suitable for application after 2 hours. Do not apply on top of metal parts.
During operation and drying of the composition, the temperature should be from +5 to +30 degrees. Painting is allowed after 2 weeks.
Typhoon Master
Products from a domestic manufacturer. Heat-resistant plaster is used for finishing walls, chimneys of fireplaces, barbecues and barbecues made of brick.
Has the following properties:
- heat resistance;
- tolerates moisture well;
- plastic;
- convenient for vertical application.
The average mixture consumption per 1 square meter is from 1.6 to 1.8 kg.
Kalina Master
Fireproof plaster. Contains Portland cement. It is characterized by increased strength. Excellent resistance to high temperatures. Quickly sets to the surface. Resistant to mechanical damage.
Pechnik
The base is fireclay clay. Suitable for masonry and finishing of stoves. Hardens quickly. It is used in working with old and new furnaces. Convenient to apply.
It does not collapse when the product shrinks, it is plastic.
Heat-resistant adhesives
Act as a connecting substance for fastening tiles to the surface of a stove or fireplace.
Two types are in greatest demand.
Terracotta
Sold dry. The main raw material is refractory kaolin clay. Does not lose properties at +400 degrees (permissible limit).
It is distinguished by its plasticity, ease of installation, and good adhesion. Used for leveling walls and plastering. All components of the composition are environmentally friendly. It hardens quickly, within an hour after mixing.
The recommended layer thickness is up to 1 cm.
Hercules
Heat-resistant glue. Used for laying fireplaces, stoves, barbecue complexes made of refractory bricks. Suitable for fixing tiles.
Packaged in bags of 5, 12 and 25 kg.
Operating temperature range from –50 to +1200 degrees.