A reflector for radiators helps raise the temperature in the room by 2-6 C. There are situations when radiators do not waste heat rationally and heat the walls of the house instead of the room.
There is a solution to this problem - installing a heat shield behind the battery. This will also help to significantly reduce energy costs for heat. And the issue of saving and preserving heat in the house is in the first place for everyone.
In this article we will talk about heat reflectors behind the battery, their types, materials used during installation and customer reviews when using screens.
A little about heat engineering and radiator grilles
Even if you need radiator grilles for decoration, do not forget that the radiators must heat the room. Any screen reduces heat transfer, even the most delicate and delicate one. Another question is that one will reduce the amount of heat transferred by 10-15%, and the other by 60% or even more. It is unlikely that you will want to sit in a beautiful but cold room, so when choosing a decorative grille you need to take into account how the heat will spread.
The principle of heat transfer from a heating radiator without a grille is shown in the figure. The main idea is that air should come from below, pass along the battery, heat up, and go up. This is how our heating works. When choosing a grille or screen, you need to remember this. For normal air circulation, it is necessary that there is a gap at the bottom and no cover at the top. As a last resort, the lid should have a large perforation area.
Not a bad option - large holes allow air to move freely
But if you look at many of the decorative grilles, you can immediately tell that the room will be cold. This especially affects grilles on heating radiators in the form of a box, which have walls on all sides. If they are very lacy, as in the photo above, there is no particular problem, but if they are made of solid wood (as in the photo below), with almost no or minimal perforations, be prepared for heating inefficiency.
The top of the battery is covered with a solid layer of wood without holes
Wood is, of course, an aesthetic material, but it has a high heat capacity. Until the wood heats up, the room will be cold. And since the array is located above the radiator and there are no holes for circulation, the radiator under such a grille will be hot, but the room will be cold.
Masking of radiators and the laws of heating engineering
The main task of any heating radiator is to heat the room. The goal is achieved by combining or separately using two methods - infrared radiation and convection. Thanks to them, comfortable conditions are formed.
We can feel thermal energy if we place our hand in close proximity to the radiator. Convection ensures air circulation and uniform temperature distribution throughout the room.
The screen for the radiator performs several important functions: it links the device with the design, protects it from damage and settling dust, the combustion of which releases toxins.
It would seem that the task of decorating the radiator was completed successfully, but the room immediately became noticeably colder. This all happened because glass almost completely neutralizes infrared radiation.
An original way to disguise a heating radiator will help to expand the window sill and use the structure as a piece of furniture.
This statement fully applies to blind screens that prevent both long-wave infrared radiation and short-wave convection.
The same can be said about the blind boxes above the top of the radiator - they are an insurmountable barrier to the spread of warm air upward (the convection method does not work). The conclusion suggests itself - the larger the area of the holes in the lining, the smaller the heat loss will be.
Tasks and materials
Most often, grilles are installed on heating radiators for decoration - not all heating devices look attractive, but the grilles are sometimes made very beautiful. The second task that battery screens often perform is to cover sharp and hard edges. This is relevant in families with children, especially if old-style cast iron radiators, the “accordion” type, are installed. Their shape is dangerous, and their appearance is unattractive; they would only be suitable in loft-style rooms.
Grates for heating radiators are made from different materials:
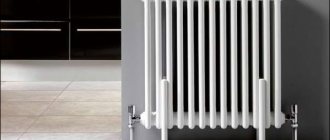
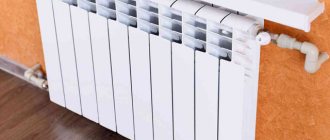
- Metal screens for batteries are produced in large quantities. They are made from thin sheet steel, which is then coated with paint. For the most part, they don't cost much, but they also look average. The service life depends on the quality of the paint. Powder enamels are preferable. They last longer, maintaining their attractiveness for decades. From the point of view of the effect on heating, metal screens for radiators are the best choice. The metal heats up quickly, and then it begins to radiate heat. So the option is inexpensive (usually) and does not greatly affect the temperature in the room (if there is perforation).
The most common form, and the design can be anything
The forging is very beautiful
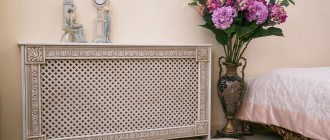
Wood always looks solid
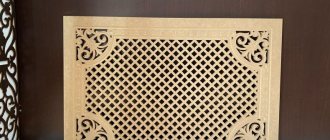
Openwork decorative grilles for batteries are usually made from MDF and HDF
Plastic washes well, is durable and unpretentious
Screen for glass radiators
Used in the manufacture of decorative grilles for radiators and more exotic materials. For example, bamboo and rattan. Such products are more demanding for interiors and are rare.
Rattan screen on wooden frame
There are also combined grilles. Most often there is a wooden frame on which some kind of decorative mesh is stretched. Bamboo and rattan wickers are most often attached to such a frame. MDF and HDF panels are usually mounted on a wooden frame.
What materials are suitable for the screen?
The first problem that had to be solved was the choice of material from which to make a heat-reflecting screen. More precisely, two materials: foil and foamed polymer.
There are several criteria for choosing reflective foil:
- The degree of surface polishing. The smoother the metal layer, the more heat will be reflected into the room. Matte foil for the screen is not suitable.
- Presence of an adhesive layer. The self-adhesive variety is more expensive, but you don’t have to bother with the selection and uniform application of glue.
- Reasonable price. In terms of price-quality ratio, it is best to take aluminum foil.
The foil can be installed either in one layer or in two (on both sides of the insulating layer). As a rule, the distance from the wall to the radiator will not allow installing two layers, and the effectiveness of single-layer shielding will not be much inferior to the option with two layers.
Insulation material
The purpose of insulating material is to create a barrier to heat. The most effective insulators are porous materials whose cells contain air. There are many materials with this structure on sale.
We make a choice based on the properties:
- thermal conductivity – within 0.05 W/m*°C.
- thickness - from 0.5 cm to 1 cm. Thinner material will not create a reliable barrier to heat, and a thicker layer is unlikely to be placed in a tight space behind the radiator;
- sufficient plasticity and flexibility. Tiled materials (such as polystyrene foam or mineral wool) will be inconvenient to use.
We recommend: How I use a vegetable net on the farm: 7 non-obvious ways
After analyzing the properties of materials presented on the domestic construction market, I settled on foam foam, covered on one side with foil. This is a foamed roll material on a polyethylene base. The main advantage of penofol is its closed air pores (due to this feature, the material does not absorb moisture). Other benefits:
- presence of a layer of foil;
- ease of working with penofol;
- affordable price per 1 sq. m.
There are recommendations when cutting penofol to add 10% to the radiator area for each dimension. But since many experts say that extra centimeters of foil material only spoil the appearance and do nothing to save heat, I decided to cut the screens strictly according to the size of the radiators.
Types and forms
In addition to different materials, radiator grilles come in different designs. All this together creates a huge number of options.
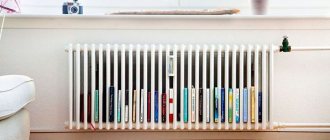
- Flat screens. Most often used if the radiator is installed in a niche. In this case, the flat panel is attached to bars fixed around the perimeter of the niche. In addition, glass screens for batteries also have this shape, but are attached to special pins embedded in the wall. This type of decorative grille for heating radiators is also called “facades”.
Flat screens are installed if the radiator is hidden in a niche
Attached grille-box for radiator
These are only the main types of screens and grilles covering heating radiators. Fantasy is limitless, there are very interesting models, but they are most often made by craftsmen with their own hands.
Homemade screen - an original idea
Price often plays an important role when choosing a screen for a radiator. The range of prices in this segment is more than significant - from 230 rubles for a metal hinged screen, to 8,000 rubles for a glass one. Some prices are shown in the table.
Installation stages and rules
You can install a ventilation grill with your own hands in a plastic or wooden window sill; installation in a concrete “board” will require much more experience and other tools. Otherwise, the grille is installed in a concrete window sill in exactly the same way.
Let's consider the nuances and stages of work for a plastic or wooden board and the same lattice. It is not necessary to remove the window sill to carry out the work. The direction of the slats (if the holes are slot-shaped and the slats are installed at an angle) should be towards the window.
A hole cut in the window sill for the ventilation grille
Tools you will need:
- Marking tool (marker, pencil).
- Jigsaw or grinder.
- Glue for plastic (optional).
- Any heavy object that can be used as a press (needed if the lattice will stick).
- Drill.
The diameter of the drill bit must be larger than the width of the jigsaw blade (so that it can fit into the drilled hole).
Stages of work
The process itself looks like this:
- Mark the place where the grille will be located.
- Holes are drilled in the corners.
- A jigsaw blade is inserted into the hole and a mounting hole is cut out for the grill itself.
- The product is installed in the hole for “trying on”.
- The edges of the hole are coated with glue.
- The grille is installed in place and pressed.
- The glue squeezed out along the edges is removed.
- Any heavy object is installed on top of the grate as a press.
Hole in the window sill for installing a grill
Metal products (as well as some plastic and wooden ones) are attached not with glue, but with bolts.
Using glue is not an ideal solution - in this case the structure will be solid. If necessary (for example, if the plastic lamella breaks), the grille will have to be torn off from the surface.
You don’t have to use glue if the groove is perfectly even: so that the lattice “sits” tightly in it without moving. In this case, if necessary, it can be pulled out - for replacement, repair or cleaning.
Mounting features
Grilles on heating radiators must be mounted in such a way that you can easily and quickly access heating appliances and pipes. Periodically, at least twice a year, the heating system elements must be cleaned of dirt and dust, so access is necessary. In addition, emergencies arise from time to time. In this case, a quick reaction is required and there is no time to unscrew the fasteners. Therefore, try to come up with a fastening system that allows you to remove the screen in one motion.
Attached and mounted
The easiest way is with mounted or attached screens. They are removed/retracted in seconds. But flat, covering radiators in niches and box screens that are attached to the wall are the most problematic. But even here everything is solved simply. You can secure the box to the wall using two strips: one on the box, the second on the wall. The whole secret is that the top edge of the planks is beveled (you can see it in the picture). The one that is nailed to the wall has a slope towards the wall, the one on the frame has a slope towards the grating. When the box is installed in place, it turns out something like a lock.
How to fix a screen box for a heating radiator on the wall
Another option is to attach metal plates to one of the strips and magnets to the other. Or attach not a wooden plank to the wall, but a metal corner, for example.
In the case of flat screens, the solution may be the same - metal plates and magnets. Another option is hooks and loops. It is easy to implement, but not very convenient to use: while you get into loops, you have to suffer. There is also a difficult-to-install but convenient way: make a screen like a sliding door.
Sliding screens for radiators
You can take the guides that are sold for furniture doors, install them, and insert the screens into the corresponding grooves. If you do not plan to actively use the niche near the battery, you can not install roller mechanisms, but it will be difficult to move them away. This method, by the way, can also be used for the box lattice. It can then be nailed “tightly” to the wall, and the front wall can be made movable.
Scope of application
Reflective thermal insulation is applicable to all surfaces without dirt and dust, suitable for complex structures with corners, bends and differences. Insulating walls from the outside can achieve maximum effect by creating an air gap of 20 mm on the foil side.
The material is effective for multi-story and single-story frame houses, and it will increase the resistance of the walls without increasing their volume. Installation is carried out end-to-end without overlaps, and the seams are taped with foil tape.
Application from inside
If you want to insulate the room from the inside, then there are two options. The first option is to make 2 air gaps between the external wall and the material, between the insulation and the cladding (for example, drywall). In this case, TIM with double foil is used.
The second option is to create one gap between the external wall and the insulation, for which material foiled on one side is used. The foil is turned indoors.
Roof insulation
Reflective TIMs mounted on the roof provide not only thermal but also vapor insulation. The under-roof space is also protected from moisture.
Reflective film is especially effective when insulating the ceiling of a bathhouse.
Piping and ventilation
Pipes require insulation with double-sided foil. If the pipes have a diameter less than 159 mm, then there is no need to create an air gap between the TIM and the pipe. If the pipes have a larger diameter, then a gap is required. The air gap is arranged as follows:
- The first option is to attach rings made of foil film to the pipe with a distance of 300-400 mm from each other. And on top of the rings the pipe is wrapped with insulation;
- the second option is to lay wooden blocks with a cross-section of 10 by 10 mm or 20 by 20 mm along the pipe, after which insulation is wrapped on top of them.
The joints must be sealed with aluminum tape. Insulating ventilation ducts will eliminate heat loss and provide sound insulation.
Decorative screens for radiators: how to choose and install
The most modern designs of heating radiators do not fit easily into the interior of a living space, let alone traditional cast iron radiators located in the most prominent places in the room - under the windows.
To disguise radiators, decorative screens are used, made from materials that best suit the style of the interior. In addition to decorative purposes, they are also installed on radiators for safety reasons . In educational and sports institutions, radiators are covered with protective grilles to prevent injuries to students.
Pipe decor
If you paint walls, radiators, pipes in the same color, then visually they will merge into one plane. You can use one ornament for decoration, which will allow the latter to get lost in the background. For painting, you can use special stencils (vinyl), which can obtain the desired shape. There are a large number of finishing options: it all depends on the design style. If the interior is made in an oriental style, you can use a bamboo trunk to hide the radiator sections. You need to vertically saw the bamboo trunk, open it, and insert a pipe there. You can wrap the pipes with a beautiful rope - you get an interesting composition.
Types of decorative screens for heating radiators
Since, depending on the purpose of installing grilles on radiators, they are made from various materials, manufacturers give consumers the opportunity to choose, offering entire collections of these useful devices that can serve as both an excellent decoration for a residential interior and protection for public spaces.
First of all, screens for radiators are divided according to the features of their designs.
- If it is necessary to close heating radiators located in a niche , then for this purpose they use flat structures, or covers on the radiators, with the help of which the recess where the radiators are located is completely closed.
- If the batteries are placed under a window sill , the area of which is covered by a radiator, then cover plates without a cover are used. They are attached directly to the window sill, hiding the heating devices behind them.
- If the batteries protrude beyond the surface of the window sill , then they will be perfectly disguised by decorative casings equipped with a lid.
If the material for its manufacture is successfully selected, it will not only hide the radiator behind itself, but will also become a wonderful decoration of the interior of the room.
For each type of these products, a variety of materials can be used, which allows you to select the decorative screen that is most suitable for a particular case.
Manufacturing
You can make a battery grid yourself, following the step-by-step instructions.
- First you need to make markings. To do this, you need to take the battery parameters as a basis, add 50mm to the height, and 100mm to the width. This will give you the dimensions of the front panel, which can be made from metal mesh.
- The sides can be made from MDF. They will be the same in height as the front part, and the depth is equal to the thickness of the battery plus 30-35mm.
- The lid can be marked according to the obtained parameters for the width and depth of the product, but it is better to make it with 15mm protrusions on each side.
- Cut out all the parts according to the markings and smooth their edges.
- Treat the wooden blocks with an antiseptic, prime them and build a frame from them.
- Cover the front and sides of the frame with prepared parts using self-tapping screws.
- Attach the cover to the rear upper beam using a piano hinge.
- Paint the resulting structure in the desired color or varnish it.
- Cover the wall behind the battery with foil and install the product.
- For greater stability, the grille can be fixed using brackets or suitable fasteners.
- Screw the adjustable feet from the bottom.
The decorative protective radiator trim is ready!
Having received the above information, you can take a more rational approach to choosing a protective grille model suitable for a particular interior. A decorative product will help disguise the unaesthetic appearance of the battery, protect the radiator from all kinds of contaminants, and relieve parents from constant supervision of children.
Materials for making battery grids
Not only its appearance, but also how long it will retain its appearance and how easy it will be to carry out daily care of the product depends on the correctly selected material for the decorative protection element. For many, the cost of such interior decoration is also important.
How to choose a humidifier for a children's room, read on.
Each of the materials used for their manufacture has its own characteristics that affect the quality of the products. Let's talk about the most popular materials most often used to create these decorative structures.
- Metal screens in the economy version look like a thin metal box painted white. Other colors are also available. There are no special frills in their design, which is why the cost of such products is low. The price of a hanging metal protective screen starts from 250 rubles.
The cost of products made from stainless steel is much higher , since they are usually decorated with a pattern made using perforation. This finish gives the product a more elegant look, but it is difficult to fit into the home interior. The main advantage is their ease of installation (they are simply hung on radiators) and low cost.
- Wooden screens are produced in a more diverse range, so choosing a product that harmoniously matches the interior of the room is much easier. In the manufacture of custom-made wooden decorative grilles, valuable types of wood are often used. This is done not only to decorate the interior, but also to minimize the shortcomings of wooden products.
These factors have much less effect on high-quality wood, however, the cost of valuable wood species is higher.
The work of craftsmen who make products from valuable wood is not cheap, and purchasing the material costs a considerable amount.
However, the elegance of the manufactured structures will allow them to decorate the interior of any style, including elements made of wood.
- Screens for batteries made of MDF , used for the manufacture of decorative screens, make it possible to produce products that can compete with natural wood in quality and cost. They are made from this material in any color and shape. In the form of decoration, slotted patterns are most often used, made using programmed machines. The color palette offered by manufacturers can match the color of the interior, or, conversely, differ sharply from it.
- Plastic decorative screens are the most affordable for consumers in terms of their cost. They are available in a variety of colors and sizes, and finished products can be selected for any room. When choosing, you must carefully monitor the quality of the material, since low-quality plastic when exposed to high temperatures is deformed and releases substances that are harmful to health. Therefore, even high-quality plastic is not recommended for use in residential premises and institutions visited by children.
- Glass screens, made from
Photo - Glass screen for batteryDesigners use stained glass or tempered glass to create original, sophisticated interiors. The structure, made of glass, is very fragile, so it should be handled with extreme care. However, the appearance of glass overlays, with exclusive designs applied to them, complements the interior of the room so favorably that they deserve special treatment.
Branded or homemade?
And this is up to anyone. My good friend, Kulibin from God, made himself a whole set of universal nets, which he adjusted to his Chevrolet. But he is a hands-on fan with a lot of free time. He tried both rigidly fixed and removable structures, securing his crafts with screws or clips. Material: aluminum or plastic. Aluminum is light and durable, but a friend says that over time it quickly fades. Plastic is easy to process, but its strength is not so great. That's why his latest craft is made entirely of stainless steel! It looks decent, but it’s better not to ask about the cost and fuss...
As for the type of fastening, the removable screens are easy to remove for cleaning, but on the road they like to rattle obnoxiously. On the contrary, the tightly fixed structure does not make any sounds when driving, but, frankly, it is inconvenient to clean it.
The main advantages of decorative grilles for radiators
Screens for radiators not only hide the appearance of radiators, which spoil the appearance of the room, but also give its interior completeness. When changing the interior, replacing decorative structures is easy.
Since it is not easy to care for radiators with a complex configuration, installing decorative casings:
- will facilitate cleaning of premises by protecting heating equipment from dust;
- at the same time they will become a wonderful decoration of the room;
- with their help, warm air from heating devices is more evenly distributed throughout the room;
- they will protect children from bruises and burns that may occur when they come into contact with heating appliances.
The simplicity of their installation allows you to install them yourself. Even in the most difficult cases, you only need to know how to use a drill.
Advantages and disadvantages
I have made my choice - next weekend I will equip my machine with a branded mesh. However, minor troubles are possible - I studied the list of them myself and want to share with everyone.
Cooling of the radiator by the incoming air flow after installing the mesh will deteriorate somewhat, and the thermal regime of the motor will change. Well, this is an expected phenomenon. When I installed nets on plastic windows at home, they tried to impose on me an “ideal net” with the smallest cells, through which “nothing could get through at all.” But it is, to put it mildly, difficult for air to pass through such a mesh - it’s easier not to open the window at all... Therefore, you can’t install a completely fine-mesh mesh. True, dirt will still penetrate through large cells. But this, it seems to me, is obvious.
Methods for installing decorative screens for batteries
The method of attaching decorative elements covering heating radiators depends on their design.
For example, mounted options are often designed in such a way that they do not require fastening at all.
They are simply hung on radiators, held on to them thanks to the curved shape of their upper part.
This option is very convenient when cleaning, especially if the product is small in size. It can be easily removed and washed with a stream of water.
If the product is made in the form of a box , then manufacturers provide holes in them for mounting to the wall. The main task in this case is to transfer the location of these holes to the wall, placing them so that the fastening lines are strictly horizontal. To check, you must use a level. Then holes are drilled in the marked places and fasteners are installed, onto which the structure is hung.
Since the range of protective and decorative grilles for batteries is large, each consumer can choose the most suitable option based on his taste, needs and financial capabilities.
The following videos clearly show how to independently assemble and install decorative screens for batteries.
Installation of the outer grille element - metal frame
Window grilles are made both with and without an element such as a metal frame.
To produce a similar version of a window grille without a frame, use only:
- steel strip;
- reinforcing rod.
If you need to install bars on the windows of a country house, then welding and forging elements are unlikely to be needed. Especially if the house is simple, wooden. In this option, the vertical parts are located at a considerable distance from each other, so that natural light will not be obscured.
Grille without external metal frame
Step one. A metal strip 4 mm thick and 40 mm wide is used. But the length depends on the following factors:
- how wide is the window opening;
- how many crossbars are there in the lattice?
You will also need smooth reinforcement Ø 14 mm. The length of the reinforcing bar will depend on:
- on the required number of vertical elements;
- from the height of the window.
In addition, you will need to have a threaded rod Ø 10-12 mm.
To create the main grille (horizontal), you will need to stock up on two metal strips of sufficient length. Their size should be 5 mm less than the width of the window opening. The strips will need to be secured in the lower and upper areas of the grille.
The third strip will be installed in the middle part of the structure. This strip will become the connecting link between several middle or all reinforcement bars.
Step two. An auxiliary reinforcing bridge will need to be welded into the central part of the grille.
Step three. Now you need to process the metal strips, cut according to the required dimensions. The edges of the strips are rotated 90 degrees.
Step four. The edges of the strips are highlighted - approximately 10-12 cm. The edge is laid on the table and securely fastened to the metal tabletop. Through a gasket strip made of metal, that is, quite strong, this element is tightened with two clamps. You can clamp the strip in a large vice.
Tightening metal strips with two clamps
A gas wrench is used to grab the free edge of the strip and slowly turn it at a right angle. Such actions are carried out with each long side of the strip.
Step five. When the strips are prepared, markings are made on them in order to drill a hole, the diameter of which is 1-2 mm larger than the same parameter of the reinforcement bars. A hole Ø 15-16 mm is drilled.
Now the strip can be moved to make another hole at the same distance from the previous one. Such actions will be carried out until the last hole is drilled.
Step six. The holes are drilled, you can insert reinforcement rods into them. The grille elements are assembled into a common structure and fastened together by welding.
Step seven. When bending the edges, the mounting areas of the strips are highlighted. Markings are made on them to weld the threaded rods. Each of the pins should have a length equal to the thickness of the window block with an addition of 3 cm (1-2 cm should be removed from the edge). These additional 3 centimeters will be required to screw the locking nuts from inside the room.
Step eight. You need to weld the studs to the side of the strip that will press against the window frame. Welding should be a continuous seam. After welding, a nut will be immediately screwed onto the stud.
Assembling a grille with two transverse stripes
Step nine. To clean the grate from rust, use an iron brush. After this, each grille element is wiped with a degreasing solution. You need to wait until the solvent evaporates and the grate dries.
Step ten. Next, the window frame is marked and holes are drilled in the designated areas. Then the grille will be attached to the window block through welded pins inserted into the holes.
Step eleven. You can lift the grille and press it against the window block with the ends of the pins. Then there will be points on the frame that have the meaning of marks. Holes are subsequently drilled through these marks.
Welding studs
It is advisable to drill holes using a wood drill. Its diameter should be 2-2.5 mm wider than the diameter of the stud. Then the pin will fit freely but tightly into the “socket”. The drill must have a length that exceeds the thickness of the window block by at least 1 cm.
Step twelve. The grille is mounted on the frame. For this purpose, you will need to insert pins into the holes of the window block. From the inside, put washers of sufficient width on and tighten the nuts.
Video: How to make window bars with your own hands:
How to attach the screen to the battery
Just call +7 (499) 39-444-16
1. How to take measurements yourself?
- — If the battery is hanging on the wall.
We measure the length of the battery and add 10 cm to it, add 3 cm to the height and depth. We get the external dimensions of the product. - — If the battery is located in a niche (inside the wall)
Measure the size of the opening and add 10 cm to the length (since the screens are overhead, it is necessary to take into account the distance to the baseboard and window sill)
2. Installation of screens on the battery.
The screens are attached to the wall using 2 self-tapping screws (which are included in the kit). To install the screen, you must have the following tool
: drill, jigsaw, level, pencil and screwdriver. We attach the products to the wall, check the level, mark with a pencil the place for the hole, drill holes with a D6 drill, insert dowels, screw in self-tapping screws, and secure the products. OK it's all over Now.
If the product is not exposed to external factors, it will last for decades.
How to glue? How to calculate the required quantity?
Note! If you are in doubt about the choice and cannot correctly calculate the amount of material required, then we can send our specialist to you with samples and a catalog. Our representative will help
with the choice of material, measurements and calculation of the required quantity of goods!
Just call +7 (499) 39-444-16
You need to glue it like regular wallpaper, but it is advisable to use special glue. We also recommend treating the surface of the wallpaper with protection or varnish.
2. How to calculate the required quantity?
Before you buy wallpaper, you need to understand how much you need. To do this, you need to measure the area of the walls and divide it by the area of the wallpaper roll, round the resulting number up and get the number of rolls.
How to choose a baguette size?
Note! If you are in doubt about the choice and cannot correctly calculate the amount of material required, then we can send our specialist to you with samples and a catalog. Our representative will help
with the choice of material, measurements and calculation of the required quantity of goods!
Just call +7 (499) 39-444-16
The interior baguette is made from a modern material called pressed polyurethane (does not burn, does not burn, environmentally friendly)
1. The entire baguette is 2.5 meters long
This size is easy to transport and leaves little to no residue.
2. The baguette is attached with assembly glue or liquid nails
The joints can be covered with special wax
3. The choice of baguette width depends on the design of your room.
How to choose an arch by size?
Note! If you are in doubt about the choice and cannot correctly calculate the amount of material required, then we can send our specialist to you with samples and a catalog. Our representative will help
with the choice of material, measurements and calculation of the required quantity of goods!
Just call +7 (499) 39-444-16
1. All arches have a full set of connecting elements
2. To select the arch size you need:
— Measure the doorway and compare the resulting dimensions with the maximum dimensions of the arch. — If your dimensions are smaller, then this arch is suitable for you. — If the dimensions exceed the dimensions, then in this case it is necessary to purchase additional elements.
The arches are available for painting and with decoration.
We will help you choose the size!
Note! If you are in doubt about the choice and cannot correctly calculate the amount of material required, then we can send our specialist to you with samples and a catalog. Our representative will help
with the choice of material, measurements and calculation of the required quantity of goods!
Just call +7 (499) 39-444-16
Installation of films behind radiators is a simple sequence of actions
From a technological point of view, the foil behind the heating battery is installed without any difficulties. You will complete all the work efficiently and quickly if you listen to some advice.
First, don't buy matte metallic material. Use only polished foil.
Second, don't buy double-sided films. One air gap is quite enough to ensure high-quality heat reflection.
Thirdly, leave a gap of about 1.5–2 cm on both sides of the insulator layer. It is necessary to obtain the optimal thermal resistance of the reflector (1.15 sq.m*°C/W).
Prepare liquid nails or standard adhesive used for installing wallpaper, as well as directly reflective foil, and proceed to install it. The procedure is as follows. First, carefully measure the dimensions of the wall areas where you plan to install the screen or niches.
The parameters of the film must correspond to the projection of the heating radiator onto the wall. Add about 10% to the result obtained. In this case, the heat-reflecting potential of the foil will be slightly greater. Some masters say that extra centimeters are not needed.
The effect from them will be insignificant, but the edges of the screen sticking out from behind the radiator will greatly spoil the aesthetics of the room. See for yourself, choose the option that suits you personally.
Then make sure that there is a gap of at least 1.5 cm between the heating device and the film that you will mount. When there is not enough free space, you will have to adjust the radiator suspension to provide the missing centimeters.
Next, remove the radiator. Mark the places where its mounting brackets are located. Dismantle them. Inspect the brick or concrete masonry of the wall surface.
If there are gaps, cracks, or other defects, plaster them (or putty). Level the wall, glue the screen (coat its back side with wallpaper or polymer composition).
Instead of glue, as noted, it is allowed to use liquid nails. In some cases, it is permissible to use staples or small nails to secure the foil (if they fit into the wall material without any problems and are firmly held in it). Carefully return the pendants to their place and install the battery.
Additionally, we will give some useful recommendations to home craftsmen who are installing heat-reflecting products for the first time. If during installation of the screen you damage its outer covering, the cut site can be masked with LAMS or LAS films.
They are made of foil and do not reduce the efficiency of heat reflection. Don't try to find screens that are too thick. Practice shows that five centimeters is enough to effectively save heat in the house.
Recommendations for the installation process
- Installing a heat-reflecting screen behind the battery is technologically simple, but will be done faster and better if you take into account the following practical recommendations:
- the maximum effect when using penofol and similar materials is achieved if there is an air gap of 15-20 mm on both sides of the insulating layer. In this case, the thermal resistance of the insulating structure is achieved up to 1.1-1.2 (m∙°C)/W. Installation is carried out on wooden slats, and penofol must be double-sided foil (type B);
- in most cases, to create a reflective screen for batteries, one air gap is enough - between the radiator and the insulating material. Double-sided foiling is not necessary in this case;
- When choosing a reflector, it should be taken into account that the foil must be polished (not matte).
How to properly install a battery screen - frame
Frames in a niche are attached to the wall as simply as boxes. To install this product, you will need the same tools - a drill with a D6 drill, a jigsaw, a pencil level and a screwdriver. We attach the frame to the wall, measure the level of the place where you need to make a hole and mark it with a pencil. In these places, use a drill to make holes, insert a dowel and screw in the screws. On the back side of the frame there are special canopies, with the help of which the frame is attached to self-tapping screws.
For a more accurate picture, we have prepared visual information on installing battery screens:
A. Our battery is located in a niche. We decided to choose a niche without a plinth, and a window sill located right on top. In this way, the product will be mounted on the right and left sides of the wall. Be sure to use a level, as the slightest inaccuracies may make it impossible to install the screen.
Q. For the box, we chose a standard battery, with a right-hand connection, which will be hidden along with the radiator behind the screen.
Before making marks on the wall, measure the distance to the fastening on the product itself (as a rule, all fastenings are located in the center of the product, but there may be non-standard indentations).
For the hole, we recommend using a drill and a drill bit size D6.
After you have made the hole, you need to drive a dowel into it, and then screw in a self-tapping screw on the right and left sides of the wall.
We use different fastenings for the box and frame.
Install the screen on the battery or on a niche using fasteners, as indicated in the picture. As you can see, nothing complicated. It is enough to have the necessary tools at hand.
The Expert Decor company provides the opportunity to choose any screen for a battery, with or without installation. If you have any questions about installing the product, please send us a message to [email protected] and we will answer you within a few minutes.
The Decor Expert online store has a huge catalog of screens made from all kinds of materials.
The following products were used in this manual:
Do-it-yourself installation of a plasterboard box
In order to close the battery, you need to measure it, and then buy metal profiles and other additional products.
What materials are needed:
- 12 mm plasterboard sheet,
- metal profiles 27x28 and 60x27,
- self-tapping screws for drywall and metal,
- dowel-nails size 6x40,
- construction serpyanka,
- perforated corners.
Tools:
- screwdriver,
- hammer drill,
- metal scissors,
- stationery knife,
- construction stapler,
- pencil,
- roulette,
- building level.
Work order:
Installation of the frame. The profile should be mounted on three adjacent sides: floor, wall, window sill.
- Press the 27x28 metal profile to the base with your hand, drill a hole using a hammer drill in both the profile and the wall.
- Using a screwdriver, screw the dowel-nail into the hole.
- At the bottom of the window sill, a 27x28 metal profile is mounted on self-tapping screws; the length of the screws should not be greater than the thickness of the window sill.
- Next, you can install jumpers made of metal profile 60x27.
Selecting the grid size. This hole must be made slightly smaller than the grid size.
Installation of drywall. Plasterboard sheets can be cut with a utility knife. Screw it in with a screwdriver.
Installation of corners. They must be secured at the corners with a construction stapler, or attached to gypsum plaster.
- Serpyanka should be applied to all seams of the plasterboard box and covered with plaster.
- Before painting or wallpapering, the plasterboard box must be puttied, sanded and coated with primer.
The principle of heating a room
Decor is the main function of battery grilles. But radiators are used to heat the home, so there should be no obstacles in the way. Even the thinnest screens reduce heat transfer, so you should choose products with a low percentage of absorbed heat in advance.
Air should enter the radiator from below, pass along it, heat up and go to the top. This system will heat the room. Therefore, when choosing a grill for the battery, you need to make sure that there is a small gap at the bottom and that there is no cover at the top. It is possible that the top cover has a large perforation area.
Many modern decorative radiator grilles reduce heat transfer by more than 20%. Screens in the form of boxes made of solid wood lose a particularly large percentage of heat. Models with a minimum number of holes and a small perforation area will be ineffective in operation.
The screen additionally protects the radiator from dirt. Dust particles settle on a hot battery and decompose under the influence of high temperature. As a result, the surrounding atmosphere becomes polluted with decomposition products, which harms the health of people, especially allergy sufferers and asthmatics. When installing the grille, the accumulation of dust on the radiators is significantly reduced. Periodically you need to clean the screen with a cloth or vacuum cleaner.
Purposes and materials of gratings
In addition to their decorative function, grilles perform a protective function. They allow you to hide and round off sharp and hard edges. This is especially true if there are small children in the house who may be injured. Radiator screens also prevent you from getting burned on hot pipes.
Screens are made from the following materials:
- Metal. One of the most popular screen materials for radiators. They are made of thin steel, which is then painted. The duration of operation depends on the quality of painting. They are considered the most optimal, since they practically do not cause heat loss. The metal heats up quickly and radiates heat itself, so the room will not be cold. The advantages include a long operating time, which reaches several decades, as well as low cost. The disadvantage is that the appearance is not the most aesthetic. There are forged models, but they need a background.
- Wood. Wood is a top-class material. It is environmentally friendly, looks stylish and allows you to create grilles of different shapes. Even inexpensive wood models look beautiful. But battery efficiency behind a wooden screen is significantly reduced. It takes a lot of time to heat up wood.
You can find radiator grilles made of exotic materials - these include bamboo and rattan. They serve only a decorative role and do not fit into every interior, so they are rarely used. There are also combined models on sale. A classic example is a wooden frame on which a decorative mesh made of another material (bamboo, MDF and HDF panels) is stretched.
Advantages and disadvantages of different materials
Wooden models have the following positive qualities:
- Durability. When used correctly, wood practically does not lose its properties.
- Reliability.
- Environmentally friendly. Wood is a natural material that does not emit harmful substances.
- High degree of heat transfer.
- Bulk wooden gratings do not withstand temperature fluctuations well. Some models may become cracked after just a few seasons.
- Duration of wood heating.
Glass screens are used infrequently. But they have the following advantages:
- The price is lower than that of wood.
- Ease of installation. Any technician can install a radiator grille.
- Stylish appearance. You can apply drawings and photographs to the screen using thermal printing to suit any interior.
- Safety, ease of care, high degree of heat resistance.
The disadvantages of glass models include fragility. Cheap products may be made of thin glass, which makes them prone to accidental breakage. High-quality, expensive screens are made of durable material that is almost impossible to damage.
The advantages of plastic models are as follows:
- Attractive price. You can find a radiator screen for any budget.
- A wide range of. There are shapes and colors to suit any interior.
- Easy to care for. Plastic products can be washed an unlimited number of times.
- They quickly lose their attractive appearance.
- When heated, harmful substances may be released. They can negatively affect people's health. Such models are prohibited from being installed in medical institutions, kindergartens and schools.
Advantages of metal models:
- Practicality. The screens are unpretentious and can be installed in any conditions.
- Resistance to temperature fluctuations.
- Strength. Metal is practically resistant to mechanical stress and vibration.
- Metal gratings are not affected by changes in pressure and humidity.
- Easy to install. They are also easy to dismantle.
- Low cost. Associated with the simplicity of manufacturing technology.
- Duration of operation. Associated with the unpretentiousness of the material and lack of response to external influences.
- Wide selection of models. They are presented in all price ranges.
The disadvantages of metal include the difficulty of making it yourself. In this case, it is better to buy a ready-made model or order it according to individual sizes and characteristics.
The rest of the materials are practically not used.
Types of screens
The classification of grilles for heating radiators is also made by design. Each type is used for a different type of battery and is designed for different installation methods.
Flat screens are used if the radiator is mounted in a niche. Then the flat panel is fixed to bars, which are fastened along the perimeter of the niche. Glass grilles are attached to special pins in the same way. These types of screens are called “facades”.
There are two types of hanging grilles - with and without a lid at the top. The first ones are placed on accordion-type batteries that protrude beyond the window sill. The shape of the top cover is made such that the grille can be fixed to the radiator. Products without a cover are attached to the upper radiator manifold using hooks that are fixed on the front panel.
Boxes are used infrequently due to the high percentage of heat loss. Air circulation in such models is difficult. Necessary if you want to cover the sides of the battery. According to the method of fixation, boxes are distinguished that can stand without support on special legs and require mounting on the wall.
Fixation Features
The main requirement for radiator grilles is the ability to quickly access heating appliances and pipes. This is due to the need to periodically clean the heating elements from dust and dirt. It is recommended to clean twice a year. There are also emergency situations in which the technician must have easy access to the failed area. It is important to think through such a fixation system in advance so that you can easily remove the screen if necessary.
Mounted and attached screens meet this requirement. They can be removed in a few seconds and installed just as quickly. Problems arise with flat and closing radiators, as well as boxes. It is recommended to attach such models to the wall using two slats - one on the box, and the second on the wall. The top edge should be beveled towards the grille. When installing the grille, this part acts as a lock, which can be easily removed if necessary.
There is another installation option. You can put metal elements (for example, plates) on one bar, and magnets on the other. Then there will be no problems with removing and installing the grilles.
Flat screens can also be attached with hooks or loops. They are easy to make, but they can be difficult to install and fit into the loop. Sometimes they also install a decorative version of grilles with sliding doors.