Today, having a heated floor in a house or apartment is far from a luxury and not uncommon. Any owner of a private house or apartment can easily buy and install it, either independently or with the help of specialists (depending on the type and method of fastening the heated floor pipes). Most often, people install such floors not for their own comfort, but for their children. In addition, the heat from the floor is evenly distributed over the entire area of the room in which it is installed. Nowadays, in markets and specialized stores, customers are presented with a wide range of different heated floors. Their differences are only in price and installation method.
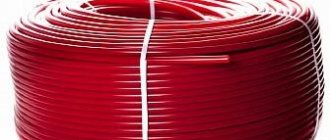
Construction of polyethylene pipe
Reinforcement.
Almost all cross-linked polyethylene pipes have a complex multilayer structure. It could be:
- polypropylene;
- fiberglass;
- aluminium foil;
- perforated aluminum;
- solid aluminum sheet.
The reinforced layer is able to neutralize sudden pressure changes inside the PE-S pipe when used in a hot water or heating system.
The design of cross-linked polyethylene products provides for the presence of a reinforced layer both on the surface of the product and at various depths. If it is necessary to solder two or more pipes, the reinforcing layer is stripped to 1 cm.
Pipes made of cross-linked polyethylene for underfloor heating are practically not reinforced. This material is also called “pure”.
Oxygen barrier. The manufacturer also calls it a “diffusion barrier” or “anti-diffusion protection.” This layer is mandatory for all types of cross-linked polyethylene products.
The reason for its appearance in HDPE pipes is the ability of oxygen molecules to penetrate into the material through a three-dimensional lattice, as a result of which cross-linked polyethylene is slowly but surely destroyed.
The diffusion barrier can also be either inside or outside the pipe.
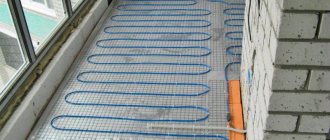
Water circuit installation diagrams
Schematically, laying pipes for arranging a liquid circuit can be done in one of the following ways:
- coil;
- double coil;
- snail.
Coil. The method of laying such a contour is the simplest and is performed in loops. This option will be optimal for a room divided into zones with different purposes, for which it will be convenient to use different temperature conditions.
The first loop is installed around the perimeter of the room, then a single snake is inserted inside. Thus, a maximally heated coolant will circulate in one half of the room, while a cooled one will circulate in the other, and accordingly the temperature will be different.
The coil turns can be spaced evenly, but the bends of the water circuits in this case will have strong creases.
The serpentine pipe placement method is ideal for rooms with little heat loss. They are used not only for apartments and private houses, but also for industrial facilities where there is a need to heat all year round
Double coil. In this case, the supply and return circuits are located next to each other throughout the room.
Angle coil. It is used exclusively for corner rooms where there are two external walls.
The advantages of the serpentine shape include simple planning and installation. Disadvantages: temperature changes in one room, pipe bends are quite sharp, so you cannot use a small pitch - this can cause a pipe break.
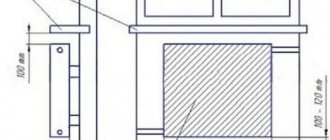
When laying the contour in the edge zones of the room (floor areas where external walls, windows, doors are located), the pitch should be smaller in comparison with other turns - 100-150 mm
Snail. Using this arrangement, supply and return pipes are installed throughout the room. They are placed parallel to each other and installed starting from the perimeter of the walls and moving to the center of the room.
The supply line in the middle of the room ends in a loop. Next, parallel to it, a return line is installed, which is laid from the center of the room and along its perimeter, moving towards the collector.
The presence of an external wall in the room may require double laying of pipes along it.
Due to the alternation of two lines when laying using the snail method, temperature fluctuations in the supply and return lines can be up to 10 °C
The advantages of this method include: uniform heating of the room; due to smooth bends, the system has little hydraulic resistance, and savings in consumables can reach 15% compared to the serpentine method. However, there are also disadvantages - complex design and installation.
Advantages and disadvantages
Using a special device, you can quickly secure pipes
The advantages of anchor brackets include:
- high speed and ease of installation of products in comparison with other methods;
- reliability of fastening of pipe blanks;
- durability;
- relatively low cost.
The fastening element can be used to fix other types of pipelines that are not related to heated floors. Due to the presence of protective plastic teeth, the products in question are highly resistant to impact loads. The disadvantages of fasteners of this class include the complexity of installation on some types of water and electric heated floors.
Common installation steps
Typically, pipes are laid so that the distance between them is 100-300 mm. More precisely, the step is determined only after calculating the total length of the pipeline and determining the heating area (room area minus the area of bulky furniture). In practice, the distance is calculated approximately (see below), and then a diagram of laying the heated floor is drawn and the step is specified.
The approximate distance in bathrooms is 100-150 mm, in living rooms - 250 mm, 300-350 mm in corridors, lobbies, kitchens, utility rooms, storage rooms, etc. The interpipe distance may vary in different parts of the same room - it can be smaller near the outer walls and more in the rest of the room. Any method of arranging warm pipelines may have different pitches in different parts of the room.
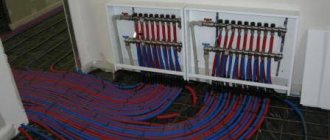
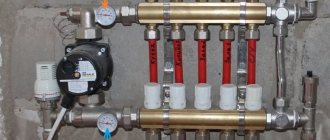
Collector connection diagram
The choice of a ready-made mechanical or automatic collector model depends on the characteristics of the heating system.
The first type of control module is recommended to be installed for heated floors without a radiator, the second can be used in all other cases.
Valtec collector groups are the most popular. The manufacturer provides a 7-year warranty on its products. The installation diagram for the liquid circuit manifold is already included in the package of the finished mixing unit
According to the diagram, the assembly of the distribution comb for heated floors is carried out as follows:
- Installation of the frame. The following can be selected as the installation area for the collector: a prepared niche in the wall or a collector cabinet. It is also possible to mount directly to the wall. However, the location must be strictly horizontal.
- Connection to the boiler. The supply pipeline is located at the bottom, the return pipeline is located at the top. Ball valves must be installed in front of the frame. They will be followed by a pump group.
- Installation of a bypass valve with a temperature limiter. After this, the collector is installed.
- Hydraulic test of the system. Check by connecting to a pump, which helps build up pressure in the heating system.
In a mixing unit, one of the required elements is a two- or three-way valve. This device mixes water flows of different temperatures and redistributes the trajectory of their movement.
Shut-off valves and fittings are installed on both pipelines, return and supply, connected to the manifold installation, designed to balance the volume of the coolant, as well as to block any of the circuits
If servo drives are used to control the manifold thermostats, then the mixing unit equipment is expanded with a bypass and bypass valve.
Water circuit installation diagrams
Schematically, laying pipes for arranging a liquid circuit can be done in one of the following ways:
- coil;
- double coil;
- snail.
Coil. The method of laying such a contour is the simplest and is performed in loops. This option will be optimal for a room divided into zones with different purposes, for which it will be convenient to use different temperature conditions.
The first loop is installed around the perimeter of the room, then a single snake is inserted inside. Thus, a maximally heated coolant will circulate in one half of the room, while a cooled one will circulate in the other, and accordingly the temperature will be different.
The coil turns can be spaced evenly, but the bends of the water circuits in this case will have strong creases.
The serpentine pipe placement method is ideal for rooms with little heat loss. They are used not only for apartments and private houses, but also for industrial facilities where there is a need to heat all year round
Double coil. In this case, the supply and return circuits are located next to each other throughout the room.
Angle coil. It is used exclusively for corner rooms where there are two external walls.
The advantages of the serpentine shape include simple planning and installation. Disadvantages: temperature changes in one room, pipe bends are quite sharp, so you cannot use a small pitch - this can cause a pipe break.
When laying the contour in the edge zones of the room (floor areas where external walls, windows, doors are located), the pitch should be smaller in comparison with other turns - 100-150 mm
Snail. Using this arrangement, supply and return pipes are installed throughout the room. They are placed parallel to each other and installed starting from the perimeter of the walls and moving to the center of the room.
The supply line in the middle of the room ends in a loop. Next, parallel to it, a return line is installed, which is laid from the center of the room and along its perimeter, moving towards the collector.
The presence of an external wall in the room may require double laying of pipes along it.
Due to the alternation of two lines when laying using the snail method, temperature fluctuations in the supply and return lines can be up to 10 °C
The advantages of this method include: uniform heating of the room; due to smooth bends, the system has little hydraulic resistance, and savings in consumables can reach 15% compared to the serpentine method. However, there are also disadvantages - complex design and installation.
Alternative options for mounting heated floors
To fix heated floors, not only a bracket is used, but also other devices:
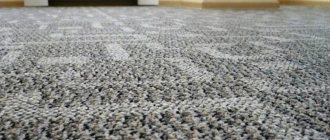
- Mats with bosses do not require additional fastening. They are easy to install and fix, and their thermal insulation qualities are above average;
- Masonry reinforcing mesh for pipelines is fixed with plastic and metal clamps. The design is reliable and highly durable;
- If the base is made of foam plastic, then the pipes are secured with an anchor bracket;
- Concrete base requires perforated tapes during installation;
- Wooden floors are usually heated with pipes installed on wooden modules.
Mats with bosses
Advantages of using mats with bosses:
- You can make a concrete screed directly onto the mats without making a protective layer. Cement does not enter into chemical reactions with mats that have a protective film on the surface;
- Easy installation - modules are assembled by hand;
- Pipe fasteners are not required; the bosses on the plates themselves firmly fix the pipeline;
- The reverse side with a relief increases thermal insulation, noise protection, and also makes it possible to build the system on an unleveled base.
Reinforcing mesh
The concrete screed can be additionally strengthened with reinforcing masonry mesh. The design becomes several times more durable. To do this, the grid must be laid in a special sequence:
- Clamps made of plastic or silicone make the fastening easy and simple, so the installation of the pipeline will be completed in a few movements. Connections of this type are very reliable and do not break;
- The use of wire limits the installation process - strong tension should not be allowed, since there is a high risk of damage to the pipe;
- An iron clamp is a compromise between plastic clamps and wire. Iron fasteners are more expensive, but the installation process will be lengthy.
Having considered all the options, we can conclude that the installation of the water circuit pipeline is carried out on a reinforcing mesh using plastic clamps.
Perforated plates
The liquid line is laid on perforated plates. They are made of polystyrene foam and have a contoured surface with fixing elements or without special devices. What are the characteristics of the slabs?
- The thickness of the mat is 1-3 cm.
- Outline height 2.5 cm.
- The distance between the contours is 2-5 cm.
- The material can withstand high temperatures and changes in thermal conditions.
- Expanded polystyrene does not deform under the influence of a deep concrete screed.
- The mats will serve as additional thermal insulation and noise protection.
The pipeline is removed using a snail or snake. If the contour is located at a distance of 16-20 mm, then it reliably holds the line. The bosses fit around the pipes on the sides. There is no need for additional fastenings. If the distance between the circuits is greater than the outer diameter of the pipe, then it is necessary to take care of the mounting elements. Holes are provided in the bosses for staples.
The perforated surface may not have bosses that rise on the surface of the mat, but grooves. Their width corresponds to the diameter of the water circuit pipe. In order for the loop to turn without loads and to correspond to the bending radius, the mats are provided with perforations in the form of a loop.
If a reflective screen is not provided for the heated floor, then mats with a foil surface are chosen. The material has only one drawback, which is associated with the high cost of the product.
We recommend: How to install heated flooring under laminate?
Installation technique
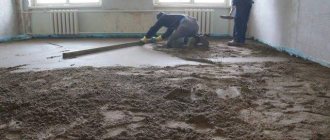
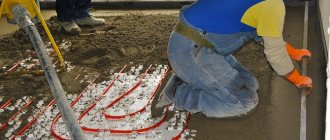
Heated floor pipes are mounted on insulation - polystyrene foam
The most common option for using anchor brackets is the fastening of heated floors with elements having a standard size of 16 mm. Laying the structure with their help is organized according to the instructions, which prescribe the following sequence of operations on polystyrene plates:
- The floor base is cleaned of accumulations of dirt and dust, as well as of debris remaining after construction work.
- The floor surface is carefully leveled, and excessive differences in height are eliminated using a self-leveling mixture.
- After setting, a layer of polyethylene film is laid on a flat surface, used as waterproofing protection.
- Its individual pieces are placed one under the other, and the overlap areas are then sealed with construction tape.
- The surface is laid with a standard edge strip, on top of which polystyrene mats are laid out with a slight offset.
- The latter are fastened together using a special type of locks.
- Directly on the surface of the polystyrene coating, the thermal circuit is laid out.
Installation of a water floor on polystyrene slabs with anchors
Among the methods of fastening water floor pipes, the use of brackets with pointed edges is of interest. Let’s briefly consider the technology of creating a heated floor “pie” on smooth polystyrene slabs.
Installation
The process algorithm is as follows:
- Clean debris from the surface of the base.
- Inspect the floor for unevenness. If there are differences in height of more than 2 mm, then use a leveling mixture on the concrete floor. If the floor is wooden, then sort it out.
- Apply a waterproofing layer of polyethylene film. The canvases are laid overlapping each other by 10 cm and overlap the walls. They are attached to each other with tape. The use of polyethylene film is necessary to protect the polystyrene foam boards from moisture on the underside.
- A damper tape is laid around the perimeter of the room.
- Polystyrene mats are laid out on polyethylene film. They are connected to each other by a special lock system, and the rows need to be oriented with a slight staggered shift. If the mats are thin, use an adhesive compound at the joints for better fixation.
- The mats have special markings that facilitate the process of contour formation. Having calculated the length of the future contour in advance and compared it with the possibility of forming along the lines, start laying pipes from one of the ends and fix them with staples along the way. It is difficult to carry out all the actions alone, so you need an assistant. One lays the pipeline, the other fixes it with staples.
Important! To improve fixation, you can first prepare small recesses in the mats for the pipeline using a special thermal knife.
- The anchor bracket for heated floors is used in such a way as to ensure reliable fixation, while the distance between the brackets on turns and bends is less than on a straight section. When cornering, more deformation forces are created, so you need to hold it better.
- The final stage is covering with gypsum fiber sheets in 2 layers. Recommend 10 mm thickness.
In the video you can see how to use a stapler with a bracket for a water-heated floor:
It’s not difficult to make a warm floor with your own hands; there are many options for arrangement. Each method requires adherence to certain technologies and consideration of nuances.
Average score of ratings is more than 0
Share link
Comments There are no comments yet, but you could be the first...
The mounting method depends on the base
The choice of method for attaching the circuit depends on the base under the pipes. Let us dwell on the options for bases and methods of attaching underfloor heating pipes.
Mats with bosses
Modular mats for laying heating elements
The use of mats with bosses provides the following advantages:
- The possibility of using a concrete screed over the mat without a special protective layer, since the cement will not react with the elements of the mat. The surface of the mat has its own protective film.
- Easy installation. Putting the modules together is not difficult.
- Simple pipe fastening. To secure the pipes, no fasteners are needed, since the slab bosses securely fix the pipes.
- Relief reverse. This provides several advantages at once: increased thermal insulation, sound insulation and the ability to use on uneven ground.
When using mats with bosses, there is no need to worry about how to attach the heating elements to the polystyrene foam.
Reinforcement mesh
A reinforcing mesh is laid on top of the concrete screed to add strength to the structure. When laying pipes on reinforcement mesh, the following fastening methods are used:
Fastening with plastic clamps is reliable and quick
- plastic clamps. Securing with silicone clamps is easy and simple, because the process of tightening the pipes takes place in a couple of deft movements. At the same time, the connections are reliable. It is impossible to break such a clamp.
- wire. Do not pull too hard, otherwise the pipe will be damaged.
- iron clamps. Average between the two previous methods, but it takes more time and the clamps are more expensive.
Conclusion: plastic clamps are suitable for attaching warm water floor pipes to reinforcement mesh.
Foam insulation
Anchor shackles
If the insulating layer consists of polystyrene boards, then special staples for a warm water floor made of plastic with pointed and hook-shaped teeth are used, which is why they are called anchors.
When using staples you need to be careful and careful. It is necessary to correctly calculate the distance between the pipes using foam plastic and only then proceed with fastening. It is not recommended to pull out staples and drive them into new places. It is possible to crumble and degrade the technical qualities of the thermal insulation material.
Concrete base
Often a concrete screed without an insulating layer is used as a base. In such cases, special perforated tapes are needed, which have special places in the structure for securing pipes. The profile is fastened to the concrete base with self-tapping screws, and the circuit of heating elements is attached to the fixing rail.
To attach pipes directly to a concrete base, use clips for warm water floors. A plastic clip is attached to the concrete using a self-tapping screw, and a pipe is placed on the clip. For example: if the pipe for a water heated floor is 16 mm, then the clip has a larger diameter and a cut-off arc for connection. Don't be alarmed if the pipe is slightly loose on the clip. The main thing is that the contour does not move during operation.
Conventional insulation with a system of wooden logs
Wooden modules
To heat wooden floor coverings, use a special wooden module that is installed on top of the joists. It turns out that a water circuit of the pipeline is laid on top of any type of insulation, securing the pipes to special wooden logs with grooves. And there is no need to rack your brains over the process of forming the contour, because the distances between the grooves have been calculated.
The fastening method is selected depending on the base for laying the pipeline. It is necessary to take into account all the nuances during the design process in order to complicate installation.
Technological process
Before starting the main processes, you should examine the working surface for defects and irregularities. If the floor is installed on the ground, then the floor screed with penoplex will have a sand cushion. At the next stage, a waterproofing layer is placed. The best option for waterproofing is the use of polyethylene; it can cope well with high humidity, temperature changes and has a budget price. Synthetic boards are laid end-to-end in the screed.
Screed with insulation
Before gluing penoplex under the floor screed, it is necessary to leave a special temperature gap at the edges of the heat insulator, which allows you to compensate for possible expansion. For these purposes, a deformation tape, for example, foamed polyethylene foam, is attached around the entire perimeter. After installation, the heat insulator is covered with an additional layer of concrete mixture (for example, a solution of cement and expanded clay).
Laying thermal insulation material
Choosing the optimal step
After selecting the material and method of pipe placement, you need to determine the distance between adjacent turns of the circuit. It does not depend on the type of placement of coolants, but is directly proportional to the diameter of the pipes. For large sections, too small a pitch is unacceptable, just as for pipes with a small diameter, a large pitch is unacceptable. The consequences may be overheating or thermal voids, which will no longer characterize the heated floor as a single heating system.
Video - Warm floor "Valtek". Installation instructions
A correctly selected step affects the thermal load of the circuit, uniform heating of the entire floor surface and the correct operation of the entire system.
- Depending on the diameter of the pipe, the pitch can range from 50 mm to 450 mm. But the preferred values are 150, 200, 250 and 300 mm.
- The spacing of coolants depends on the type and purpose of the room, as well as on the numerical indicator of the calculated heat load. The optimal pitch for a heating load of 48-50 W/m² is 300 mm.
- For a system load of 80 W/m² or more, the pitch value is 150 mm. This indicator is optimal for bathrooms and toilets, where the floor temperature must be constant according to strict requirements.
- When installing heated floors in rooms with a large area and high ceilings, the coolant laying step is taken to be 200 or 250 mm.
Warm water floor installation project
In addition to a constant step, builders often resort to the technique of variable placement of pipes on the floor covering. It consists of more frequent placement of coolants in a certain area. Most often, this technique is used along the line of external walls, windows and entrance doors - maximum heat loss is noted in these areas. The value of the increased pitch is determined as 60-65% of the normal value, the optimal value is 150 or 200 mm with an outer pipe diameter of 20-22 mm. The number of rows is determined during the laying process, and the calculated safety factor is 1.5.
Schemes for enhanced heating of external walls
Variable and combined laying steps are practiced in external and peripheral rooms due to the urgent need for additional heating and large heat losses; in all internal rooms the usual method of placing coolants is used.
The process of laying underfloor heating pipes is carried out in strict accordance with the project
Benefits of penoplex
This insulation is available in the form of slabs of various thicknesses. The standard slab width is 600 mm, length – 1200 mm and 2400 mm. The minimum sheet thickness is 20 mm, the maximum is 100 mm. Depending on the thickness, the package can contain from 4 to 20 sheets of penoplex.
PENOPLEX®COMFORT is a unique brand of thermal insulation boards that is ideal for thermal insulation of country houses or city apartments
The main advantages of this insulation include:
- zero water absorption;
- low thermal conductivity and vapor permeability;
- absence of harmful fumes;
- resistance to microorganisms;
- high strength.
Properly installed insulation will reliably protect the room from cold, noise, moisture penetration, and will create comfortable conditions even in the most severe frosts. Unfortunately, penoplex is not resistant to solvents and high temperatures, and also has a fairly high cost. But, despite this, it is used very widely for floor insulation, gradually replacing mineral wool and foam plastic.
Calculation table of thermal insulation in different regions
Table of penoplex parameters
| Sheet dimensions, mm | Sheet thickness, mm | Amount in a package | Insulation area for one package, m2 |
| 1200x600 | 20 | 20 | 14,4 |
| 1200x600 | 30 | 14 | 10,08 |
| 1200x600 | 40 | 10 | 7,20 |
| 1200x600 | 50 | 8 | 5,76 |
| 1200x600 | 60 | 7 | 5,04 |
| 1200x600 | 70 | 6 | 4,32 |
| 1200x600 | 80 | 5 | 3,60 |
| 1200x600 | 100 | 4 | 2,88 |
Penoplex. Installation instructions from the manufacturer
Mounting options and fixation methods
Effective operation of underfloor heating is possible provided that the pipes are correctly installed and connected to the central heating system. The key task of the contractor is to correctly distribute the linear footage of the pipeline on the surface of the subfloor to ensure uniform heating of the floor covering.
As a rule, pipes are installed in a “snake” pattern, i.e. First, the pipe goes in one direction, then makes a 180-degree turn and is laid in the opposite direction so that the two sections are located relatively close to each other (up to 30 cm).
This way, the coolant energy is effectively distributed over the entire floor area in the room. The pitch between pipe branches depends on its thickness, material, flexibility and intended heating mode. Thin plastic pipes made of polypropylene or polyethylene are laid in frequent increments.
Before installing a heated floor, prepare a rough surface - a concrete screed or a wooden plank floor, on which film waterproofing is laid. One of three types of underlay is placed on the subfloor:
- reinforcing metal mesh;
- polystyrene boards;
- mounting rails.
A special fixing substrate is a mandatory requirement for the correct installation of underfloor heating pipes, otherwise the pipes may move during the process of pouring the cement screed, and the system will not work correctly.
Reinforcement mesh - advantages and disadvantages
Metal reinforcing mesh is the most popular way to fix underfloor heating pipes. It is sold in the form of identical lengths or in coils, and is laid on a concrete floor. Pipes are distributed along it and fixed using various fasteners.
The advantage of this method is the availability of reinforcing mesh and its low cost in construction stores. The disadvantage is the labor-intensive installation process and the high risk of damage to plastic pipes.
We recommend that you familiarize yourself with: Metal hose in a sheath with PVC insulation to protect the cable
Pros and cons of polystyrene backing
Polystyrene boards are shaped products with protrusions equidistant from each other - bosses, between which pipes are laid. There are various shapes and configurations of bosses.
The main advantage of this installation method is the speed and ease of installation of pipes, which can be arranged in any way: “snail”, “snake” and other patterns. Thanks to the protruding elements of the polystyrene plates, the pipes are protected from mechanical damage. Disadvantages include the high cost of materials and the need to use additional fasteners.
Mounting rails for laying heated floors
Tires are long products with special clamps with which pipes are secured. With their help, you can easily and quickly install flexible plastic pipes that will be protected from damage.
Compared to reinforcing mesh, mounting bars are less labor-intensive in terms of installation, but their disadvantage is that they are rarely available for sale and can be quite expensive.
In addition to the substrate, various fasteners are used to firmly fix underfloor heating pipes:
- Plastic clamps or cable ties are simple products that form a loop covering the pipe and the bars of the metal reinforcing mesh. This is the simplest and most affordable method of fixation, but it is only suitable for reinforcement substrate.
- Plastic clamps with notches are products designed for fastening pipes to a polystyrene backing. They are installed on top of the pipes and pressed into soft polystyrene, held in place by spacers included in the sharp tips.
- Plastic clips are products in the form of a small horseshoe with a flat, level base on which they are installed. The pipe is laid and held motionless.
- Metal clamps in the form of a loop that matches the diameter of the pipe. Such products have a hole for a fastening element - a nail, self-tapping screw or bolt - for fixing on the rough surface.
We recommend reading: Why heating pipes in an apartment make noise or hum, and how to fix it
How to choose mounts
The selection of suitable fasteners depends on the type of substrate and the method of installation of the finished floor. As a rule, after installing and fixing the heated floor pipes, they are filled with cement screed, on top of which a layer of hydro- and vapor barrier is laid, and then the finished floor.
Despite the fact that experts recommend using several protective layers, both before and after installing a heated floor, many owners prefer to save on materials by not using a reinforcing substrate.
In this case, the pipes are laid directly on a rough concrete or wooden floor, which is also acceptable when using roll waterproofing. To fix the pipeline in a stationary state, you can use plastic or metal clips.
Fasteners for heated floors
Let's start with easier-to-install roll-on electric floor heaters. These are cable or carbon mats and film heaters (also carbon or bimetallic). They are rolled out over a layer of insulation. They are usually secured with tape. Only for film floors they often use double-sided tape, and for mats - regular tape. In some cases, the cable mat mesh is shot with a staple gun or a construction stapler.
Scotch tape is a universal material used to attach some materials for heated floors.
Fastening underfloor heating pipes
Laying pipes or heating cables requires special clamps. They may be different. The design and installation method differ, which largely affects the installation speed. So, what and how can you secure the pipes or cables of a heated floor:
- Lay a metal mesh with a step between the rods of 5 cm. The step is not important, it’s just more convenient to calculate the step of laying a pipe or cable. With this method, the pipes are attached to the cells with plastic clamps or pieces of wire.
- Single clips (pictured below right). They are used together with a heat insulator on which markings are applied. The same grid with a side of 5 cm, but drawn. Each fastener is fixed in the subfloor according to the installation diagram. Even more painstaking and lengthy work. Such fasteners work well only when using high-density polystyrene. Then the fastener is inserted by hand or with a special machine, grabbing the pipe or cable.
- Mounting tapes (pictured top left). They can be metal or polymer. In metal ones, the petals are bent and cover the cable or pipe. The plastic ones have grips located quite often. The pipe or cable is simply pressed into them. These planks are attached in increments of 40-50 cm. Not a bad option: they are inexpensive, installation proceeds quickly.
- Expanded polystyrene boards with molded fixing elements (pictured below). These are the most expensive retainers. But two layers of the “pie” are combined at once: thermal insulation (plates are available in thicknesses of 30 mm or more) and fasteners. The shape of the fastening element depends on the manufacturer, but in any case, pipes and cables are fastened quickly and easily.
It’s up to you to decide which fasteners to use for heated floors. The fastest way is polystyrene plates, the cheapest is mesh. But a word of warning: when choosing fasteners for a water floor, keep in mind that you will need to fill the water heated floor system before pouring the screed. When using plastic mounting tape, there is a possibility that the pipe will break out of its sockets without a tie. There is such a possibility in polystyrene plates, but this happens extremely rarely. From this point of view, a grid is better.
Velcro
suggests using the Rautherm Speed system as a fastener for the floor water line. It consists of a covering on which there are small loops and a tape with hooks on it. The system works on the Velcro principle. Purchase the fastening system from dealers in Moscow and St. Petersburg.
A tape is wound around the pipe and placed on mats with loops. The hooks fit into the loops and fix the contour in a certain place. If necessary, the location of the highway can be adjusted.
The mats have a thickness of 3 mm. They are an additional thermal insulation material for the floor and prevent noise from entering the room.
On the outside they have a sticky surface, which is protected with tape. When laying the mats, the tape is disconnected and the roll is rolled out over the floor surface. The material is designed for pipes with a diameter of 14-20 mm. Withstands pressure 6 bar, temperature 95 0C. The installed system is filled with concrete screed.
A variety of devices are used to secure the floor water main pipeline. Methods are selected based on installation efficiency and product cost. Small costs will be required to lay the highway using reinforced mesh and mounting tape.
YouTube responded with an error: The request cannot be completed because you have exceeded your quota.
- Related Posts
- What are the characteristics of Aura underfloor heating?
- Should I use penoplex for heated floors?
- How to install heated floors in a country house?
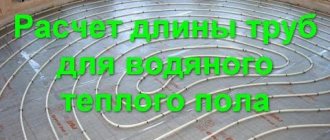
- How to calculate the length of a heated floor?
- How to set up a heated floor?
- How to properly install a heated floor?
Types of heated floors
Today there are three main types of underfloor heating systems:
- water;
- electric;
- infrared.
A water heated floor operates on the basis of water pipes, which are laid directly under the finished floor covering. The source of the coolant is hot water from the heating system (less often, from a separate heating device - boiler and boiler). For installation and connection of pipes, metal-plastic and plastic pipes are used, which are connected to the heating outlet pipeline.
Electric underfloor heating is based on the so-called. heating cable. By passing current through itself, the wire converts its energy into heat due to the high resistivity of the conductor. Any cable is not suitable for installing an electric heated floor - you need a special wire with a conductor of the required thickness, as well as with good insulation.
Infrared heated floors are the rarest variety. It is installed on the basis of special roll films, in which special heating elements are built-in. When exposed to current, they produce infrared radiation, generating heat.
Next, we will talk specifically about the water type of heated floor, which is most often preferred, because... it is much easier to connect pipes to an existing heating system in a house or apartment.
We recommend that you read: How to choose a pipe cutter for installing copper pipes
Lack of calculation of heat losses for heating
This is the biggest mistake when installing a heated floor (or any other heating system). When installing heating system radiators, you should not follow the same standards that are generally accepted in a house without heated floors. Sectional batteries should not be installed according to the number of windows in the room and based on the calculation of the room's area. This can result in a non-functioning system or increased unnecessary heating system installation costs.
According to the rules, the installer himself is obliged to make calculations of the number and power of radiators and heated floors. If a specialist offers you to install radiators under each window opening, and the number of sections is determined by your desire or budget, then it is better to refuse immediately. In this case, there is a chance that you will freeze in winter. As a result, you will have to change radiators to more powerful ones, or expand existing ones. Taking into account the cost of installation and dismantling of heating, this amounts to an impressive amount. In addition, you may have to redo the heated floors themselves.
The calculation takes into account such items as the pitch of the heated floor pipe, the wall thickness and internal diameter of the pipe, the thickness of the reinforcing mesh, the total thickness of the screed, the distance from the load-bearing wall, the thickness of the insulation, the thickness of the screed above the pipe, the thickness and type of floor covering, the thickness of the substrate or a layer of tile adhesive
Reinforcement mesh
The most inexpensive element for attaching a floor water line is reinforcing mesh. Select a material with a cell of a certain size. It depends on the step length with which the pipeline is laid: 10*10 cm, 15*15 cm.
Among the advantages of this fastener, the reliability of the fittings is noted. It serves as additional reinforcement for the concrete screed, which is formed for the water-heated floor.
- The pipes are secured using staples or tape. The brackets are made of heat-resistant plastic. They have spines pointing downward; securely hold the pipe in place.
- The staples are installed in a certain order on the entire surface of the reinforcing mesh. They have hooks on the underside. With their help, fastening to the fittings is made. The step between staples is 30-40 cm.
- In places where the pipe bends, it is necessary to place 3 staples. One is designed to hold the pipe in the center, the others provide a certain bending radius.
- The outline is drawn with a snake; push the pipe into the fastener with your foot. Use soft shoes.
Instead of staples, the line is reinforced with plastic tape. It has teeth on the inside. There is a loop at the end. The tape is wrapped around the pipe and inserted into a loop. In this case, the teeth are held by the edges of the loop, securely fixing the contour.
The work is more labor intensive. In this case, the plastic comes into contact with the reinforcing mesh. When using staples, the product is placed on a slight elevation. The grid remains at the bottom.
Mounting rails
The liquid line circuit can be strengthened using mounting bars. They represent a single system of anchor brackets. The material is produced in the form of tapes.
- The tires are placed on the surface of the insulation in increments of 1 m.
- They are attached to the concrete surface using dowels.
- They are installed on the thermal insulation material using mounting brackets.
- The locks are connected in increments of 5 cm. The size is chosen according to the pipe diameter of 16 mm or 20 mm.
We recommend: How to calculate the length of a heated floor?
Installation of the circuit using tires is quick. Among the disadvantages of this fastener for heated floors is the insecurity of the pipe bend. To fix the contour at the turning points, contours are laid or reinforced mesh is used.
Before installing the floor line, a design is carried out. It determines the pipeline laying step. In places where household appliances or furniture are supposed to be installed, the distance between the hinges will be greater.
On the active area, the recommended step is 15 cm. To determine the distance between turns, it is necessary to calculate the power of the heating system and the number of pipes. Calculations can be performed using an on-line calculator.
Features of cross-linked polyethylene
Cross-linked polyethylene is produced either physically or chemically. When it is created, units of ethylene molecules form a spatial (three-dimensional) network with cells through cross-links. Cross-linked polyethylene as a material is designated PE-X. According to the production method, they are distinguished: PE-Ha, PE-Xb, PE-Xc, PE-Xd.
PE-Ha is a polymer that is formed when heated using peroxides. PE-Xb polyethylene is obtained by moisture treatment with a catalytic agent and implanted silane. PE-Xc is a material formed after electron bombardment of polymer molecules. PE-Xd is extremely rare and is produced using nitrogen technology.
PE-Ha cross-linked polyethylene pipes are best suited for underfloor heating.
There are several types of cross-linked polyethylene pipes, they differ in the manufacturing method
Advantages and disadvantages
Pipes made of cross-linked polyethylene for heated floors have a number of advantages:
- Elasticity. This allows you to use the most optimal level of bending when laying, without the risk of subsequent cracking and fractures. Rehau products are considered to be especially high quality in this regard.
- Environmentally friendly. Cross-linked polyethylene contains no harmful components that would be released during heating. This guarantees safety in laying heated floors inside residential premises.
- High combustion temperature. The material begins to melt only after reaching a temperature of +400 degrees. As a result of the breakdown of the substance, water and carbon dioxide are formed, which are completely non-toxic.
- Excellent performance characteristics. The system, made of cross-linked polyethylene, is not afraid of rotting, corrosion and chemical influences. All this is the key to long-term and flawless operation of the water heated floor.
- Frost resistance. In the event of a significant drop in temperature, polyethylene products are not deformed.
- Sound-absorbing abilities. Thanks to this, there is no noise from the coolant circulating inside the circuit.
As for the weaknesses of polyethylene, they usually indicate the need for competent installation work. For example, it is recommended to securely fix turning areas, because this material does not hold the curved configuration given to it very well. In addition, the resistance of polyethylene products to direct sunlight is not very good.
Laying the contour must be done as carefully as possible, avoiding any damage to the protective layer
Cross-linked polyethylene or metal-plastic
Cross-linked polyethylene pipes and metal-plastic pipes are the main competitors when it comes to installing plumbing, heating systems or heated floors. They have a lot in common. Both types of pipes are quite flexible, durable, resistant to corrosion and relatively easy to install - you certainly don’t have to weld anything. True, it is still easier to install metal-plastic pipes than PEX pipes, with which you need to be extremely careful
Metal-plastic pipes have a slightly higher thermal conductivity coefficient (0.45 versus 0.38), but they will not survive freezing inside the coolant. PEX pipes, after the water in the system has melted, can be used as before. Moreover, some types of PEX pipes easily regain their shape. Resistance to high temperatures and pressure is high for both types of pipes: metal-plastic can withstand pressure up to 25 atm at a temperature of 250C, can be operated at coolant temperatures up to +950C with a short-term increase to +1200C, however, the maximum pressure is 10 atm. Thus, the performance characteristics are quite comparable with the similar parameters of cross-linked polyethylene pipes, which we cited above.
The choice depends mainly on the operating characteristics of the water supply system and the budget. The range of prices among pipes, even within the same group, is significant, but PEX pipes are often cheaper than metal-plastic pipes.
Features of fixing pipes in the circuit
Laying underfloor heating pipes can be done in one of the following ways:
- using plastic strips that look like cantilever tape;
- using special mats with laying grooves;
- laying heated floors using metal mounting tape;
- using separate brackets - they are attached to the base at a distance from one another.
As an example, we can consider the use of a plastic fastening strip, which has grooves for 16 and 20 mm pipes. At the same time, different clamps on the fastening element are located at intervals of 50 millimeters, and clamps for pipes are located at a distance of 20 centimeters from each other.
A convenient installation method is to fasten the circuit using strip (or tape) clamps - they provide a 200-mm pipe pitch when laying a heated floor and therefore there is no need to make markings.
A similar distance of 20-25 centimeters should be maintained when installing a heating structure using point brackets. They are designed to ensure that the screed is heated evenly, regardless of the installation method - spiral or snake.
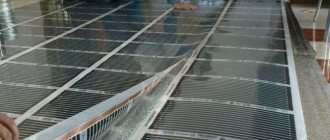
It is also possible to provide a fixed gap between the pipes by using heat distribution plates made of aluminum. They are placed on extruded polystyrene foam boards that have special grooves on their surface. The result is a kind of assembly system that has much in common with children's construction sets, since all the necessary dimensions are already provided in advance.
To avoid deformation of the metal plastic during a sharp turn of the heating circuit, a steel spring having a length of 20-25 centimeters and a width of 18-20 millimeters is put on the pipe before installation work. It should be pulled over the intended bending point, as a result of which it will compress the walls and the plastic will begin to stretch evenly, so that creases will not occur. During the installation process, the spring is pushed further to the end of the contour and then removed.
You need to know how to properly lay a pipe for a heated floor over a screed so that the coating is heated evenly. The fact is that warm air on concrete does not rise strictly vertically to the top, but at an angle of 45 degrees, resembling a cone in shape. In the case when the edges of the flows intersect on the surface of the concrete layer, then the floor covering will warm up evenly and when moving along its surface the temperature difference will not be felt.
In reality, it is enough for the thickness of the screed to be smaller, namely about 10-12 centimeters, and there are several explanations for this:
- A finishing floor covering will also be laid on top of the concrete layer, which will increase the height of the floor.
- In practice, pipes located in the screed do not create clear heating limits, and the concrete is heated nearby, as a result of which the surface maintains the same temperature.
Installation and selection of pipes for heated floors is a completely solvable task. But it must be remembered that the heating system is installed once for a long time and repairs as a result of a breakdown will cost a significant amount.
Features of cross-linked polyethylene
Cross-linked polyethylene is produced either physically or chemically. When it is created, units of ethylene molecules form a spatial (three-dimensional) network with cells through cross-links. Cross-linked polyethylene as a material is designated PE-X. According to the production method, they are distinguished: PE-Ha, PE-Xb, PE-Xc, PE-Xd.
PE-Ha is a polymer that is formed when heated using peroxides. PE-Xb polyethylene is obtained by moisture treatment with a catalytic agent and implanted silane. PE-Xc is a material formed after electron bombardment of polymer molecules. PE-Xd is extremely rare and is produced using nitrogen technology.
PE-Ha cross-linked polyethylene pipes are best suited for underfloor heating.
There are several types of cross-linked polyethylene pipes, they differ in the manufacturing method
Advantages and disadvantages
Pipes made of cross-linked polyethylene for heated floors have a number of advantages:
- Elasticity. This allows you to use the most optimal level of bending when laying, without the risk of subsequent cracking and fractures. Rehau products are considered to be especially high quality in this regard.
- Environmentally friendly. Cross-linked polyethylene contains no harmful components that would be released during heating. This guarantees safety in laying heated floors inside residential premises.
- High combustion temperature. The material begins to melt only after reaching a temperature of +400 degrees. As a result of the breakdown of the substance, water and carbon dioxide are formed, which are completely non-toxic.
- Excellent performance characteristics. The system, made of cross-linked polyethylene, is not afraid of rotting, corrosion and chemical influences. All this is the key to long-term and flawless operation of the water heated floor.
- Frost resistance. In the event of a significant drop in temperature, polyethylene products are not deformed.
- Sound-absorbing abilities. Thanks to this, there is no noise from the coolant circulating inside the circuit.
As for the weaknesses of polyethylene, they usually indicate the need for competent installation work. For example, it is recommended to securely fix turning areas, because this material does not hold the curved configuration given to it very well. In addition, the resistance of polyethylene products to direct sunlight is not very good.
Laying the contour must be done as carefully as possible, avoiding any damage to the protective layer
Cross-linked polyethylene or metal-plastic
Cross-linked polyethylene pipes and metal-plastic pipes are the main competitors when it comes to installing plumbing, heating systems or heated floors. They have a lot in common. Both types of pipes are quite flexible, durable, resistant to corrosion and relatively easy to install - you certainly don’t have to weld anything. True, it is still easier to install metal-plastic pipes than PEX pipes, with which you need to be extremely careful
Metal-plastic pipes have a slightly higher thermal conductivity coefficient (0.45 versus 0.38), but they will not survive freezing inside the coolant. PEX pipes, after the water in the system has melted, can be used as before. Moreover, some types of PEX pipes easily regain their shape. Resistance to high temperatures and pressure is high for both types of pipes: metal-plastic can withstand pressure up to 25 atm at a temperature of 250C, can be operated at coolant temperatures up to +950C with a short-term increase to +1200C, however, the maximum pressure is 10 atm. Thus, the performance characteristics are quite comparable with the similar parameters of cross-linked polyethylene pipes, which we cited above.
The choice depends mainly on the operating characteristics of the water supply system and the budget.
The range of prices among pipes, even within the same group, is significant, but PEX pipes are often cheaper than metal-plastic pipes. Date: September 25, 2022
Types of pipelines for a water system
Currently, the consumer market offers several options for materials and components for water heating systems. When choosing a pipeline for a heated floor, you need to take into account their cost, characteristics and service life.
Let's look at the most common types of pipelines and their characteristics.
Polypropylene
In a building materials store you can find two options for polypropylene pipes, such as metal-polymer and polymer. They are characterized by good resistance to corrosion, resistance to the abrasive action of the coolant and a durable top layer that does not deform when in contact with cement mortar. Manufacturers of metal-plastic pipelines guarantee that they will last about 40 - 45 years, polymer products - more than 50 years.
Polyethylene
A distinctive feature of these pipes is that no components are needed for installation. The joining of products is carried out using a soldering iron. To make the pipeline elastic, it will be enough to warm it with a hairdryer. Polyethylene products are reliable and durable, but for a water floor they must have a reinforcing layer. The average lifespan of a pipeline is 50 years.
Stainless
Corrugated pipes made of this material are considered the most durable; their service life has not yet been established. They do not corrode, do not deform from high temperatures and do not freeze during frosts. The flexibility of the material allows the pipeline to be laid in increments of different sizes, which simplifies installation work. The only drawback of stainless pipes is that their rubber seals have a service life of only 30 years.
Copper
According to consumer reviews, pipes made of this material have the highest heat transfer. You can use coolants such as antifreeze or antifreeze with them. They are easy to use. Due to its optimal size, the strength of the concrete screed is not reduced during installation. Their service life is about 60 years.
In addition to the above characteristics, when choosing pipes for laying heated floors, you need to pay attention to their technical parameters. They must meet the following requirements:
- Linear expansion no more than 0.055 mm/mK;
- Thermal conductivity is no less than 0.43 W/mK;
- Diameter – from 1.6 cm to 2 cm.
It is also worth paying attention to their purpose. Many beginners make a big mistake by choosing conventional hot water pipes for heated floors.
Therefore, before purchasing, it is very important to read the attached instructions, where you can make sure that the product is suitable for the heating system
Characteristics of expanded polystyrene
Foamed polystyrene foam looks more advantageous compared to other thermal insulation materials, due to the fact that it allows you to get a fairly dense, durable and rigid base. During its production, the initial mass is foamed by introducing a low-boiling liquid into it, under the influence of which granules are formed that have a waterproof styrene shell. After exposure to hot steam, granules are obtained that have increased in size by 10 to 30 times compared to the original size. After the granules are sintered together, strong, rigid slabs are formed.
Laying pipes on a grid
Extruded polystyrene foam with low thermal conductivity is very popular. The positive qualities of this material include the following:
- Moisture resistance and the ability to not allow steam to pass through ensure that the thermal conductivity of the insulation remains at the same level even when exposed to moisture.
- Environmental friendliness and safety of the material for humans and the environment.
- Biological passivity and the ability of the material to prevent the formation of fungus and mold.
- Resistance of the material to chemical reagents.
- Maintains performance at extremely low (down to –50 degrees) and high (+85 degrees) temperatures.
- The low weight of polystyrene foam boards allows them to be used on any floor without adding weight to their structure.
- The material is easy to process, trim and lay. All work can be done independently, without involving assistants.
- Thanks to its smooth surface, the material interacts well with the base on which it is laid.
- Excellent thermal insulation properties are provided by the bubble structure of the material.
- Expanded polystyrene simultaneously creates a waterproofing layer due to its resistance to moisture.
How and with what to cut polystyrene foam at home?
Laying pipes on a foil layer with markings
An important quality for flooring is its noiselessness. Expanded polystyrene boards have excellent sound insulation properties.
The thickness of the heated floor structure taking into account the pouring of the concrete screed
The safety of the material is no less important - polystyrene foam practically does not burn and even has a self-extinguishing property. However, during the smoldering process it releases harmful toxins.
Preparation stage
Whatever technology for laying heated floors you choose, you need to make an accurate calculation of the required amount of materials to solve the problem in a particular room. To do this, you need to determine the optimal parameter for the power of the heating circuit, the temperature in the system, the amount of heat loss and the flooring option.
You should choose a high-power underfloor heating system if:
- the finishing coating will be massive granite or marble slabs, or any other building materials characterized by high heat capacity;
- the room has poor thermal insulation of the balcony and walls;
- there is a significant number of glazed structures, such as a balcony, bay window or winter garden;
- The room is located on the top or first floor.
Attention! | Cloudflare
Why should I fill out a CAPTCHA?
Completing the CAPTCHA proves that you are a human and gives you temporary access to the web resource.
What can I do to prevent this from happening in the future?
If you're on a personal connection, such as at home, you can run an antivirus scan on your device to make sure it's not infected with malware.
If you are in an office or shared network, you can ask the network administrator to run a network scan for misconfigured or infected devices.
Another way to prevent this page from appearing in the future is to use Privacy Pass. You may need to download version 2.0 now from the Firefox Add-ons Store.
.
Automation of installation of anchor shackles
A manual tacker is cheaper, but requires more time for installation.
Among professionals, a common method is that a special device called a “tucker” is used to fix the pipes. The latter accommodates at least 120 anchor shackles, installed in semi-automatic mode. If you use pre-marked installation locations, this device can be used to secure the pipe quite quickly and reliably.
The disadvantage of such devices is their high cost and the need to pre-assemble a set of staples. Branded products of this class are extremely rare on the domestic market. Most often, these devices are used by experienced craftsmen or professionals working in the construction fields.
Advantages and disadvantages
Insulation materials are classified according to their form:
- liquid – cement mortar, polymer penoizol;
- bulk – expanded clay, sawdust, foam crumbs, penoizol, slag;
- block (in the form of slabs and mats) - mineral wool, polystyrene foam, expanded polystyrene, vermiculite, wood concrete;
- rolled - polystyrene, mineral wool of lower density, isolon, penofol.
Liquid materials are good for obtaining seamless screeds. Bulk compounds fill the space very tightly. However, their installation requires a frame, while block and roll insulation can do without them. Liquid solutions take time to dry completely, but have a long service life. The roll has a lower density compared to the block, which is reflected in the difference in thermal conductivity.
The most common types of heat insulators have their pros and cons, which are, to one degree or another, inherent in their analogues:
- Expanded polystyrene and polystyrene foam. These insulation materials are characterized by average mechanical strength and compression resistance. Low density contributes to low water resistance. Under normal conditions, the materials are non-toxic and resist combustion well, but under the influence of high temperatures, polystyrene foam begins to smolder and release toxic substances. Experts note absolute biological stability; rodents, insects and microorganisms will never grow in extruded polystyrene foam.
- Mineral wool, according to users, has a number of advantages, thanks to which it is still the most popular type of insulation. The most important thing is its low cost, due to which it can be used in unlimited quantities. Also especially noted are vapor permeability, noise insulation properties, a high degree of fire resistance and low thermal conductivity. Among the disadvantages, it is worth highlighting hygroscopicity, since when mineral wool gets wet, it loses its remarkable characteristics.
- Expanded clay and other bulk compositions do not leave waste after installation. They are environmentally friendly, vapor permeable, fireproof, and immune to biological agents. Professionals highlight expanded clay as almost the only type of insulation possible for insulating floors on the ground. As for the disadvantages, the main one is low hygroscopicity. The second significant drawback is the thickness of the layer, since at least 15 cm is required to achieve the effect. This means that it cannot be used in places with a lack of height.