Features of the material
Penoplex is a foamed polymer made by extrusion from general purpose polystyrene. Modern equipment makes it possible to produce material with an ordered structure in which small gas bubbles are evenly distributed. Such isolated and completely closed microscopic cavities have a size of about 0.1-0.2 mm. The reagent for foaming is light types of freon with the introduction of carbon dioxide.
Penoplex is a foamed polymer made by extrusion from general purpose polystyrene
By its nature, penoplex is chemically inert, which eliminates its oxidation or rotting. The main goal of developing this material is to provide high thermal insulation capabilities with low water absorption and very high compressive strength. An important characteristic is good manufacturability, i.e. It cuts and bends easily, allowing it to be used in hard-to-reach places.
As is known, the thermal insulation characteristics of any foamed or porous material are sharply reduced under the influence of moisture, which is absolutely not typical for penoplex. A slight water absorption by the material is observed only in the first 7-8 days, when moisture fills the cells located near the surface. Subsequently, the penetration of water stops, and the initial saturation has little effect on the thermal insulation capabilities of the product. Moreover, it should be noted that it is impenetrable to steam, which is very important for bath conditions.
The main form of the slab: width 60 cm and thickness from 2 to 15 cm
The material is divided into 3 groups:
Its types differ in specific density, mechanical strength and heat resistance. Insulation of the floor in a bathhouse with penoplex is carried out by the first 2 types of material.
On a note! Penoplex 45 has increased mechanical strength and is intended for floors where significant load and vibration are possible.
The main form of production of the slab: width 60 cm and thickness from 2 to 15 cm. Sheets with a thickness of 10-12 cm are very popular. The standard length of the slabs is 120 and 240 cm; in special cases, material 4 or 4.5 m long can be used.
Preparatory work
Preparatory work includes installation of a waste water drainage system and installation of a subfloor.
To install a drainage system:
- We excavate the soil to a depth of 40 cm, with wall dimensions of 40x40 cm;
- We concrete the bottom and walls of the tank to a thickness of 5 cm;
- We connect the fan pipe with one end to the reservoir, and the other into a special septic tank;
- Determine the level and location of the drain hole;
- We lay the second pipe from the bathhouse to the tank.
Important! Drainage design and site markings take place before work begins. To prevent unpleasant odors from entering the room, pipes are equipped with automatic valves
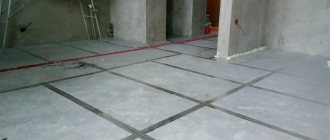
Preparing the base of a concrete floor consists of the following operations:
Removing the top layer of soil and filling it with sand;
Installation of a gravel cushion with a thickness of no more than 15 cm. Gravel must be used in a coarse fraction;
Backfilling with crushed stone. The thickness of the crushed stone layer is 10 cm
Important! It is necessary to compact each layer of sand, gravel and crushed stone.
Developments of “zero” markings: From the bottom point of the door frame, set a point upward by 1 meter; From this point along the perimeter, draw lines along the walls. Use a construction or laser level; On each wall from the drawn line, lower the points down vertically exactly 1 meter
Important! The connected points are the finished floor level.
Drive nails into the corners and connect them with a cord;
Divide the room into sections no more than 2 meters wide;
Place “buns” – heaps of concrete mortar – along the boundaries of the plots;
Lubricate the guides with technical oil for subsequent removal of the beacons from the concrete;
Place the guides on concrete “buns”. Profiles, metal pipes or wooden blocks are used as guides. The guides must be aligned in height with the “zero mark”.
Fill the resulting structure with concrete 5 cm thick. To avoid stagnation of water, it is necessary to organize a slope when laying concrete in the direction of the drainage.
Preparatory work for installing a wooden floor consists of the following operations:
- Laying floor joists with a slope;
- Attaching boards to them. It is better to choose solid coniferous trees as a material. The type of wood for the logs and boards must be the same. If the length of the walls of the room is the same, then the lags are laid in any direction, otherwise, the lags must be laid from the wall, which is longer in length and in a transverse direction relative to the water drainage.
- Install support chairs in the center of each joist to prevent them from sagging. The supports can be made of wood, concrete or brick. Brick and wooden supports rest on a concrete platform, at least 20 cm thick, reinforced with reinforced mesh. The projections of the platform beyond the boundaries of the supports are 5 cm on each side.
The concrete platform is a 40 cm depression in the ground, with backfilling and compaction of subsequent layers:
- Sand 10-12 cm thick spilled with water;
- Coarse crushed stone 15-20 cm thick;
To compact the layers, use vibrators or vibrating rammers.
Work on the construction of a concrete platform:
- Install wooden formwork and cover the inside with waterproofing. Use roofing felt as a waterproofing material.
- The first layer of concrete mixture is laid with a thickness of at least 12-14 cm;
- Each layer of concrete must be compacted. Concrete is a mixture of sand, cement, fine crushed stone diluted with water. Mix bulk material in a ratio of 1:3:5. Stir the mixture until a thick consistency is obtained.
- Cover with reinforcing mesh;
- Pour the second layer of concrete and leave until completely dry;
- We coat the concrete preparation with bitumen;
- Glue a layer of rolled waterproofing.
Important! The height of the support chairs should match the height of the places on which the ends of the floor joists will rest. If a strip foundation is designed for the bathhouse, then the levels of the top of the foundation and the support tables must coincide
The lags are laid from the walls towards the water collection tank. It is necessary to make cuts in the joists with a bevel of 2-3 mm, with the exception of the outer joists.
Use of material for bath insulation
How to insulate the floor in a bathhouse with penoplex?
There is a limitation under which the material can be reliably used - these are temperature parameters - 50 ... + 75 ⁰С. It is this characteristic that complicates its use in bath conditions. Already at temperatures above 70⁰C in heated air, the release of harmful compounds dangerous to humans can begin.
At temperatures above 70⁰С in heated air, the release of harmful compounds dangerous to humans may begin
In the sauna, the temperature rises +90...+95 ⁰С, and with such heating, using penoplex for interior decoration is dangerous to health. In a Russian bath, the temperature of the steam room can be +60…+65⁰С, which also raises doubts about the possibility of using the material, especially for insulating the ceiling, where superheated steam rushes. Another thing is the floor in the steam room. Taking into account the laws of physics, there is no need to worry about maximum temperatures at the floor level, but in reality they do not exceed +45...+50⁰С below. Here, cooling the floor from the ground side plays a significant role. You should also take into account the fact that the floor in the bathhouse is not covered with penoplex on top. The material is used as thermal insulation, on which a finishing coating is then applied. All this indicates the possibility of using penoplex in the steam room of a Russian bath. In any other bath premises (washing room, dressing room, rest room) the use of the material does not raise any doubts.
The material is used as thermal insulation, on which a finishing coating is then applied.
Advantages of using insulation material
The steam room and the entire bathhouse are insulated not only because of the cold winters. A well-insulated building will also quickly heat up from a melted stove. However, when insulating a building, it is taken into account that different building structures are thermally insulated in different ways. During this process, insulating layers are created that differ in structure.
Insulating the steam room and the entire bath allows you to:
- Organize proper circulation of moisture and steam . High-quality thermal insulation of building structures will prevent the appearance of water droplets on walls, ceilings and various finishing materials. Therefore, the cladding will be less exposed to negative influences. This will reduce the likelihood of it rotting. In addition, there will be less mold and mildew to form on it. Reducing the negative impact will have a positive effect on the appearance of the finishing material. It will retain its original appearance longer.
High-quality thermal insulation allows you to increase the service life of the bathhouse finish Source tildacdn.com
- Significantly reduce the amount of firewood needed to light the stove . If you use the right quality insulation for a sauna, then you will be able to heat the premises of the building faster. In this case, a significantly smaller amount of fuel will be required to light the stove structure. In addition, people will not have to wait long for the temperature in the steam room to reach the desired value.
- Increase the level of comfort in all areas of the building . Thanks to high-quality insulation, people will not freeze in the dressing room and rest room. They will be able to shower in a special compartment at a comfortable ambient temperature.
Typically, insulation of a steam room in a bathhouse is done from the inside. This is a proven option for thermal insulation of building structures. Thanks to insulation, the service life of the entire structure increases. The use of high-quality thermal insulation will allow the owner to carry out repair work less frequently.
A proven insulation option is the internal thermal insulation of the steam room Source dekoriko.ru
On a note! It is always necessary to carry out additional insulation of the building structures of the bathhouse if the structure was originally built in violation of the technology. In addition, there are often incorrectly built stoves that quickly cool down. In this case, it is thermal insulation that will reduce heat loss through the walls, ceiling and floor.
Features of penoplex
Do-it-yourself insulation of the floor in a bathhouse with penoplex depends on its design and material. There are several options for ensuring it: insulation of the foundation, log base and floor.
The process of insulating a strip bath foundation involves applying waterproofing using bitumen mastic. Penoplex sheets are attached using an acrylic-type adhesive.
The work is carried out in the following order:
Advice! When insulating the lower part of the floor in a bathhouse, it is recommended to take separate care of the thermal insulation of the basement part of the wall, which is in more difficult conditions.
The insulation of the base is carried out in the following order:
Required Tools
When arranging a bath floor using foam boards with your own hands, you should prepare the following tools and devices in advance:
- grinder (when installing wooden floors);
- electric drill;
- screwdriver;
- sharp knife;
- scissors;
- furniture stapler;
- paint brush;
- putty knife;
- trowel and other tools for concreting and plastering;
- shovel;
- hammer;
- mallet;
- roulette;
- building level;
- metal ruler.
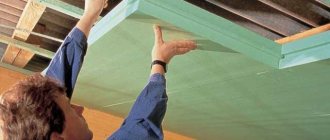
Insulating the floor in a bathhouse with penoplex
Floor insulation
How to insulate a concrete floor in a bathhouse with penoplex? A concrete floor in a bathhouse without reliable thermal insulation will be cold. Penoplex is the material that easily copes with this problem. Floor insulation is carried out in the following order:
If the floors in the bathhouse have a wooden base, then the procedure for applying penoplex insulation will be as follows:
A layer of waterproofing and vapor barrier is applied on top of the penoplex
Attention! Important condition: all wooden floor elements must be impregnated with an antiseptic composition before installation.
Penoplex is a modern, excellent heat insulator. In the steam room it should be used with great care and with additional protection from harmful emissions at high temperatures. In other bath rooms, a floor with insulation made from this material will provide comfort and last for many years.
Source
Insulating the foundation with penoplex - simple and reliable
Today, foundation insulation using penoplex is one of the cheapest and most popular methods of thermal insulation. Penoplex is the latest foamed polymer material, the distinctive feature of which is a completely closed cell structure. And thanks to this characteristic, water absorption will be minimal here. In addition, the cells are filled with air, which is an excellent thermal insulator. The insulation is also very resistant to mechanical damage.
This material is produced in the form of plates that have a mounting groove. Therefore, insulation using penoplex is an incredibly fast and simple process, accessible even to a layman. The slabs are easy to lay, and the formation of even the slightest gaps and any seams is completely eliminated.
Types of insulation
The following insulation options are available:
- vertical;
- horizontal;
- insulation of the soil located around the house.
With vertical insulation, work is carried out outside the house. The slabs of material are firmly attached with high-quality glue that has a concrete or polymer base.
In the basement part, the insulation is mounted using dowels specially designed for this purpose. In this case, the insulation protects not only the interior of the house, but also the outer surface of the foundation, which incredibly increases the service life of the entire structure.
In the horizontal version, the slabs are laid directly under the base of the foundation. This method of thermal insulation perfectly protects against freezing, the common problem of frost heaving, and groundwater.
If the soil around the house turns out to be very heaving, then the ideal option would be to insulate the soil directly around the house using a blind area previously insulated with penoplex.
If you have chosen penoplex as insulation, then the question naturally arises - how to carry out insulation more correctly: inside or outside. Maximum protection from harmful environmental conditions will be provided by external insulation. But it is easier to carry out such insulation at the construction stage.
Those who are going to start insulating an old house usually don’t want to dig up the foundation, but it is important to remember that any insulation of the foundation from the inside is a bluff and insulation of the basement or basement, but not the foundation.
Vertical option
Before starting work, you need to dig out the foundation exactly to the depth, clean it of dirt, stones, soil residues, etc., and, if necessary, level the surface with cement mortar. Using bitumen or polymer mastic, the water-based coating procedure must be carried out. Under no circumstances should you purchase solvent-based mastic. Contact with it will destroy the insulation.
Glue intended for polystyrene foam must be diluted exactly according to the instructions, then mixed thoroughly and left to mature. On the foundation, the lowest line for laying is first marked. If the base is somewhat uneven, then you can place the insulation slightly below the level where the foundation begins.
Usually, for more effective thermal insulation, several layers of penoplex are laid at once in a checkerboard pattern so that the slabs of the subsequent layer cover the seams of the first. The technology for laying the next layer is the same.
There is no additional need to secure insulation in the underground part of the foundation. After filling it with soil, it will stay tight. But in the base part, immediately after the glue has dried, the material must be additionally secured with dowels. The length of the drill must correspond to the thickness of the slabs.
Horizontal option
For this insulation option, slabs with a thickness of 6-10 cm are selected.
The site chosen for the foundation is carefully and accurately marked, and the topmost layer of soil is removed to the required depth. The bottom is made perfectly flat, the site is filled with bulk material (most often sand) and then compacted. Temporary formwork is prepared and filled with a thin layer of concrete.
A polyethylene film is laid on top of the insulation. Then all joints are carefully taped with tape. This film is a waterproofing layer and perfectly prevents concrete from leaking.
Next, formwork is performed, followed by reinforcement and the final pouring of the foundation.
The material has a lot of advantages. One of them is the low price. A package of 8 sheets with a total area of 5.76 m2 will cost you approximately 1.5 thousand rubles.
Is it possible to insulate a bathhouse with foam plastic: floor, ceiling, foundation
Foam plastic began to be used as insulation in the mid-20th century. The foam consists of expanded polystyrene. When foaming, air bubbles form. Due to the large number of air bubbles, polystyrene foam is considered an excellent thermal insulator. But is it possible to insulate a bathhouse with foam plastic? Let's figure it out together.
Is it possible to insulate polystyrene foam and a bathhouse?
Polystyrene foam as insulation: pros and cons
Foam plastic is loved by users not only for its good thermal insulation properties. It has a number of advantages:
But despite all the good looks, polystyrene foam has a number of disadvantages that manufacturers are constantly struggling with:
Indeed, when burned, the material emits fumes that are harmful to humans. But manufacturers claim that modern material is made with the addition of a special fire-resistant substance, which helps it become self-extinguishing. It can ignite spontaneously only at a temperature of +420 °C; for example, spontaneous combustion of wood begins at a temperature of +270 °C.
Insulating a bathhouse with foam plastic is not as scary as it seems at first glance.
Harmful substances are released by the material when it melts, and not when heated in a bath. It is difficult to answer whether the manufacturers are telling the truth, and how to distinguish modern material from old batches. But practice has shown that insulation can be used for some parts of the bathhouse.
Is it possible to insulate a bathhouse with foam plastic and how?
You can use insulation to insulate some parts of the bathhouse. But you should refrain from insulating the steam room with it, since the temperature in it can rise to 95 ° C, and in the sauna even higher. And foam plastic can begin to collapse at temperatures above +95 °C, so even 90 °C will be critical for it.
It is not recommended to use polystyrene foam to insulate wooden baths from the inside; the fact is that the walls will be insulated from heat and the dew point will shift between the insulation and the wall. This will lead to premature rotting. Therefore, insulation is carried out only on the outside or along internal partitions.
According to user reviews, the bathhouse, insulated from the outside with polystyrene foam, has become more comfortable, the temperature in it quickly rises and in winter does not drop below +10. The only thing you should not forget about is the vapor permeability of the foam. To prevent the walls from getting wet, it is necessary to install a ventilation system in the bathhouse.
We recommend insulating baths made of stone, brick or blocks with foam plastic. Wood itself is a good heat insulator. Moreover, a wooden bathhouse is capable of accumulating heat, that is, accumulating and retaining it for a long time.
Video description
One of the options for insulating a brick bath is shown in the video:
Bathhouse made of timber
If small timber was used to construct the building, then not only the steam room in the wooden bathhouse is insulated, but also all other rooms. Complex thermal insulation is also carried out when the structure was originally built from low-quality materials.
If the timber bathhouse was built in strict compliance with the technology, then all the cracks are caulked. In addition, the wood is treated with special substances that prevent the formation of fungi and mold. In this case, to insulate a steam room, basalt wool, which has a foil coating, is usually used. Fiber insulation and foil can also be used separately.
Expanded clay concrete bath
If the structure is built from expanded clay concrete blocks, then insulation is carried out using moisture-resistant heat-insulating material. After all, the walls in this bathhouse have a porous structure. Therefore, they themselves will retain heat perfectly. However, such structures are negatively affected by high humidity.
One of the options for moisture-resistant heat insulator Source cs.petrovich.ru
For baths made of expanded clay concrete blocks, basalt wool is also often used. At the same time, a vapor barrier layer and waterproofing are laid. Additionally, it is recommended to install a ventilation system.
On a note! If a foil thermal insulator is used, the insulating layer may have a small thickness. However, in any case, it is additionally necessary to install waterproofing.
Which parts of the bathhouse are advantageous to insulate with foam plastic?
Since polystyrene foam is not only a good heat insulator, but can additionally protect the surface from moisture, it is often used to insulate the foundation of a bathhouse.
How to insulate the foundation of a bathhouse?
Polystyrene foam is excellent for foundation insulation. But we must not forget that the insulation crumbles and is afraid of mechanical damage. To protect it from the outside, it is necessary to make a protective partition from boards or bricks.
Foam plastic is optimal for insulating the foundation. It does not allow water to pass through and the foundation will be reliably protected.
Polystyrene foam has proven to work well as insulation for the foundation of a sauna on loamy and clay soil. Since moisture does not get inside the material, it will protect the base of the bathhouse from moisture and heaving in spring and winter. But you should not use insulation when the groundwater level is higher than usual and flooding cannot be avoided. Moisture getting under the foam cannot evaporate and the foundation will begin to collapse.
The thickness of the foam for insulating the foundation of a bathhouse is chosen according to your region, so for the middle part of Russia 50 mm is suitable. In the corners of the structure, thicker material of 100 mm is used, since heat loss in the corners is the highest.
Progress of foundation insulation work:
The foundation is first excavated and cleaned of dirt. Apply a primer made of bitumen mastic and a waterproofing agent, for example, liquid rubber, to the wall. The coating is left to dry for 1–2 hours.
The foam is attached directly to the foundation wall using bitumen mastic or a polymer-based adhesive. The slabs begin to be laid from below, and they must rest on a hard base. If the foundation is just being built, then a protrusion is specially left for the foam slabs. For the old foundation, gravel is added on which the slab will rest.
The joints and the part that is glued are completely lubricated with bitumen mastic. On sale you can find foam boards with an L-shaped lock. These are easier to glue together and the protection will be more airtight.
When the slabs are laid, they are once again covered with bitumen mastic and a protective partition is made. It's easier to install boards, but they will rot quickly, so use brick. A half-brick wall is made from it along the entire foundation. Among modern materials, geotextiles have performed well. It is simply rolled out along the foam and the protection is ready. But the price of geotextiles is high.
The entire structure is buried on the side with soil and a concrete blind area is made on top. Making such insulation is labor-intensive, but the bathhouse will be protected reliably.
Is it possible to insulate a bathhouse with foam plastic floors?
Since polystyrene foam does not absorb moisture, it is often used to insulate floors in saunas. If you close the material in a screed, there will be no mechanical effects on it, and the floor will be warm.
Insulation under concrete screed
Part of the soil is removed and a sand cushion of 10–15 cm is filled in. It is leveled and compacted. Then gravel is poured, which must be hammered into the sand. Next, cover with PVC film or roofing felt, they will serve as a waterproofing material.
It is not difficult to insulate floors in a bathhouse under a screed with polystyrene foam, but the result is a structure with high heat-insulating properties.
Next, foam boards are laid, which are coated with bitumen mastic. A PVC film is again laid on top of the foam and a reinforced mesh is laid. The base for the concrete screed has been assembled.
How to insulate sauna floors using joists
We do not recommend insulating floors along joists, on top of the subfloor, in a steam room, but in other rooms (dressing room or rest room) a similar option is appropriate. For insulation, you can even use the material in crumbs, because it will be laid between the finishing and rough boards and there will be no load on it.
Even a beginner can lay foam boards along the joists.
The rough joists are covered with waterproofing, possibly with PVC film, and polystyrene foam is laid on top. Place it between the joists. A finishing floor is installed on top.
Ceiling insulation with foam plastic
Often the ceiling of a bathhouse is insulated with foam plastic. But to use insulation, you must follow a number of rules:
Place polystyrene foam on the second layer between the ceiling joists. The first layer can be expanded clay or a mixture of clay and sawdust. The vapor barrier must be of very high quality, otherwise wet steam will get under the foam and remain there. But if you do everything correctly and efficiently, heating the bathhouse will be easier, since the warming up time will be reduced by 2 times. You can see more details on how to perform the work in the video:
Polystyrene foam is a good insulation material. But like any material, it has pros and cons. Knowing the disadvantages, you can prevent them with some design features of the thermal cake. We answered the question: Is it possible to insulate a bathhouse with foam plastic? Then the reader decides for himself. And the video and photos in this article will help you make the right choice.
Source
Briefly about the technology
Concrete floors
Let's start with concrete. Regardless of which type of insulation you plan to use, the entire process of insulating the floor will look approximately the same. Therefore, the step-by-step guide in my article will be more schematic than educational. However, to any person who is not so far from construction (and I suspect that there are some among the readers of my blog), everything will be clear without small details (which I can cover separately if questions arise).
So, whether you decide to lay foam plastic under the screed or use, for example, glass wool, the stages of work will not differ significantly. The first step is to prepare the base. The soil is thoroughly compacted, with the preparation of the so-called cushion (naturally, all the necessary details for arranging the drain are also provided). We think through the entire sewerage system in advance.
We fill in a rough screed, designed to ensure leveling of the base and ease of carrying out the next steps. After it hardens, a layer of waterproofing is installed (you can also read about this in more detail in other articles on my website).
Now a layer of thermal insulation is laid, the thickness of which depends on the design of your structure (at a minimum, it cannot be thinner than the standard sizes of the sheets of insulation used).
*Separate recommendations for working with perlite
Perlite and vermiculite
First, avoid drafts while preparing the mixture, otherwise your “sand” (which makes up the base) will scatter so much that you will not be able to collect it. Secondly, to make the mixture it is recommended to use cement of at least grade M 400. Thirdly, follow the recommended proportions, which will speed up the hardening of the layer and ensure its maximum efficiency.
After laying the thermal insulation, the main layer of concrete with its indispensable reinforcement should be poured (I also have many articles about the intricacies of this process).
Well, all that remains is to finish this epic (of course, after the concrete has completely hardened) by laying tiles or mosaics. True, there is one more point. If you are making a bathhouse “for yourself” and are ready to invest a little in it, then before laying the cladding, we can recommend installing an “electric heated floor”.
This is essentially the same as installing heated floors in any living space. Infrared film under the tiles is very easy to install, and turning on its heating depends only on your choice and weather conditions (but in severe frosts you will not regret having it). The relaxation room will delight your feet with great pleasure.
Another option is to make a water heated floor. For those interested, here is a link to the article. By the way, this small bathhouse has been in operation for 4 years, and so far there have been no problems with heating the floor or the entire room...
Wooden floors
Now let's talk about wood floors. In general, the technology for insulating them (meaning non-leaking floors) is similar to working with concrete. But there are also some peculiarities:
- Choice of insulation. The ideal option, in my opinion, would be polystyrene foam, which does not allow moisture to pass through (when using other materials, you will have to think carefully about the correct arrangement of waterproofing).
- Preparing the subfloor. I have also written about this more than once in articles on my website. Here you can use low-grade boards that will be attached to load-bearing beams (joists). At the same time, the essence of arranging such a floor will not differ much with different types of foundation. After all, both the strip foundation and the foundation on screw piles, after installing the support beam, turn into an elementary structure, work with which is carried out according to a single technological process.
- Waterproofing membrane. A thin layer designed to protect beams and subfloors from exposure to steam or leaking water. When laying it, you should thoroughly insulate the joints and provide overlaps on the walls (about 20 cm).
Insulation. In general, the principle of its installation is so simple that I won’t even dwell on this point
The only thing I would like to pay attention to is the choice of insulation. Depending on the material used, you may have to install another layer of waterproofing on top of it. The final
All “unflattering” grooves and joints, as well as the space at the outlet of the sewer pipe and drain, can be blown out with foam. After this, feel free to lay the finished floor, not forgetting about the gaps (about 4 cm) between it and the underlying level, which will significantly improve ventilation and will help the floors dry out as quickly as possible.
Do-it-yourself floor insulation in a bathhouse: we make everything extremely simple
Today, many people are trying to have a Russian bathhouse in their homestead, and the easiest way is to build it yourself, then you can be absolutely sure that everything is done according to the technological process. Moreover, each stage of the device needs to be given a lot of time and attention so that everything works out as thoroughly as possible. Insulation also plays a significant role in this, and insulation of floor structures in the first place. True, you always need to start from the top, that is, from the ceiling, but a warm floor is simply of enormous importance.
The floor in a bathhouse is always exposed to particularly strong influences, ranging from sudden jumps and temperature changes to extreme humidity, which is also quite important. If you do not learn in time how to properly insulate the floor in a bathhouse with your own hands, you will soon notice significant heat loss, and, consequently, unnecessary energy consumption. But this is not the most important thing. Whatever the structure of your floor, no matter how well it is made, if it is not properly insulated and provided with ventilation, it will soon begin to collapse, which may even lead to the fact that you will have to start building everything from scratch.
We begin to understand from the very beginning: why and how to insulate the floor in a bathhouse with your own hands
Many people, even having built a Russian bathhouse on their own plot, do not even imagine what all this fuss with insulation is for, we look for the best option for materials, believing that this is not at all necessary. In fact, you can, of course, completely abandon the insulation of the concrete floor in the bathhouse, as well as the wooden one, and the insulation of the walls and ceiling, but the results of such construction will definitely not please you. Moreover, there are many objective reasons for this, of which we will name only the most “loud” ones, which can be considered compelling arguments in favor of floor insulation, and not only them.
It is for these reasons that it is worth immediately, even when creating the primary project, to take into account the thermal insulation of the entire building, and first of all, the floors, although insulation always begins from the top. Moreover, you need to understand that it is through the floor that most of the heat from the steam room flows away, spoiling the entire effect and significantly reducing the therapeutic value for health. But before you figure out how to insulate the floor in a bathhouse in a washroom, you need to understand what materials exist for this, and how to use them correctly, and only after that you can start working.
Insulating the foundation with penoplex: step-by-step instructions
Penoplex, one of the most popular types of insulation, is characterized by a low degree of thermal conductivity and resistance to moisture. In addition, it is lightweight and very compressive. Insulating the foundation of a house with penoplex is therefore a more than advisable procedure. Moreover, it will not be difficult to do such work with your own hands.
First of all, of course, you will need to make a material calculation. To do this, determine the area of the insulated surface. Penoplex slabs usually have dimensions of 600*1200mm. To effectively insulate the foundation, insulation with a thickness of at least 100 mm is required. Therefore, most often 50mm slabs are glued in two layers. Among other things, the project will need to include costs for additional materials.
At the first stage, you need to roll away the soil from the foundation to a width of about half a meter. Dig a trench below the level of the sand cushion. Of course, the foundation should be opened along its entire perimeter. You will need to pour sand into the bottom of the trench and compact it flush with the cushion that already exists under the base. However, this procedure is performed only after the foundation walls have been waterproofed.
Before insulating the foundation with penoplex, it is necessary to level its walls. This procedure is carried out using beacons. They are installed at such a distance that it will be convenient to use the rule in the future. The profile should extend approximately 50cm above ground level. The solution is mixed in a ratio of 1*3. Before applying it, the walls are moistened with water. The finished leveling layer must dry for at least a week.
To protect the surface from water, it should also be coated with molten bitumen mixed with used motor oil at the rate of 40 liters per 100 kg. This additive will make the waterproofing layer more elastic and resistant to low temperatures. You can also use ready-made bitumen mastic.
The composition is applied to the surface using a roller with a long handle. When performing this work, you should ensure that all cracks, seams and pores are filled with bitumen. Next, strips of roofing felt are pressed tightly onto the treated surface, gluing the overlaps.
So, now let's see how you can insulate the foundation of a country building with penoplex. The material is fixed in this order:
- Acrylic glue is applied to each slab at five points.
- The slab is pressed tightly against the waterproofed surface.
- This way the entire foundation is covered. The joints are additionally coated with the same glue or foam.
- The second layer is installed in exactly the same way, only with the seams offset relative to the bottom row.
Important: Additional fixation of the slabs with dowels “fungi” is carried out only on the base - above the level of the winding. To avoid damage to the waterproofing, these fasteners cannot be used on the foundation itself. On the base, 5-6 dowels are driven into each slab.
Reinforcement and plastering
After installation, the slabs are covered with a fiberglass mesh. Between the strips of this material you need to overlap 10cm. Next, proceed to re-plaster the surface in the manner described above.
Advice: In order for the foundation to last longer, it is worth installing a drainage system at the same time as insulation. To do this, a trench is dug half a meter deep around the perimeter of the house at a distance of about 60 cm and with a slope of 1% away from the site. Next, pipes are laid in it, after which everything is covered with earth.
At the final stage of insulating the building’s foundation with penoplex, the blind area is poured. They do it with their own hands like this:
- the trench is filled with earth,
- laying crushed stone,
- cover it with roofing felt
- the blind area itself is poured.
After this, the insulation procedure can be considered complete. The base is usually additionally finished with tiles or stone.
Optimal insulation for the floor in a bathhouse: which is better and for what reasons
Extreme conditions inside the bathhouse, constant temperature changes, and significant high humidity determine the selection of all materials for insulation with special care and accuracy. It is worth understanding that the raw materials usually used for this may not be suitable, since they simply will not withstand such operating conditions. The best insulation for the floor in a bathhouse should be resistant to both one factor and another, and in addition, experts recommend choosing a material with a pronounced cellular structure, which will help it last a long time, performing all the functions that it actually provides , and are expected.
Photo from the site: eleosstroy.ru
The most popular is insulating the floor in a bathhouse with expanded clay with your own hands, of course, provided that the floor is made of concrete or cement screed. This environmentally friendly, natural material is extremely lightweight and also has very enviable thermal insulation qualities and properties. Among other things, expanded clay has enviable fire-fighting properties, and it is also reliable and durable.
Photo from the site: ktovdome.ru
If you are seriously considering the best way to insulate the floor in a bathhouse, you should also pay attention to the various mineral insulation materials that are available on the market today in a wide range. Today, these are the most popular and relevant materials. Mineral wool is environmentally friendly, lightweight and it is possible to purchase foil rolls; it also does not burn at all, but it also has its drawbacks. When installing floor insulation using mineral insulation, great attention will be required to waterproofing, otherwise the entire effect will be reduced to zero.
Photo from the site: oaoplastic.ru
You can also insulate the bathhouse floor with polystyrene foam, that is, foam material that is sold in the form of slabs, weighs little, and does its job perfectly. Moreover, laying it is as easy as shelling pears, and you can even cut it with a penknife. However, it is worth knowing that when heated, this synthetic material can release aldehydes into the air, which can seriously affect human health. If you are not sure whether you can properly insulate it, then you should not use it. And the fire safety of insulating floors in a bathhouse with foam plastic and concrete can be safely questioned.
Photo from the site: donnaflora.ru
You can also qualitatively insulate a concrete floor in a bathhouse using perlite, a bulk material that also has a synthetic base, like polystyrene foam. You need to know that it is simply added to the cement-sand mortar during rough pouring. On top of such an insulating layer, a finishing coating will already be poured, which must be leveled over the surface, and only then the final finishing coating, such as boards, tiles, artificial or natural stone, etc.
Photo from the site: l-spb.ru
Among other things, it is possible to insulate the floor in a bathhouse with penoplex, which also belongs to the family of foam materials, such as styrofoam or polystyrene foam, which is essentially the same thing. This is a very high-quality material that is quite strong, durable, has high thermal insulation qualities, is resistant to moisture, and its installation is simple and accessible even to those who have never dealt with anything like this before.
As for the thickness of the thermal insulating layer, everything will depend on numerous particular conditions. For example, the climate zone plays a huge role, as well as the quality of the selected material. For example, expanded clay needs to be poured in a layer of 25-30 centimeters to ensure high-quality functionality, but mineral wool and 5-10 centimeters will be quite enough. To make calculations easier, you can use the following table.
Photo from the site: banya-expert.com
How to properly lay penoplex on walls
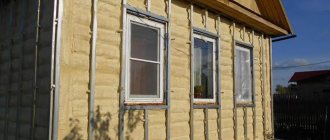
Insulation of walls with penoplex can be done with your own hands, without calling a specialist.
Penoplex, also called extruded polystyrene foam, is widely used in the field of thermal insulation. It has low thermal conductivity, is waterproof, and is also fire resistant, making it ideal for wall, floor, or foundation cladding. Moreover, its price is quite reasonable. Insulating walls with penoplex will be most effective if you follow the correct installation technology.
- preparatory work;
- installation of the base profile;
- installation of foam boards;
- securing sheets;
- decorative surface finishing.
Preparation
During the preparatory stage, the walls are cleaned of dust, various contaminants and remaining finishing materials. Paint coatings can be completely removed with your own hands or using construction tools. Fungus and other mold lesions are removed with a special composition. After cleaning, it is recommended to impregnate the coating with sanitizing agents with bactericidal properties.
For insulation, it is necessary that the surface is almost flat, so that all irregularities are smoothed out. Also, if necessary, it is possible to prime them.
Installation of the base profile
Insulation of walls with penoplex inside and outside.
Installation of thermal insulation begins with the installation of special base profiles. They are necessary for even gluing of the slabs. In addition, the profile helps protect polystyrene foam from various external influences.
The profiles are fastened using special dowel-nails. The profile should fit snugly to the base. You can use washers for this.
Important! The width of the base profile must correspond to the width of the extruded polystyrene foam board.
Adjacent profiles are connected to each other using special connecting plates. But it is necessary to leave a small gap between the elements of 2–3 mm.
Installation of penoplex
A layer of glue is applied to the material around the perimeter and center, after which it is placed on the base profile.
You can do the work of leveling the sheet yourself by rotating it horizontally and vertically, applying slight pressure on the base. Verification of correct installation is carried out at the building level. Excess glue is removed from the joints between the plates. The gaps formed when installing the sheets must be filled with small wedges made from pieces of material. It is not advisable to fill cracks with polyurethane foam, as this can lead to the formation of cracks.
Advice! For the best possible fastening of penoplex. It is recommended to lubricate its entire surface with glue.
Wall mounting is done from top to bottom in a checkerboard pattern. Having installed all the slabs, the distance created between the base profile and the base of the material is filled with polyurethane foam.
Important! Door and window openings are insulated from whole sheets, not from pieces.
Slab fastening technology
An example of wall insulation with penoplex indoors.
After approximately three days, when the glue has completely dried, work on the sheathing can be continued. Penoplex is secured using dowels with a large plastic cap. The dowel is installed in such a way that it connects two adjacent sheets, as well as two slabs located vertically. Dowels are attached on four sides and in the middle of the material.
Insulation can be done from inside the room or outside.
External cladding of the building
External cladding technology is the most common. Thermal insulation work is carried out during the construction of a house or during the reconstruction of an old building. The advantage of working from the outside is that the cladding does not in any way affect the usable area of the room.
External thermal insulation can be done using ventilated or plaster facades. Ventilated facades do not provide the opportunity to demonstrate a design approach, since they have a standard appearance. But they have more effective vapor permeability, unlike plaster ones.
The technology of “wet” facades requires frequent repairs due to the unstable finishing layer. Therefore, the insulation must be placed tightly enough.
When finishing external walls, expanded polystyrene sheets with a thickness of 80–100 m are selected
Heating a home is one of the most expensive expenses in its maintenance, and wall insulation provides a significant opportunity to save on heating. Insulating a house is not very difficult and you can handle this task on your own.
It makes more sense to insulate the walls outside a country house:
- in this case, you can increase the layer of thermal insulation without compromising the internal dimensions of the rooms,
- insulation protects the load-bearing walls of the house from temperature fluctuations and other atmospheric phenomena: snow, rain, temperature,
- The walls of the house will be protected from the outside from moisture; dampness, moisture will not accumulate in them, mold will not form, etc. This is especially true for wooden houses.
How to insulate the walls of a house from the outside. Insulation scheme:
- wall of a wooden house;
- material – insulation;
- air gap;
- final finishing, this can be siding, board.
Installation work is easy, especially if the walls are wooden. Wood is malleable in processing. We must not forget about the air gap, this will prevent moisture accumulation.
Which insulation material should I choose?
Two types of materials are used to insulate walls: mineral wool or polystyrene foam. The main advantage of mineral wool is that it does not burn. When insulating a house made of wood, this is a fairly significant argument and it is often chosen. In addition, it is light, inexpensive and holds heat well.
On the outside, you can cover the house with boards on top of the insulation; this option will look quite organic. Or you can use siding or plastic for external wall cladding, then the house will look modern and new.
Insulation of a wooden house with Penoplex.
How to properly lay Penoplex. Laying Penoplex on the wall.
It is best to cut the slabs with a sharp large knife, because it crumbles (do not crush, but cut). Along a straight ruler, a piece of plywood with a straight edge, or along a strip. You can cut 2-2.5 cm smaller than the required size, insert all 3 layers of 50 mm (wall) and fill with foam using a gun. You can lay the slabs sideways; with this geometry of the board, cracks will form.
Doesn’t burn in fire and doesn’t sink in water: simple insulation of the floor in a bathhouse with expanded clay
First, you need to understand what expanded clay is in order to accurately determine whether it is suitable as insulation for your structure. In fact, such expanded clay balls, familiar to everyone, are obtained by firing clay for a fairly short time, which is easy to melt. It is worth understanding that insulating a wooden floor in a bathhouse with this material is possible, but difficult, since for optimal functionality it must be laid exclusively between two layers of concrete pouring - rough and finishing. Among other things, this material not only has unique qualities, but also has a fairly low price, which makes it popular and relevant.
Simple instructions: how to insulate the floor in a bathhouse with expanded clay
The final drying of the solution will occur in about two weeks, when your coating can be considered suitable for use. However, work on the decorative finishing salt of the floor covering can begin 3-4 days after pouring.
Simple do-it-yourself insulation of the floor in a bathhouse with polystyrene foam
In fact, all materials intended for insulation, which have a cellular structure, as well as synthetic origin, can be combined into one. That is, how to insulate the floor in a bathhouse with polystyrene foam, as well as with polystyrene foam - this is exactly the same thing. So let's understand the subtleties and nuances of this work, there is nothing complicated in it, and there cannot be anything. Most often, these materials are sold in the form of large slabs, which will need to be cut into pieces according to the required dimensions.
Brief and accessible step-by-step recommendations: insulating a concrete floor in a bathhouse with polystyrene foam
Next, everything needs to be done exactly the same as in the previous version, that is, you need to throw a reinforcing mesh of metal, and pour a clean concrete screed on top of this whole “sandwich.” On top of such insulation, you can easily lay a “warm floor” system, decorate it with tiles or artificial stone, and even make removable wooden panels that can be taken outside for complete and high-quality drying.
Innovations in action: do-it-yourself insulation of the floor in a bathhouse with penoplex
Such a fairly new material as penoplex is used for insulation of baths somewhat less frequently, due to its cost. Its price is higher than expanded clay and polystyrene foam, so consumers who are not yet familiar with its unique properties are afraid to purchase such a product, and completely in vain. Moreover, due to its truly outstanding qualities, as well as environmental friendliness, penoplex is suitable even for insulating floors in a bathhouse with wooden floor structures.
How to insulate the floor in a bathhouse with penoplex: simple tips
In fact, everything here is exactly as simple as in the previous options we presented. However, when working with wooden structures there are some nuances. These points are worth discussing in more detail, so it's worth starting again from the beginning.
You need to know that if you were unable to create a gap to ensure ventilation, you need to lay a reinforcing mesh on top, which will “keep” the distance between the board and the insulating material.
Photo from the site: 9ban.ru
Using exactly the same method, you can use a wide variety of insulating materials, and it can be mineral wool on a foil-laminated base, or it can be simple empty glass bottles, for example, beer bottles. Craftsmen have adapted to using them, replacing industrial options; to do this, it is enough to simply place the bottles one next to the other under a layer of finishing fill, and due to the voids inside there will be a kind of air cushion, which will provide the necessary thermal insulation. It works no worse than the newfangled penoplex, which is good news.
Source