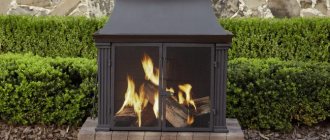
After purchasing a stove, some of our clients make a firm decision to install it themselves. We support such initiatives and, whenever possible, help with consultations, because if a person has the time and desire to do something with his own hands, that’s always wonderful. We treat cases with less confidence when clients entrust the installation of a furnace to cheap builders and installers...
The critical difference between these two cases is that the owner will always double-check several times in Yandex: “how to properly install a stove for a bath.” But one-time specialists more often rely on their logic than on SNiP standards - after all, studying the standards is not included in the cost of their work. In this article we will tell you exactly what needs to be checked and taken into account if the installation of the furnace is carried out independently or through dubious specialists.
Why did we decide to write this article? The fact is that about 3 years ago, the government of our country decided that installers of stoves and fireplaces are no longer required to license their activities (Resolution No. 1219 of October 6, 2017).
This means that it’s enough to make a website, fill it with water about your mega-experience, set the price 2-3 times lower than competitors and order advertising. As a result, clients, tempted by the low price, hire such unfortunate masters, after which they find themselves in extremely bad situations. Moreover, the easiest of them is the need to purchase a new stove. But there are worse consequences. You can learn about such “worse” from fire department reports: “The installation was carried out in violation of the standards...”
We recommend not to chase the lowest cost in this matter and either trust professionals, or delve into it and figure it out yourself. It was for the second client case that we decided to prepare a series of articles. This is how this article appeared.
The first piece of advice from our experts is:
If you want to save money on installing a stove for your bathhouse, then understand the basics and supervise the work of hired workers.
If you don’t want to control it, then delve into the issue entirely and install the stove yourself.
If you don’t want to get involved, then leave the issue to a specialized company.
So, you have already built a sauna with a steam room, chosen and bought a stove, and even stocked up on oak brooms. It’s just a matter of little things, well, almost - all that remains is to install the stove and you can enjoy the healing properties of a real Russian wood-fired bathhouse. But to prevent your long-awaited dream from turning into a nightmare, consider the following...
Where is the best place to put a stove in a wooden house?
When choosing the optimal location, the operating principle of the stove, the possibility of further connection of the chimney and ease of maintenance during operation are taken into account.
Fire breaks must be calculated - the distance between heating surfaces and walls made of flammable materials. The installation location of the stove in a wooden house is determined as follows:
- Principle of operation:
- Air-heating furnaces, operating like the Russian “Burzhuika” or the Canadian “Buleryan”, are installed in a place where convection currents move unhindered. If it is planned to heat adjacent rooms, the structure is built into the interior partition, or air ducts are connected.
- A stove with a built-in water heat exchanger is installed so that the circuit in the stove is the lowest point of the heating system. The location is not critical and is determined only by fire safety requirements.
- Connecting a chimney - installation of a heating stove and chimney in a wooden house are closely interconnected. The stove is located where it will be easier to connect the chimney in compliance with fire safety requirements.
- Ease of maintenance - to fire and clean the stove, you will need a sufficient distance towards the opening of the combustion chamber door. Furnace equipment with panoramic glass provides the opportunity to admire a live flame; this feature is also taken into account when choosing a location
- Fire breaks - from the heating surfaces of the stove body to the walls made of combustible materials, leave a distance of 110-125 cm. In the direction of the opening fire door, at least 125 cm.
Types of fire safety retreats.
Open fire retreat.
An open fire retreat is the free space between the stove and the combustible structure.
It is not difficult to make an open indentation of the stove from the wall; to do this, when designing, it is enough to move the stove wall away from the flammable surface to the required distance.
Not every case is the same; there are differences.
There is less distance to a protected flammable surface than to an unprotected one.
The thickness of the furnace wall also influences the size of the fire safety retreat.
All tolerances are shown in the table below.
Enclosed fire safety retreat.
Closed fire protection retreat - the space between the furnace and the combustible structure is closed by a non-combustible wall.
With such a device, the retreat appears, as it were, in a box.
This fire protection device is slightly more complex than an open setback.
Inside the closed fire protection retreat, a cavity is formed, closed on all sides, and inside this cavity the wall of the furnace will heat up, so it is necessary to arrange ventilation here.
In the walls covering the retreat, openings should be provided above the floor and at the top with gratings with a clear cross-sectional area of at least 150 cm each.
Watch a video about ventilation of fire protection retreats.
The floor in a closed setback must be made of non-combustible materials and located 70 mm above the floor of the room.
The fire safety standard regulates the minimum setbacks and cuts for stoves.
| Furnace wall thickness, mm | Retreat | Distance from the outer surface of the stove or smoke duct (pipe) to a wall or partition not protected from fire, mm | The distance from the outer surface of the stove or smoke duct (pipe) to a wall or partition protected from fire. |
| 120 | Open | 260 | 200 |
| 120 | Closed | 320 | 260 |
| 65 | Open | 320 | 260 |
| 65 | Closed | 500 | 380 |
Notes on the table.
Fire-resistant retreats and cuts are a very important part of fire safety when installing stove heating.
The stove maker should not neglect these elements; the lack of indentations and cuts is the most common cause of fires from stoves.
Source
Protective non-combustible wall coverings
If there is no need to carry out work to protect walls using screens, in this case, you will still need to reliably protect the surfaces from exposure to high temperatures.
You can use classic mineral wool or use mineralite slabs. We get a reduction in the distance from the wall to the stove in the house, without the risk of fire and deformation of building materials.
Minerite
Installation of reflective trim
This is one of the main methods of protecting surfaces from high temperatures. To do this, you can use a sheet of thin cold-rolled metal with its glossy surface or buy more expensive stainless steel sheets with a mirrored face. This heat-reflecting protection allows you to quickly heat the room without wasting firewood and reliably protects the walls and ceiling from deformation.
First, the sheathing strips are secured. The bars should be selected taking into account the thickness of the insulating material. A thermal insulation layer is embedded in the spaces between the sheathing parts. On top of it, sheets of reflective sheathing are attached to wood or metal screws (this depends on the material of the bars).
Using this method of protection, you can reduce the distance from the stove to the wall to 380 mm.
Protecting walls from the heat of the stove can be used as decorative decoration for premises.
Examples:
Photo 1
Photo 2
Installation of sheathing with cladding
This method will require increased costs for the purchase of materials, but will also make your home cozy and beautiful. Porcelain stoneware or expensive tiles can be used as cladding, it all depends on the capabilities of the owner of the house.
Work on the protection and decorative finishing of walls is carried out in several stages, the result is a kind of cake:
a ventilation gap is made on top of the wall, 20-30 mm thick; then a layer of thermal insulation is laid and fire-resistant drywall is attached on top of it; a layer of decorative finishing is laid on fire-resistant glue or mastic using beacons to ensure an equal gap between the rows
It is important not to use large tiles. Such parts are more susceptible to deformation, unlike small tiles.
Using this method, you can reliably isolate the stove from the wall and make a gap of 150 mm between them.
Example
Protecting a wooden wall from the heat of a stove
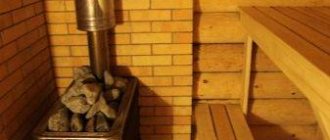
Wooden baths require especially careful compliance with fire safety rules when arranging them. The source of the fire can be anything, an unextinguished cigarette, coals falling from the furnace of the firebox, an uncleaned chimney, but the main source of threat remains the stove itself.
The surface of the stove heats up to 300° - 400°, the heat falls on the wooden walls, which leads to their excessive heating and charring. It is extremely difficult to stop the process of ignition of wooden surfaces; the best way to avoid a fire is to prevent it. There are two truly effective ways to insulate the surface of wooden walls from the heat of sauna stoves - protective equipment in the form of a screen or the construction of special cladding from non-combustible materials.
Protective screens near (around) the stove
Protective screens are insulation panels that cover the side surfaces of the furnace and reduce the intensity of thermal radiation. Screens can be metal or brick. As a rule, they are used for metal furnaces.
Method #1 - metal screens
The most common protective screens are factory-made steel or cast iron sheets. They are installed around the stove, at a distance of 1-5 cm from the walls of the firebox. Depending on the need to insulate one side or another of the furnace, you can purchase side or front (front) screens. Many metal furnaces are initially manufactured with protective screens in the form of a protective casing.
Protective screens make it possible to reduce the temperature of external metal surfaces to 80-100°C and, accordingly, reduce the fireproof distance to 50 cm. The total distance from the firebox to the wall (including a gap of 1-5 cm) will be 51-55 cm.
Installing protective screens is not difficult. Thanks to the presence of legs, metal panels are easily bolted to the floor.
Method #2 - brick screens
A brick screen can cover all the side surfaces of a metal furnace, representing its outer cladding. Then the stove will be in a casing made of brickwork. In another case, a brick screen is a wall separating the stove and the flammable surface.
To lay the protective screen, solid fireclay bricks are used. The binder is cement or clay mortar. It is recommended to use half a brick (thickness 120 mm). But, if there is a lack of material, it is possible to make a wall of a quarter of a brick (60 mm thick), although in this case the thermal insulation properties of the screen will be reduced by half.
Small openings (sometimes with fire doors) are left at the bottom of the shield for air convection between the brick wall and the stove.
The brick walls of the screen must end at least 20 cm above the top surface of the oven. Sometimes the masonry goes all the way to the ceiling.
The brick screen is not installed flush against the walls of the stove, the optimal distance is 5-15 cm. The acceptable distance from the brickwork to the flammable wall is 5-15 cm. Thus, the use of a brick screen allows you to reduce the distance from the stove to the wooden wall to 22-42 cm (stove - ventilation gap 5-15 cm - brick 12 cm - ventilation gap 5-15 cm - wall).
When is this required?
There are times when there is no need to protect walls. If the stove is located at a safe distance from the wall from a fire safety point of view, the installation of protective screens and other measures can be neglected. The distance from the walls that is required to reduce the heat from the source varies:
- A stove laid in a quarter of a brick should be located no closer than 35-40 cm from the wall;
- A metal stove without lining should be placed a meter away and no closer;
- A metal one with a lined furnace can be installed 70-75cm from the wall.
However, not every steam room has the opportunity to fulfill these requirements, due to the small area. The layout of steam rooms with an area of 6-8 m² can hardly accommodate the necessary set of items for the steaming procedure. Therefore, the need to insulate walls with special sheathing is relevant.
Installation of railings
In order to prevent possible contact between a person and a hot stove, railings can be installed along the perimeter of the fireproof foundation.
To reduce the level of harshness of radiation from metal, it is recommended to line the stove with natural stone or refractory brick.
In order for the air flow to pass freely to the firebox, openings must be left at the base of the masonry. The dimensions of these openings must be no less than the area in terms of the space around the firebox (it is better if the openings are twice as large as this area). The length of the firebox contour in plan is multiplied by three centimeters of the gap. The result is an area (in centimeters), no less than which the windows at the base of the masonry should be.
Articles about baths:
- back to the section “Building a house with your own hands”
- Bath brooms
- Bath and sauna in the house
- Ventilation holes in the bath
- Bath ventilation system
- Internal structure of the bath
- Interior decoration of the bath
- Construction of a chopped bathhouse
- Construction of bath walls
- Auxiliary materials for the construction of a bathhouse
- Choosing a place for a bath
- Choosing a stove for a bath
- We make furniture for a bath
- Reducing humidity on the walls of the bathhouse
- Which sauna should you choose?
- Choosing stones for a bath
- Installation of a sewerage system for a bathhouse
- Caulk of a wooden bath
- Operation of hatches and chimneys
- Materials for building a bathhouse
- Installation of a concrete floor in a bathhouse
- Installation of bath doors and windows
- Installation of a wooden floor in a bathhouse
- Bathroom ceiling installation
- Lighting in the bath
- Features of choosing tiles for a bath
- Finishing of sauna log houses
- Bath heating
- Cleaning the ash pan
- How to choose the right stove for a sauna
- How to take a steam bath correctly
- Heaters for solid fuels
- Steam room ceiling
- Rules for lighting the stove
- Types of sauna stoves
- Bathhouse repair
- Chimney pipe repair
- Repairing the crown of the chimney
- Bath walls
- Arrangement of the roof of the bathhouse
- Thermal insulation of the bath
- Bathhouse foundation
- Cleaning chimney bricks
- Choosing an electric heater for a sauna
Safe placement and connection of an electric oven
A convenient solution is an electric heater. This is a great alternative to a wood stove. Doesn't take up much space. There is no chimney pipe. No need to clean or load fuel. It is enough to set the temperature correctly.
When connecting, it is important to follow the rules for connecting to the network and fire safety.
It is recommended to ground the electric heater. If this is not possible, then zeroing is carried out. To do this, on the distribution panel, the grounding wire of the electric furnace is connected to the zero terminals.
Installation of an RCD is required. This is excellent protection against short circuits during voltage surges in the network.
The wiring covering must be heat-resistant. The cross section is selected according to power and mains voltage. Read more in the article: “Electrical installation of a bathhouse.”
Where to put the stove in the bathhouse?
The location of the stove depends on many factors, in particular, on its type, as well as on the location of the firebox (in the same or in an adjacent room). In addition, fire safety is important - there should be at least half a meter from all fuel.
So, those who decide to install a brick oven make a foundation for it, so the location is already determined at the sketch stage. But with a metal stove, sometimes people delay until the last minute, not knowing which model to buy. Therefore, it happens that already finished walls have to be cut and other unnecessary work done.
IMPORTANT! The location of the supply ventilation depends on the location of the stove, so it’s better to think in advance. In addition to ventilation, it is worth thinking about fire safety, especially in a bathhouse with flammable walls
Often, in order to provide it, part of the wall is made of brick. Which again speaks to the need for planning.
In addition to ventilation, it is worth thinking about fire safety, especially in a bathhouse with flammable walls. Often, in order to provide it, part of the wall is made of brick. Which again speaks to the need for planning.
The location of the stove in a bathhouse with a separate steam room
There can be two options:
- or the stove, together with the firebox, is located entirely in the steam room, which means it only heats it;
- or the firebox is moved to the adjacent room, which allows for partial heating of that room too.
The location of the stove in a bathhouse with a separate steam room: option with a firebox from the rest room. Diagram from the article about the hood
In the first case, during the cold season you will have to think about how and with what to heat the neighboring rooms, in the second - the same problem remains only partially.
Stove in a bathhouse with washing and steam room
Here you can also find several solutions. The firebox can be taken not to the rest room or dressing room, but to the washing room. But this is problematic from the point of view of storing firewood. Therefore there are other options.
Stove in a bathhouse with washing and steam room
You don’t have to remove the stove at all, just install a water tank at the top, which will be connected through the wall to the “samovar” on the chimney pipe in the steam room. “Samovar” is a heat exchanger (!stoves with a heat exchanger are reviewed here), which can be found on sale; with its help, water for the washing room is heated, and from the tank there is heat sufficient to maintain a normal temperature of 30-32 degrees in the washing room.
In some cases, the problem is solved by additional heat sources - a warm floor or a second stove.
Is a foundation always needed for a furnace?
We already said above that no, it is not always needed. The need for it arises only when the weight of the sauna stove with everything associated (from the water tank to all the bricks that line the floor, stove and chimney) exceeds 700 kg. If the total weight is lower, you can simply lay the base with bricks instead of a foundation, put 12 mm asbestos on top, and on top of it - a steel sheet of any thickness (from 1 mm). The topic is discussed in detail here.
IMPORTANT! A separate foundation for a brick oven is made so that it has its own shrinkage, not related to the shrinkage of the house. Such a foundation is made thoroughly, deepened to the load-bearing layer
If the stove weighs more than 700 kg, but not much, then you can make a shallow foundation
Such a foundation is made thoroughly, deepened to the load-bearing layer. If the stove weighs more than 700 kg, but not by much, then you can make a shallow foundation.
Usually the foundation for the furnace is not brought up to the height of the subfloor, because then the bricks are laid and the height is compared. The area of the stove foundation should be 15-20 cm larger than the area of the stove base on each side.
The video below clearly demonstrates the process of pouring a foundation for a bathhouse yourself. The video is a little dark, but it gives you an idea of the process.
Video description
The video presented here shows a competent and accurate solution to this problem:
Advice. In order not to doubt the performance characteristics and safety of the heat insulator, buy material designed for temperatures up to 800-1000 degrees.
Also, when installing the stove, you should think about the convenience of opening the firebox door. It is advisable that it opens in the other direction from the place where the firewood is stored, otherwise it will interfere with kindling, and the next time it is stacked it can cause a burn from accidentally touching the hot metal. Therefore, if possible, the door should be moved to the convenient side.
Selection and installation of a chimney
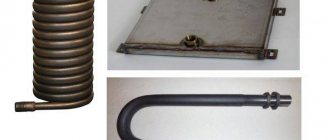
It is impossible to solve the problem of how to properly install a stove in a bathhouse without knowing the requirements for installing a chimney. But first you need to decide on its type. Chimneys are made of brick, steel, ceramic and in the form of a double pipe made of galvanized or stainless steel with a thermal insulation gasket - the so-called sandwiches.
The first option in the case of a metal stove can be immediately dismissed as too heavy and requiring the construction of a powerful foundation on which the brick structure will rest. This is very difficult and expensive, as it will require considerable expenses for materials and the services of specialists, who are also difficult to find in our time.
Brick chimney Source interistroy.ru
The remaining types are quite acceptable, and each of them has its own advantages:
- Thick-walled steel pipe is the most budget option. But when flue gases pass through it, it becomes very hot, which increases the risk of fire. However, this problem can be solved by organizing the correct penetration through the floors and roof.
- Ceramic chimneys can be considered the ideal solution: they are the most durable, as they do not corrode and withstand high temperatures without collapsing or deforming. But they are rarely used due to their very high cost and heavy weight.
Elements of a ceramic chimney Source gromasstroy.by
- Sandwich pipes are the best option in terms of price and performance characteristics. They are much lighter and cheaper than ceramic ones, and their outer surface does not heat up as much as single steel pipes do.
Most factory stoves are produced for such chimneys or even complete with them. However, the durability and performance characteristics of sandwich pipes largely depend on the quality of their assembly and the type of filler. If condensation forms in the internal space, the wet thermal insulation will cease to perform its functions. The same thing happens with mineral wool, which is not designed for heating above 800 degrees - it burns out, crumbles down, leaving the internal cavity of the chimney half empty, and therefore unable to prevent heating of the outer wall.
In addition, the sandwich pipe cannot be placed directly on the outlet pipe of the furnace. A single-wall pipe must first depart from it, which is connected to a double-wall pipe with a special adapter.
The sandwich pipe device allows you to assemble a chimney from several elements without welding Source vopros-remonta-info.ru
Separation of a section of ceramic coating along with the solution from the base
The most likely cause of such destruction is an incorrectly selected primer mixture or no priming at all before laying the tiles. A common mistake when preparing the base is priming with concentrated latex, which forms a thin rubbery film on the surface that prevents adhesion to cement-based tile adhesives.
The separation of the laid tiles along with the mortar from the base can be caused by deformation of the base
The preserved finish is inspected and tapped to identify voids that are fraught with additional destruction of the cladding. If the area of the collapsed finish and existing voids in total exceeds 20% of the total area of the base, then the wall or floor cladding will have to be re-done in full, taking into account the mistakes made, since after partial repairs the destruction of the old tiles will most likely continue.
Putting the stove into operation
During the first kindling, the stove is heated for 1.5 hours, then proceed to a full fire
The brickwork is dried at a temperature of +5 – +30°C. At this time, doors and valves are opened around the clock. The first kindling takes place without the use of flammable liquids and flammable materials. Use dry newspapers and small wood chips. After obtaining a stable fire, you can add logs in small portions.
The ashpit is kept open, the intensity of combustion is controlled by closing or opening the door. Check the draft and heating rate. The heating process lasts 1 - 1.5 hours, then you can proceed to normal heating of the stove.
Foundation for an iron furnace
Despite the fact that iron sauna stoves are usually light in weight, even for the lightest thin-walled model it is advisable to have a separate foundation. The thing is that even a slight misalignment, sometimes invisible to the eye, leads to accelerated wear. And only the presence of a solid foundation guarantees its absence, and therefore long-term operation of the stove.
Making a foundation for an iron stove is not difficult. Necessary:
- Dig a pit of a suitable size. The size of the foundation should be 10-15 cm larger than the dimensions of the stove (more is possible, less is not possible). If the metal furnace is built with a brick screen, then the indentation is calculated from the outer edge of the screen. The depth of the foundation and pit depends on the type of soil. On non-heaving soils, 50-60 cm is sufficient.
- Crushed stone is poured into the bottom and compacted thoroughly. The compacted size of this layer must be at least 30 cm.
- Compacted crushed stone is poured with liquid cement mortar. The approximate ratio of materials for its manufacture is as follows: take 4 parts of sand for one part of cement, the amount of water depends on the state of the solution - it should be of medium thickness.
- After the layer has dried (in a day or two), a waterproofing layer is laid. This can be roofing felt in two layers or one of the new bitumen waterproofing materials (roll or coating).
- The formwork is set according to the selected foundation dimensions.
- A layer of concrete is poured. For one part of cement you need to take 2.5 parts of sand, 4 parts of fine gravel or expanded clay (with expanded clay you will get a more thermally insulated base). First, cement and sand are mixed dry until an even color is obtained. Then gravel or expanded clay is poured in and everything is mixed again. When all parts are evenly distributed, dilute with water. Water usually goes a little less in volume than cement. We carefully level the laid out solution, checking its horizontalness using a building level.
- Instead of a concrete layer, you can use bricks. They are placed on a cement-sand mortar.
The formwork can be removed after three days, and the concrete gains its design strength in three to four weeks. For normal ripening, it must be regularly moistened with water: sprinkle generously 2-4 times a day, depending on the temperature. There should be no puddles, but the solution should get wet well. If it's too hot outside, cover the base with plastic wrap to prevent moisture from evaporating quickly.
There is a moisturizing option that does not require frequent spraying: cover it with burlap or some other fabric, add a good layer of sawdust, and wet it. This is enough for a day.
A concrete base is cheaper and stronger, but requires more physical effort, even if you have a concrete mixer. The disadvantages of concrete include the difficulty of dismantling it.
How to line the foundation for a metal stove
If the upper part of the base is cast from concrete, then outwardly it has an unattractive appearance. You can line the foundation with bricks from the outside, but this is only if conditions permit: the brick is still of decent size. For other cases, cladding with thick ceramic tiles (thick ones) is suitable. Porcelain tiles are likely to crack at high temperatures. Perhaps a natural finishing stone would be suitable.
The tiles are laid on a special heat-resistant glue (there are such). The grout is also selected accordingly - resistant to high temperatures. You can do without grouting: carefully open the seams with glue. If you do everything carefully, the appearance will be normal. The grout only looks good at first. Then, when ash and soot are added, you will be tortured to scrub it off.
Pile-grillage foundation
How to properly install a stove in a bathhouse that will be built on unstable soil? It is on this foundation, according to the following scheme:
- Prepare the place - remove the top layer of soil and use ropes and stakes to mark the location of the future sole.
- Make pits (at the corners of the marked perimeter) - dig them to a depth of 15-20 cm, no more.
- Take the piles (section width 108 mm and length 2.5 m) and screw them strictly vertically into the holes made at the previous stage. It turns out that they are above the finished floor line - cut them with a grinder so that they go 10 cm below.
- Weld the heads, paint the protruding elements to protect them from external influences and extend their service life, and secure another “ten” channel around the perimeter with shelves inward.
- Lay sheet steel inside the resulting contour and fix it.
- Lay reinforcement (if necessary), pour concrete, give it time to dry, coat with waterproofing solution.
Installation features
When installing a chimney, there are several nuances that must be taken into account during the work:
- the first horizontal link should have a slight slope from the stove, which will protect the device from condensation;
- There are two ways to remove the smoke exhaust duct through the wall: raise part of the pipe to the ceiling and at this level bring it outside, or place the exit point of the duct to the street at the level of the stove inlet pipe. The second method is more preferable, which involves the use of a smaller number of shaped parts (only one rotary elbow);
- the entire chimney structure must be assembled from pipes identical in technical characteristics;
- in the area of passage through the wall, the pipe must be solid, without joints;
- the joints of sections and shaped elements should be coated with heat-resistant sealant before assembling the system, and after installation they should be additionally secured using special wide clamps;
- A protective umbrella must be installed on top of the pipe.
Frame wall construction
How to properly install a sauna stove equipped with an external firebox? Of course, with the installation of a partition between the steam room and the adjacent room. It is made from two beams with a cross section of 100 by 600 mm and a height equal to the ceiling of the room, pre-treated with an antiseptic. Place these spacers vertically, securing them at the top and bottom with self-tapping screws using perforated corners. Also fix a horizontal jumper between them to create a frame shaped like the letter H. There will be a fuel channel and brickwork on the floor, and at the top, at the floor level, there will be sheathing and insulation. Insulate the structure - fasten basalt wool slabs between the beams, install the lining with lathing, fix the foil steam protection with a construction stapler. After this, make brickwork, leaving a gap of 3-4 mm between it and the channel and wooden guides. For reliability, use corners, take care of the visual beauty of the seams. The finished portal should look aesthetically pleasing, so mount the trim, complete the finishing, level it and correctly determine the center.
Basalt cardboard characteristics
The main difference of this material is its high thermal insulation and sound insulation. It is non-flammable, fire-resistant and fireproof. At the same time, basalt cardboard has extremely low hygroscopicity, in other words, it is not able to absorb moisture from the air. The temperature of use of this material is +500 degrees, while for a short period it can withstand up to +700 degrees. Another reason why cardboard should be used in a bathhouse is that it has excellent vapor permeability. It has increased resistance to microorganisms and rodents, does not crumble, does not rot, and is resistant to vibrations and thermal-oxidative aging. The approximate service life of this material is 50 years.
At the same time, basalt cardboard is very easy to cut; this can be done even with a simple knife. The sheets bend well and can take any shape, which allows for excellent thermal insulation of the bath room. Parts made of such material can be fixed using special glue
When cutting, it is necessary to take into account the shrinkage of the cardboard, which can occur from exposure to elevated temperatures. In case of high humidity, the sheet may bend, but after drying it will return to its previous shape. In total, it can withstand more than two thousand cooling and heating cycles
In total, it can withstand more than two thousand cooling and heating cycles.
Chimney installation
A feature of stoves is the release of a large number of aggressive radical molecules immediately after kindling.
If the chimney is not well insulated, it will quickly burn out under the influence of acid dew. This applies to both brick and sandwich structures.
Particular attention is paid to the fireproof cutting of the chimney and the passage unit. The dimensions of the ceiling trim for the bath are 460x460 or 600x600 mm. For additional protection of walls located closer than 700 mm from uninsulated sections of the pipe, a low-mounted double screen made of basalt cardboard is used.
Installation on a wooden floor
Options
There are three options for installing a heat-resistant base:
- a metal sheet;
- brick;
- natural or artificial stone;
- ceramic or porcelain tiles. The minimum size of protection should be 40 cm.
Preparing the walls
As already mentioned, it is easier to decorate the walls with refractories than to take away useful space from the steam room. The most economical, but not the best option is to nail a sheet of metal to the wall on bars.
In general, we have the following options:
- attach the refractory sheet to the wall;
- plaster it (it is better to make the layer more than 2.5 cm);
- make a brick casing for the stove;
- lay it out with bricks instead of a wooden wall.
If the stove is located close to the wall, then you will need a two-layer mineralite with an air gap of 3 cm between these layers of ceramic bushings. It looks something like this: wooden wall - first layer of mineralite - bushings - second layer of mineralite.
When space allows, you can get by with one layer, but grommets are also used to attach it to a wooden wall.
Heat-resistant tiles or mirror stainless steel are sometimes placed on top of the mineralite. The latter perfectly reflects heat, but heats up itself, so it can be attached to any refractory material - mineral wool, ceramic fiber, superisol, etc.
Those who brought the firebox into the dressing room either put up a brick wall, or then cut out part of the timber. A space is left in the brick with a reserve for the combustion tunnel, where a heat insulator, for example, mineral wool, is subsequently placed. It is also used at the junction of brick and wooden walls. If you don’t want to replace the entire wall, make a portal - at least a meter wide.
Ceiling preparation and chimney installation
Often the cause of a fire is the section of the ceiling where the chimney is located. There are many errors associated with the passage of a chimney through ceilings.
The specific cause of the fire may be:
- pipe overheating;
- cracks in the pipe allowing sparks to pass through;
- shortcomings in the distance to combustible objects.
If you haven't thought about the position of the stove in advance, there may be a beam above it. In this case, part of the beam is cut out and fastened with jumpers to adjacent beams. The empty space above the center of the pipe passage must be at least 90 cm in diameter.
The chimney is installed from the pipe that comes out of the stove. In the case of a larger diameter monopipe, an adapter is put on the pipe. The first pipe passing through the steam room will be a monopipe
A gate is installed on it, then it continues again, but not to the end (this is very important!) of the overlap, because there they put a “start” on it - an adapter for a sandwich pipe that will pass through the ceilings
Pipe connections should not be in overlap areas.
It is important to know here that although sandwiches are the most common, they are a dangerous type of chimney. An analogue of sandwich pipes is ceramic or brick chimneys, but both options are heavier and more expensive
The outer side of the box can be wrapped with basalt cardboard to prevent it from touching the wood. The pipe is then laid on the roof through a hole larger in diameter than the pipe itself. Next, it is sealed with sealant, a master flush is put on and secured to the roof with self-tapping screws at intervals of 5 cm. Finally, a deflector or umbrella is installed.
Preparing the oven
Before installing the chimney, the stove should already be located in its designated place. It is recommended to heat it outside first
It is extremely important to do this, because... the first fire is usually accompanied by burnout of industrial heat-resistant paint
The oven may smoke a little and smell. This is a normal state for her. At the same time, you will find out whether it has any manufacturing defects.
New stones should also be tried out in the fresh air, not inside, because they can also sting the throat and eyes.
Strictly follow the step-by-step instructions for installing a metal stove.
Ceiling
Its preparation is implied by any competent scheme for installing a stove in a bathhouse. Why? Because a significant part of fires start from above the room - due to overheating or cracks in the pipe. Therefore, when arranging the ceilings, a hole is left for the chimney - with a diameter of 90 cm. Thanks to this solution, later, when connecting the heating unit, you will not have to cut out part of the beams and invent jumpers to maintain the strength of the structure. Attention, the pre-designed passage must be square, not round, so that the cutting box can be tightly inserted. This is a channel made of tin and stainless steel, inside of which the pipe will be located. But the outside still needs to be wrapped with basalt cardboard to prevent direct contact with the wood of the walls of the room.
Making and installing a chimney with your own hands
Before you remove the chimney through the wall with your own hands, you need to decide on its installation location and dimensions, and also develop a design diagram.
Options for correct placement of the chimney are presented in the following diagram:
Size calculation
The main parameter for choosing a chimney pipe is its internal cross-section. The internal diameter is calculated depending on the power of the heating device. Just keep in mind that the cross-sectional size should not be too large, otherwise heat will not be retained in the heater, and a pipe with an excessively small diameter will not create the required level of draft for smoke removal. And, of course, the diameter of any section of the structure should not be less than the outlet of the heating device pipe.
For stoves of low and medium power, the diameter and height of the chimney can be selected according to the table:
| Boiler power, kW | Diameter, cm | Height, m |
| 18 | 13 | 7 |
| 28 | 15 | 8 |
| 45 | 15 | 9 |
| 65 | 20 | 10 |
| 90 | 25 | 13 |
Selecting the location of the chimney outlet
The place for the chimney pipe outlet should be a blank side wall, where there are no attic windows, balconies or second floor windows.
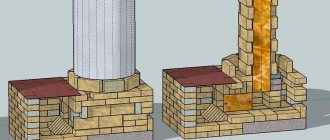
Correct laying of the stove
Where do you start laying a stove in a brick wall with your own hands? As mentioned above - from the formation of a recess for the chimney, the stove itself and the vent. If the chimney has not yet been formed, it is done first. The best option is to form it from heat-resistant brick at the maximum height, that is, without transitions. It is also desirable that the upper part of the chimney is located at a height of approximately 4.5 m or higher. If it is lower, it will often blow into the oven when there is a strong wind outside. Because of this, the smoke will go back into the ash pit and into the house, and not out.
If the stove is mounted in an opening between a wooden wall, then part of the building structure will simply have to be removed. The wall is supported by a spacer. By the way, if the installation of the stove trim will be carried out in one go, then it is allowed not to make thick inter-pitched seams. You can do without them by simply increasing the density of the solution (adding more concrete) and reducing the distance of the masonry along the seam (instead of the usual 10 mm, make 5 or less).
Scheme of laying furnace rows.
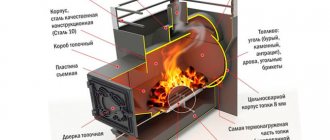
If you look at the shape of the oven from above in cross-section, it turns out that it consists of 4 compartments. This is the best option. You can reduce it to 3:
- blower;
- the combustion chamber;
- chimney (coil).
The fourth chamber in question is where soot accumulates. This part can be completely abandoned only if the stove is installed in a bathhouse. There, anyway, cleaning the chimney must be done 1-2 times a year, since due to the accumulation of moisture, the outflow of smoke is reduced, and sometimes the air duct becomes clogged. In this case, the stove accumulates all the soot in the chimney. It is recommended to make a removable door in the elbow (transition at a right angle) - this is where all the debris and other remnants of solid fuel combustion products will accumulate.
When laying the stove, it is advisable to make the distance from the blower to the combustion chamber as large as possible. In this case, it is better to make the transition between these chambers as narrow as possible - this increases the speed of movement of air masses.
It is impossible to build such a structure only from brick, so experts recommend installing special nozzles made of metal.
Fortunately, they are relatively cheap. There are several advantages to this design. Firstly, the air flow speed increases, and secondly, the consumption of solid fuel and the efficiency of the heating structure decreases. Roughly speaking, this increases efficiency.
Bathhouse layout and stove installation features
Before you build a bathhouse, you need to think through in advance all the issues related to the future design. It is worth understanding that proper design makes it possible to create an extremely effective bathhouse that can satisfy all needs.
At the planning stage, it is worth paying special attention to the main functional elements of the bathhouse. In particular, we are talking about a sauna stove, which simultaneously creates heat, provides visitors to the sauna with steam, warms up the entire room and heats the water if a tank was connected to the stove.. Speaking about sauna stoves, one cannot fail to mention the correct choice of a good model
There are a lot of manufacturers involved in the manufacture of bath equipment, whose products can be both quite traditional and suitable for solving a variety of problems. Naturally, such devices differ greatly from each other, and the price range is also wide.
Speaking about sauna stoves, we cannot fail to mention the correct choice of a good model. There are a lot of manufacturers involved in the manufacture of bath equipment, whose products can be both quite traditional and suitable for solving a variety of problems. Naturally, such devices differ greatly from each other, and the price range is also wide.
Taking into account all of the above, we can come to the conclusion that a sauna stove needs to be selected individually, depending on operating conditions, the cost of the equipment and personal wishes. Before purchasing a stove, it would be useful to read several articles on how to choose a stove for a sauna.
In this sense, two main groups of requirements for the location of the sauna stove can be distinguished:
- Fire safety requirements;
- Requirements for placement depending on the characteristics of the entire building and the premises located in it.
Both categories of factors are quite important and require detailed consideration.
Additionally: wood treatment with impregnations
Fire regulations require that wood be treated with special impregnations that reduce its flammability. However, we know very well that impregnation in a bathhouse is not particularly desirable, because at a high temperature inside the steam room, all the chemicals begin to be released into the air and poison a person. That's not why we go to the bathhouse.
And yet, not all rooms experience such a temperature load as a steam room, so it would be reasonable to treat at least them with fire retardants, as well as the attic, especially since a considerable proportion of fires occur due to sparks flying from the chimney (here Also install a spark arrester or a deflector with it).
IMPORTANT! You won’t be able to soak wood once and forget about it. Impregnation is resumed after checking: if a sliver catches the flame from a match, then it’s time to renew. The average frequency is once every two years.
The composition should be applied in two or three layers at least 6 hours to dry between stages . Yes, and pay attention to the presence of pigments to indicate impregnation if you do not want the wood to become, for example, a bright pink color. (That is, the color is not from chemicals, it is added specifically to distinguish treated wood from untreated wood.)
***
So, now that you have an idea of how to install a stove correctly, it’s time to put your acquired knowledge into practice. Write comments, we are interested in your opinion about what you read.
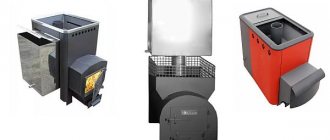
If you have not yet decided on the type of stove you need, then you should familiarize yourself with the characteristics and models of different types: gas, wood, electric. The variety of types of designs, sizes and prices provides the widest selection of stoves for baths and saunas. And which one is better, everyone has the opportunity to decide for themselves.
Fire safety rules
If you plan to use an iron stove in a steam room, for fire safety purposes you must strictly follow the installation rules
:
- The firebox doors should open towards the door, and the heater door, on the contrary, should open towards the corner of the room.
- The penetration through the ceiling must be a structure with a heat-insulating layer and a metal screen on the ceiling. Its format should be 1/3 larger than the projection of the stove body.
- If an electric furnace is selected, proper installation involves the installation of grounding, as well as coordination of the implemented project with the fire inspectorate.
- The bathhouse is equipped with fire extinguishing equipment. They must be at hand and in good condition.
- Regardless of which stove installation scheme is chosen, it is required to comply with standards regarding the distance from the stove to structures.
Lining the firebox with bricks in a bathhouse is good protection against fire
Distance from the stove to the walls of the bathhouse
It is important to know how to correctly install the stove in a bathhouse in relation to walls and other structures. Remember:
- there must be a gap of at least 0.5 m between the metal or brick lining of the stove and the wall (a similar distance is maintained with respect to any other flammable structures);
- walls and structures made of flammable materials located in the immediate vicinity of the stove must be covered with a screen made of fire-resistant materials.
Stove installation diagram - recommended distances
Installing the stove unit on a wooden floor
If the choice fell on a small metal stove (the weight together with stones, brick casing, fuel and water tank does not exceed 700 kg), it can be installed without constructing a foundation, directly on a wooden floor. Since it is recommended to select a stove unit at the bathhouse design stage, in the place where it will be installed, it is necessary to provide for laying the logs with a smaller pitch - this will increase the strength of the base.
Installing a metal stove in a bathhouse directly on the floor, according to SNiP, requires installing a screen that will protect the wood from ignition
. The weight of the screen is also taken into account when calculating the total load on the floors.
Metal stove on a wooden floor in a bathhouse
Screen arrangement:
A rectangle corresponding to the dimensions of the stove is drawn on the floor at the installation site. 50 cm is added to it on the side of the fire door, 10 cm on the other three sides. If the stove is mounted with the fire door outside the room, a place for the portal is marked on the wall with the expectation that 25–50 cm should be left around the stove body on each side sides around the perimeter. If necessary, part of the partition or wall is dismantled in accordance with the markings. A rectangle is cut out of a fireproof heat-resistant plate according to the size of the figure drawn on the floor (with added centimeters). The prepared element is attached to the floor using self-tapping screws. Fireclay or solid red bricks are soaked in water, after which a platform is mounted from them in one layer on top of the fixed slab
It is important to use a heat-resistant mortar for laying stoves and check the horizontal level of the site. Ceramic or porcelain tiles can be laid on top of the brick for an aesthetic appearance. The base in front of the fire door in the room is covered with a steel sheet, and if the firebox goes outside, the corresponding area is concreted. 24–48 hours after the foundation has been laid out, the stove can be installed.
Wall decoration near the stove
Baths are built from different materials, but most often wood is used to construct wall structures. The building can be frame or be a log house made of logs or timber.
The walls near the stove can be finished with tiles or natural stone
When arranging a screen on the walls, basalt cardboard or a heat-resistant plate, which is attached to self-tapping screws, is used as thermal insulation. The protective layer can be laid out from solid red or fireclay bricks (half-brick masonry). The use of ceramic or porcelain tiles is also practiced. The cladding will not only protect the walls from overheating, but will also add attractiveness to the interior of the steam room.
The simplest option for protecting a wall is to install a steel sheet with a thickness of at least 3 mm on top of the thermal insulator.
Fireproof furnace cuttings
When performing furnace work, it is imperative to comply with the “Rules for the performance of work and repair of furnaces, chimneys and gas ducts.” Below is a presentation and explanation of those points without knowledge of which it is impossible to carry out furnace work.
- 3.2.1. In places where combustible and non-combustible building structures (walls, partitions, ceilings, beams, etc.) are adjacent to stoves and smoke ducts (chimneys), it is imperative to provide cuttings made of non-combustible materials. When the stoves are located in the opening of a wooden wall or partition, vertical cuts are made to the entire height of the stove, hearth or chimney.
Rice.
1. Vertical fireproof furnace cuttings: 1 – heating furnace; 2 – felt or asbestos; 3 – brickwork; 4 – metal sheet. When passing a smoke duct (chimney) through an attic or interfloor ceiling, horizontal cuts are made. Vertical cuts are laid in ½ brick or ¼ (on the edge) in a good mortar without bandaging the seams with the masonry of the stove or chimney. Horizontal cuts are placed with ligation of the seams, carried out simultaneously with the laying of the channel. They represent a canal wall enlarged to a safe size. To carry out cuttings, you can use other fireproof materials - reinforced concrete slabs, ceramics, metal, asbestos-cement slabs. When installing cuttings near furnaces, it is necessary to take into account possible shrinkage of the walls of wooden buildings; it can reach 4% of the height of the building. In interfloor and attic floors, the cutting height increases by the height of possible shrinkage. When trying on insulation made from flammable materials (moss, sawdust, peat, etc.) in attic floors, the groove at the chimney must be raised higher by 2 rows of bricks.
When performing horizontal cutting in an interfloor or attic floor, it is necessary to ensure that the brickwork does not rest on beams or flooring; the outer walls must be smooth so that cracks do not form during shrinkage. All seams must be tightly filled with mortar. Frequent causes of fire are cracks that form in the mass of the stove and smoke channels due to uneven settlement or spalling of the mortar from the seams. Therefore, the main means of fire prevention is the protection of wooden and flammable structures with fireproof materials. Non-thermal conductive materials are used for protection: wool felt and asbestos. Felt conducts heat poorly and is a good heat-insulating material. When ignited, it smolders, releasing smoke with a pungent odor, signaling the danger of fire. To make the felt more resistant to fire, it is impregnated with a liquid clay solution before laying. All wooden structures adjacent to the cuttings are covered with 2 layers of felt or asbestos. The structure in this case is considered protected.
- 3.2.2. The distances from the inner surface (from smoke) of stoves, ducts and chimneys to the combustible or non-combustible structure of the building should be no less than those indicated in Table 1.
- 3.2.8. The distance from the ceiling (overroof) of the stove to the ceiling should be 350 mm for an unprotected one and 250 mm for a protected one.
- 3.2.9. When installing them through roofs, the outer surfaces of brick chimneys should be removed from combustible structures (beams, sheathing) at a distance of at least 130 mm.
- 3.2.11. To protect the floor, under the furnace door of the stove there should be a metal sheet measuring 0.7 x 0.5 m, laid with the long side along the stove.
- 3.4.7. Foundations for furnaces and chimneys are laid in accordance with the general Rules for conducting masonry work in accordance with SNiP 11.17.78.
Between the foundations for the stove and the foundations of the building walls, a gap of at least 5 cm is left, filled with dry sand.
- 3.4.11. The masonry (of the stove) must be made in compliance with the horizontality of the rows, the verticality of the outer surfaces and corners, the shape and size of the internal channels. Each row of masonry must be made with ½ brick joints. In rows where ¾ bricks are to be used, bandaging with ¼ bricks is allowed.
- 3.4.12. The thickness of the seams of stove masonry made from ordinary clay bricks should be no more than 5 mm, and from refractory and refractory bricks 3 mm.
The thickness of the joints of the chimney masonry, made with a complex mortar, must be no more than 10 mm, the horizontal and vertical joints of the masonry must be completely filled with mortar. During the laying process, the internal surfaces of the channels (furnace) and chimney must be treated by mopping.
Fire resistant structures
A special heat-resistant cladding is used as protection for the walls. To do this, the fire-resistant cladding is covered with heat-resistant tiles. Non-flammable glue is used for its installation. The following facing materials have good fire-resistant qualities:
- terracotta tiles;
- tiles;
- porcelain stoneware;
- soapstone and so on.
In addition, fire-resistant plasterboard, mineralite, glass-magnesium sheet and other fire-resistant boards for a bathhouse can be used as fire-resistant protection for walls. It must be taken into account that for each type it is necessary to provide ventilation in the form of a gap at the bottom. Practice shows that the use of cladding as heat-resistant protection for walls in a bathhouse has almost the same thermal characteristics as reflective cladding. The only drawback is the cost, which is several times higher than standard options.
Heat resistant tiles
Today you can buy special tiles on the building materials market. Fire-resistant versions of this finishing material are made from clay without the addition of dyes and other chemical additives. The advantage of such tiles:
- versatility of the material;
- large range of colors;
- high strength and durability;
- ability to withstand high temperatures.
To lay such tiles, special heat-resistant adhesives and grouts are used.
All the materials listed in this article have proven themselves to be effective in protecting the wooden elements of a bathhouse from heat.
The most cost-effective solution is to create an additional brick wall in the area where the hot furnace is located. Such a wall can be built from gypsum and lined with heat-resistant tiles.
Still have questions? Ask them to a specialist, leaving your number in the form.