Installation of cast iron radiators
The heating appliance market is striking in its diversity. But the familiar cast iron radiators are still popular due to their many advantages. They are durable, corrosion resistant, easy to use and very durable. But even the most reliable device may one day require replacement. You can solve the question of how to hang a heating radiator on brackets yourself. The main thing is to have experience, the necessary materials and take into account some installation nuances.
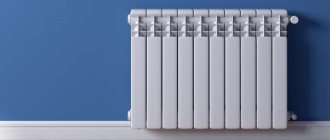
Modern cast iron radiators are an example of style
- Features of selection and installation
- Preliminary preparation
- Main stages of independent work
- Decorative design of radiators
Features of radiators with decorative design
Cast iron radiators, made with a specific design in mind, are not characterized by maximum efficiency during operation, since their characteristics are somewhat lower.
Cast iron radiator with a small amount of decor Source remontnik.ru
For example, the heat transfer of such structures is insufficient, since there is an additional decorative layer of paint on the surface, which retains heat. The power of such units is significantly less, since in order to emphasize the aesthetics of the room, the batteries are made in a compact shape.
There is also a possibility of a drop in hydraulic resistance inside the structure. This is due to the increased compactness of the sections. Therefore, it is often difficult to choose.
Designer cast iron radiator in a metallic shade Source dmworld.ru
Beautiful cast iron radiator in an antique style Source retro-lux.ru
Connection sequence
The most crucial moment in installing batteries is connecting them to the heating circuit and then checking them. In order for all work to be carried out efficiently, you must follow the installation sequence of the cast iron radiator.
- The heating circuit is first turned off, the supply of coolant to the apartment is stopped, and then drained from the pipes using a circulation pump.
- The battery is hung on brackets and its horizontal and vertical position is checked with a building level.
- The plugs are unscrewed from the device.
- In the event that the side connection diagram for cast iron heating radiators is “introduced” into a single-pipe circuit, then you must first install and connect a bypass with a valve. If the system is two-pipe, then flow pipes with taps are used.
At the last stage, the Mayevsky tap is installed on cast iron radiators.
After connecting all the heating elements, a test check of the quality of work is carried out. It will show how securely the system is installed. To do this, water is introduced into it under pressure. If there are no leaks or strange noises or knocks, then all elements of the circuit are connected correctly.
Technique for performing work on connecting radiator sections
Extending radiators is a useful skill for a home handyman.
Knowing how to join sections, it will not be difficult to provide your own microclimate in each room. Before connecting two radiators, a power calculation is made. The formula is simple - 10 m2 requires 1 kW of thermal power. The section's performance is indicated in the data sheet. This data will be useful for calculations. Then you need to buy the required number of elements, find tools and assemble the heating device.
Tools and components for work
To assemble a heating radiator with your own hands, you will need:
- wrench or adjustable wrench;
- radiator key;
- plugs with right and left threads – 1 pc.;
- nipples;
- paronite gaskets;
- intersection gaskets made of durable, flexible material;
- battery sections;
- sandpaper of fraction No. 120.
Thread gloves are useful for protection. It is more convenient to install the batteries with two people; an assistant will not hurt.
Step-by-step battery expansion process
Do-it-yourself heating radiator assembly can be done at any time. If the heating season has already begun, the network must be shut off, the coolant must be drained from the circuit and the heating device must be dismantled.
How to connect the battery:
- Place the dismantled radiator on a horizontal plane. To avoid scratching the coating of the battery and table (floor), lay a cloth. Remove all additional elements - taps, temperature sensors. To wash the battery, take it into the bathtub, open the plugs and rinse with a stream of water.
Check the integrity of threaded connections and ends of the heating device. If there are deposits, sand the joints. Place the battery back on a flat, horizontal surface. The area is chosen to be level to ensure the tightness of the joint. The slightest curvature of the position will lead to an uneven joint. For seals, only paronite gaskets are chosen. This is a durable, flexible material that can withstand heat without loss of quality. Check the quality of nipple threads
Smooth and uniform cutting without chipping is the key to a strong joint. Move the sections together, placing spacers between them. Carefully begin to tighten the nipple. The part has a left-hand thread on one side and a right-hand thread on the other. This means that when rotating, both sections are attracted
It is more convenient to carry out work with a special radiator wrench. The tool may come complete with a battery, but is also sold separately.
This means that when rotating, both sections are attracted. It is more convenient to carry out work with a special radiator wrench. The tool may come complete with a battery, but is also sold separately.
- Grab the sections a little, check the evenness of the joints and tighten until tight. The number of turns of the nipple turns on each section must be equal.
Knowing how to increase the heating battery, it is not difficult to assemble a system with the required power indicators. After building up the sections, the radiator is checked for leaks.
For a household check you will need:
- a piece of pipe with a cross section of 15 mm;
- automobile pump with pressure gauge;
- tire nipple.
Now solder the nipple to the pipe and insert it into the radiator. This design is needed for air pressure testing. Install a plug on one of the radiator inlets. Connect a car pump with a pressure gauge to the nipple. Pump air at a pressure of 1 bar. If the tightness of the joints is broken, a whistle of escaping air will appear. You need to find a leak, tighten the nipple or change the gasket. Carry out the pressure test again. If there are no leaks, install the radiator into the network.
Pressure testing with water is carried out in the same order. Instead of air, colored water is pumped in. Let the device stand for 5 hours and inspect for leaks. If there is a leaky joint, water will leak out. Tighten the joints, check again, install the battery into the system.
An extended battery increases in weight. Before installing the radiator, it is advisable to strengthen the fasteners and screw in additional brackets. This will protect the device from collapse, because the battery will be even heavier with coolant. The device is integrated into the network at a selected location, taking into account the increase in battery length.
The procedure for carrying out installation work
Installation of brackets for a cast iron battery
First you need to determine the required number of brackets. It depends on the area of the heating device. For 1 sq.m. The heating surface needs 1 bracket. Calculate the surface area of the radiator depending on the number of sections of the device and mark the wall for installing brackets. After marking, check the calculations again, drill holes, insert dowels into them and screw in the fasteners.
Installing a heating radiator
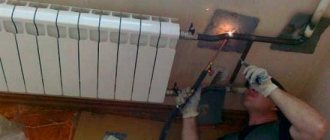
The heating circuit must be closed and the water must be completely removed. The remaining coolant can be pumped out with a pump. The battery is hung on supports, and a bypass is connected for a one-pipe system. Next, the radiator is connected to the system using threaded connectors. All joints must be sealed. Any sealing materials are suitable for this; tow is usually used. If you know how to use a welding machine, take the opportunity to weld the joints of the pipes and the pipeline.
After installing the device, pressure testing is required. This procedure is performed by professionals with the appropriate equipment. If you have a device, do everything yourself; if not, then buying an expensive device for the one-time installation of one or several radiators is not advisable. After installation is complete, check the operation of the system.
Theoretically, there is nothing complicated in installing cast iron heating radiators, but in practice, not everything is as easy as we would like. If you do not have the necessary experience or an assistant who has already performed similar work, it is still better to hire a team of plumbers. Of course, paying for their work will significantly increase the cost of the heating system as a whole, but you will save time, effort and nerves. The final decision is yours.
Recommendations for selection
To achieve efficient heating of a room, you need to understand not only the types of batteries. As you know, each has its own level of heat transfer, which largely depends on the number of sections. Let's look at this issue in more detail.
Calculation of the number of sections
At the moment, there are several ways to calculate how many battery sections are needed for the heating to be effective. Let's get acquainted with a technique that takes into account the area of the room. The statement here is that to heat 1 m2 you need 100 W of device power.
The formula is as follows: N = (100 x S)/Q where:
- N—number of sections;
- S—room area (m2);
- Q is the heat transfer level of one section (W).
For more accurate calculations, it is recommended to take into account the following features: the number of double-glazed windows, doors, wall thickness.
How to choose the right bracket
The main rule when buying a retainer: it must withstand the weight placed on it. The maximum load is usually indicated in the included instructions. It is easiest to choose a bracket for an aluminum radiator, since it weighs little and any type is suitable for it.
For very powerful batteries, use floor stands. But if the covering in the house is wooden, then you need to make sure that the clamps are equipped with additional fasteners to the wall. This is necessary in order to reduce the load on the boards. For light heating elements that will be located in a deep niche under the window, it is better to buy a long bracket.
For cast iron radiators, it is recommended to use holders with the ability to slightly change the height, otherwise installation difficulties may arise. The price of an adjustable bracket is not so high as to give up installation convenience.
It is important that the alloy contains no toxic substances released when heated. You should not buy parts secondhand, especially without the appropriate accompanying documents.
Please note that the lightest one - the corner bracket - is intended only for aluminum and copper radiators
Fasteners for steel heating devices
There are two different types in this group: tubular and panel radiators. They have different designs and, accordingly, different fastenings.
In panel radiators, brackets are welded on the rear wall, with the help of which they are hung on brackets. The shape of this type of fastener is different: it is designed specifically for staples.
In panel radiators, brackets are welded on the rear wall
When installing panel radiators, it is necessary to strictly monitor the vertical position of the brackets. High precision required: four or six staples must fit exactly onto the hooks
It is also important that the wall is perfectly flat and smooth. In general, using conventional brackets, panel radiators are quite difficult to hang
It is easier to work with other types of holders.
Standard bracket for panel radiator
Since the mass of the heating device is small, it is quite enough to fix it on the upper brackets and install stops at the bottom that will give it direction in the horizontal plane. They are not attached to the wall, but are hooked onto a bracket and simply rest against the wall. For reliability, the part that faces the wall is expanded.
This is what a set of brackets for tubular steel batteries looks like: the upper collector is hung on the hooks, and plastic stops are placed below
There are also special mounting strips for easy installation. They are a strip of metal with plastic clips at the top and bottom. When using this fastener, there is no need for brackets on the rear panel. The slats are fixed to the wall, a radiator is inserted into them, which is held in place by plastic hooks.
Rail for quick installation of panel batteries
Fasteners for tubular radiators are similar to sectional ones: the same hooks, only of a different size, often equipped with plastic covers.
There is also a special fastener with SMB tube grips. This is a strip of steel with plastic clips and a shelf at the bottom that serves as a support for the radiator. This mounting plate can be used if the weight of the device filled with water does not exceed 100 kg. Installation is simple: place the battery on the shelf, bring the top edge closer to the latches. They grab the nearest tube and a click is heard. The radiator is installed, the supply pipes can be connected.
Bar for quick installation of a tubular radiator with shelf and clamps
There is a second option for quick installation: SVD fasteners. It consists of two parts. One is attached to the radiator, the second to the wall. Then they are connected to each other and secured with a steel loop.
Another type of holder for tubular models: two parts, one is attached to the wall, the second is attached to the pipe. They are held together with a wire fastener.
Floor mounting for tubular radiators can be of several types: tubular supports that are welded at the factory, or stands with hooks. Radiators are hung on such racks, and the racks themselves are attached to the floor.
Brackets for radiators are of different types and types: for wall and floor installation. The standard ones that come with the kit are reliable, but they are more difficult to work with. Planks and devices for quick installation save time, but cost a lot.
Fasteners for cast iron, sectional, panel radiators
The procedure for installing radiators does not depend on their type: the rules remain the same, only the fasteners change. If installation under a window is intended, the following distances must be observed: from the floor should be at least 80-120 mm, to the window sill at least 60-100 mm, to the wall - 30-50 mm. It is also necessary to decide on the quantity and location of fasteners.
The number of brackets (hooks) per battery depends on its length. If there are few sections - up to 8-10 pieces - then two holders are required at the top, and at least one more at the bottom. If there are more than 10 sections, install three supports on top and two below. For each next five to seven sections of cast iron radiators and ten tubular and aluminum ones, the number of fasteners increases: one holder is added at the top and one at the bottom.
Methods of using various types of fasteners for sectional radiators
Fasteners for cast iron batteries
Since these are the heaviest heating devices, the holders for them are the most massive: they must hold considerable weight for years. These can be individual or curved pins attached to a bar. In any case, when making mounts for cast iron batteries, thicker metal is used. In price lists it usually comes with the addition of “reinforced”. Can be painted (standard color is white) or not. Some manufacturers paint it in the desired color upon request (when ordering a radiator, specify the type of fastener and its color).
The mount for a cast iron battery is made reinforced: from thicker metal
When purchasing, you will need to take into account the dimensions: fastenings for sections of different depths are made specially, since it is necessary to ensure a distance to the wall of at least 3-5 cm.
In addition to brackets for cast iron radiators, they also produce hooks. They are sold in pairs with dowels. Installation is standard: a hole is drilled, a dowel is inserted into it, and a hook is screwed into the dowel (there is a thread on one side).
There are mounting strips for cast iron radiators that make installation easier
In addition to wall mounting, there are legs for floor installation. They come with adjustable height or not. The upper arcs that fix the section to the stop are also different: there is an arc made of steel wire, and there is a chain of movably connected links. In both cases, the batteries are fixed to the support using these arcs and bolts.
Racks for floor installation of sectional radiators - any wall-mounted radiator can be installed on the floor
The best known manufacturers and models: characteristics and prices
Cast iron radiators are produced by many large and small companies. This is due to the fact that the casting process at conventional pressure parameters is technologically simple and can be organized in small workshops.
Advice! Avoid purchasing products from a little-known manufacturer, as they most likely do not have quality control and bench testing of assembled batteries, which large manufacturers always do.
STI Nova 500
Country of brand and location of production facilities – China. The model from the Nova line combines the advantages of cast iron radiators and a modern appearance. The characteristics are suitable for use in Russian conditions. Designed for installation in private homes, industrial premises, and public buildings. You should be careful when installing in multi-storey buildings with a centralized heating system.
The material is not subject to corrosion and therefore the radiator is suitable for using any coolant.
The surface is painted with a white heat-resistant polymer composition. The service life declared by the manufacturer is 30 years, the warranty is 5 years. The product is supplied assembled with a number of sections from 4 to 14. Section weight is 4.2 kg, coolant volume is 0.52 liters. For installation under low window sills, similar shaped models with a center distance of 300 mm are available.
Viadrus Bohemia 450/220
The Czech company Viardus, founded in 1888, specializes in the manufacture of components for heating systems: cast iron liquid fuel boilers, cast iron heat exchangers for boilers, as well as radiators. Extensive experience allows us to manufacture products that meet European quality standards ISO 9001 and ISO 14001.
The Viadrus Bohemia 450/220 model is retro-styled and is available in two versions: with legs and without legs. This is convenient, as it allows you to install the radiator on the floor if the strength of the wall does not allow hanging installation.
The peculiarity of the company's products is that the products are delivered in final finishing, and the required package includes through-hole plugs.
The models produced at the brand’s Turkish factories are not decorated with patterns, and the rib lines have smooth shapes. The supply of products on the market is limited and is produced to order, since the cost of one section can reach 7,100 rubles, which reduces mass use.
Viadrus Hellas 470/218
The Hellas line comes in two standard forms: on legs and for wall mounting.
When purchasing, you must take into account that the weight of each six-channel section is 7.2 kg, so increased demands are placed on the strength of the brackets, and the wall must be solid. Painting color – gray. The factory warranty is 20 years. The price of one section can reach 11,000 rubles, which translates the products into the category of luxury items inaccessible to the mass consumer.
RETROstyle TOULON 500/160
RETROstyle TOULON 500/160 batteries are produced by Radimax (Russia).
The advantage of the product is a variety of coloring methods. Radiators are offered in the following versions:
- primer in 12 RAL colors, varnish coating is provided by the buyer;
- painting with heat-resistant glossy paint from the RAL palette;
- matte finish in NCS colors;
- combined painting with two colors, one of which creates the background, and the second highlights the convex pattern;
- patination - antique finishing;
- aged metallic colors;
- craquelure, imitating surface cracks through which the first layer of paint is visible;
- reptile - coloring imitating snake skin;
- individual decoration.
Thanks to the variety of finishes, you can choose products for any style chosen in the interior of the premises.
To create a unified style, the Radimax company manufactures and sells shut-off valves made in the style of radiators; the kit will cost about 13,000 rubles.
RETROstyle WINDSOR 500
The batteries are produced by the same company Radimax. The radiator fins are decorated with classic patterns. On the manufacturer’s page, you can select and visually evaluate the combination of background color and pattern color, which is convenient when pre-ordering a product.
Painting or priming in the chosen color will cost from 300 to 1,650 rubles.
We understand the popularity and high cost of vertical heating radiators
Exemet Romantica 510/350
The radiator is made in the French style of the turn of the 19th and 20th centuries. The upper part of the two-column structure is decorated with a crest.
The maximum number of sections in the battery is no more than 26 pieces. The products are supplied assembled, as each radiator is subjected to hydraulic tests. The manufacturer stipulates that the products are only suitable for use in closed heating systems using clean water or glycerin as a coolant.
Restrictions on the quality and composition of the coolant allow the use of Exemet Romantica 510/350 exclusively in individual buildings.
Iron Lion Pion 600
Country of development and production – China. The maximum number of sections provided by the seller is 15. If the battery consists of 10 elements, then there are two sections with legs, with a complete set of three.
The product is made in retro style with rounded edges. The number 600 in the name shows the total height, while the center distance is 400 mm - this should be taken into account when purchasing, since in most buildings the pipes are located at distances of 300 or 500 mm.
Factory delivery includes painting with black primer, which will require independent varnishing. On request, painting in RAL colors can be done for approximately 700 rubles/section or artificial aging (1,700 rubles/section).
Connection diagrams
The most fault-tolerant scheme for connecting heating radiators in a private house with a bottling and boiler is a single-pipe Leningradka. Heating appliances are connected parallel to the bottling line, which is laid around the perimeter of the room.
Somewhat cheaper to install, but noticeably more problematic to operate, is a circuit that uses a series connection of batteries. Suffice it to say that their independent adjustment in this case is impossible.
A variant of a single-pipe circuit with a serial connection.
Finally, a two-pipe system involves connecting each radiator as a jumper between the supply and return lines. It is inconvenient in that it requires the already mentioned balancing - limiting the passage of the heating devices closest to the boiler.
What are the possible diagrams for connecting heating radiators to the supply line?
- One-sided. The connections are connected to the upper and lower radiator plugs on the right or left. It is compact, but makes the heating of the device uneven: the last sections will always be colder than the first.
- From bottom to bottom. In this case, the battery must be equipped with an air vent. The advantages of the solution are that the radiator with this connection does not require flushing and always heats along its entire length.
- Diagonal. Heating of sections is even more uniform; however, the lower corner of the device with a blind plug will gradually silt up.
Connection options for liners.
Radiator location
In the vast majority of cases, radiators are installed under windows, and this location is completely justified. The fact is that there is always a flow of cold air from the windows - and the heated air masses rising from the radiator prevent them from entering the room. In addition, heated air prevents condensation from forming on the glass.
Required tools and materials
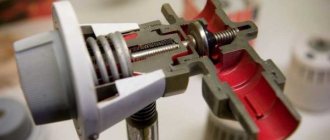
Technology for unscrewing and assembling cast iron batteries: a – nipples capture the threads of sections (2-3 threads); b – tighten the nipples, join the sections; c – install the third section; d – two radiators are grouped.
Replacing or installing various cast iron radiators can occur in several stages and in completely different ways. To carry out this installation, you will need:
- gloves;
- protective glasses;
- gas welding;
- mounting keys;
- rubber gaskets;
- screwdrivers;
- radiator keys (short and long).
If you decide to install or replace it yourself, be very careful and follow the technical and safety rules. Welding work can be harmful.
Methods of fastening aluminum and bimetallic radiators
Products that are very similar in shape are used. Only they are made from thinner metal. In general, brackets for sectional radiators of any type are very similar. There are universal corner brackets for aluminum and bimetallic radiators. They have a recess at the top and bottom for the collector, so they can be mounted on both the right and left.
Special corner brackets for lightweight sectional radiators
There are no floor-standing aluminum or bimetallic radiators. But there are racks that allow you to install any of them on the floor. In this case, the rack is first fixed to the floor, and then the heating device is installed and secured on it.
Floor mounting of aluminum radiators helps if the walls cannot withstand even such a small weight (if they are made of plasterboard or aerated concrete, or other similar materials).
Any sectional radiator can be mounted on such racks
You won’t be able to hang anything on the now fashionable glass wall.
But then you need to pay attention to what the entire structure looks like from the reverse side. In this case, it is more advisable to use convectors built into the floor for heating.
floor-standing models of tubular radiators (at the same time they can serve as fencing), cast-iron retro radiators.
Advantages and disadvantages
Modern design solutions
The advantages of the product are determined more by the material than by the design. Main advantages:
- Cast iron conducts heat well and accumulates it. The radiator takes longer to heat up than a steel or bimetallic one, but gives off heat for a long time after the boiler is turned off. An hour after heating stops, the residual heat transfer for cast iron models is 30%, while for steel models it is only 15%.
- The water used in central heating is not clean. Salts, mechanical impurities, sand destroy the pipeline material. Debris is deposited on the walls: the working diameter decreases over time, and the efficiency of heat transfer decreases. Cast iron is not afraid of salts and abrasive particles. After 30 years, the batteries work as efficiently as on the first day after release.
- Cast iron batteries cannot withstand constant high water pressure, but they are not afraid of water hammer. This option is used when arranging heating with natural circulation.
- Radiators last at least 50 years. If you change the gaskets on time, it will take even longer. Usually they are replaced not because of leaks or low efficiency, but to make the interior more modern.
- The price is the lowest among heaters.
Disadvantages of radiators:
- The main disadvantage is its considerable dimensions and heavy weight. The 8-section model weighs more than 60 kg. They are difficult to transport, lift to the top floor, and install.
- If when the heating is turned off, high thermal inertia acts as an advantage, then when turned on it turns into a disadvantage. The room warms up for at least 12 hours.
- To service the batteries, you need a large volume of coolant and a more powerful boiler. This is not a hindrance for central heating, since the system was originally designed to transfer a large amount of coolant. For an autonomous one, this is a significant drawback.
- There is no need to talk about design. Rough, heavy radiators hardly fit into the interior.
Compliance with installation standards
Even knowing how to install a cast iron battery, you should remember why you need to adhere to the standards approved by SNiP. Maybe someone will consider this unnecessary, and will be wrong, since any deviations from the parameters are not just a violation of safety rules, but also a decrease in the efficiency of the system itself.
General rules for installing radiators include:
- The position of the device relative to the vertical axis of the window. The middle of the battery should coincide with it. The permissible deviation should not exceed 2 cm.
- The battery must have such a number of sections that when assembled it occupies 75% of the width of the window opening.
- SNiP indicates how to secure a cast iron battery to the wall. So the distance between it and the floor according to the standards is 60 mm, under the window sill 50 mm, and from the wall - 25 mm.
When the location has been chosen and all calculations have been made, you can begin installing cast iron heating radiators with your own hands. To do this you will need tools and the necessary fasteners.
Features of selection and installation
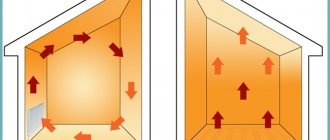
Before starting work, you need to decide on the installation location. The heating device is placed in the area where the most significant heat losses are observed. As a rule, this is a place near the windows. Heat losses are not excluded, even if you have modern energy-saving double-glazed windows installed. There is no need to even talk about ordinary wooden frames.
If there is no heating device under the window, then the cold air falling along the wall “spreads” across the floor. Attaching cast iron radiators to the wall in this location will change the situation. Rising warm air will prevent the spread of cold currents.
Another area of heat loss is the area near the front door. But this is more often faced by owners of private houses and apartments on the ground floor. In this situation, the heating device is hung as close as possible to the entrance. When choosing a location in accordance with the layout, do not forget about sufficient space for the pipeline.
For the most effective protection, the radiator should account for at least 70% of the width of the window opening. When choosing the appropriate option, keep in mind that a small device will not provide the required comfort. A battery selected correctly in size will avoid cold areas on the sides of the window, condensation and dampness.
When looking at models for installing cast iron batteries, consider the climate of your area. Purchasing a device with high heat transfer will be justified only for very cold regions. For residents of the middle zone, batteries with average performance are sufficient; for residents of southern latitudes, low devices with a minimum number of sections are suitable.
Rice. 1 – connecting sections to each other
Installation of cast iron heating radiators must be carried out according to certain rules of location in relation to the floor, window sill and walls:
- For installation, it is necessary to determine the middle of the window opening. Then from this point you need to set aside the distance on the right and left to the fasteners.
- To simplify the assembly process and at the same time avoid the formation of cold zones, place it at a distance of 8 - 14 cm from the floor.
- There should be at least 10 - 12 cm between the window sill and the battery, so as not to disrupt convection and not reduce thermal power.
- There must be a gap of at least 3 - 5 cm between the wall and the device.
Placement of heating devices
It is of great importance not only how to connect heating radiators to each other, but also their correct location in relation to building structures. Traditionally, heating devices are installed along the walls of rooms and locally under windows to reduce the penetration of cold air flows in the most vulnerable place.
There are clear instructions for this in SNiP for installing heating equipment:
- The gap between the floor and the bottom of the battery should not be less than 120 mm. When the distance from the device to the floor decreases, the distribution of heat flow will be uneven;
- The distance from the back surface to the wall on which the radiator is mounted should be from 30 to 50 mm, otherwise its heat transfer will be impaired;
- The gap from the top edge of the heating device to the window sill is maintained within 100-120 mm (no less). Otherwise, the movement of thermal masses may be hampered, which will weaken the heating of the room.
Bimetallic heating devices
To understand how to connect bimetallic radiators to each other, you need to know that almost all of them are suitable for any type of connection:
- They have four possible connection points - two upper and two lower;
- Equipped with plugs and a Mayevsky valve, through which you can bleed the air collected in the heating system;
A diagonal connection is considered the most effective for bimetallic batteries, especially if we are talking about a large number of sections in the device. Although it is not advisable to use very wide batteries equipped with ten or more sections.
Advice! It is better to think about the question of how to properly connect two heating radiators of 7-8 sections instead of one device of 14 or 16 sections. It will be much easier to install and more convenient to maintain.
Another question - how to connect sections of a bimetallic radiator may arise when rearranging sections of a heating device in various situations:
The place where you plan to install the heating device is also important.
- In the process of creating new heating networks;
- If it is necessary to replace a failed radiator with a new one - bimetallic;
- In case of underheating, you can expand the battery by connecting additional sections.
Aluminum batteries
Interesting! By and large, it should be noted that a diagonal connection is an excellent option for any type of battery. You don’t know how to connect aluminum radiators to each other. connect diagonally, you won’t go wrong!
For closed-type heating networks in private homes, it is advisable to install aluminum batteries, since it is easier to ensure proper water treatment before filling the system. And their cost is much lower than that of bimetallic devices.
Of course, over time, moving through the radiators, the coolant cools
Of course, you will have to try hard before connecting the sections of the aluminum radiator for regrouping.
Advice! Do not rush to remove the factory packaging (film) from installed heating devices until finishing work in the room is completed. This will protect the radiator coating from damage and contamination.
The work process itself does not take much time, you do not need any special skills or expensive equipment, you can purchase all the necessary tools at any hardware store. And don’t forget, the connection will serve you for a long time and without hassle only if you used high-quality materials in your work and followed all the rules for installing the heating system.
We are talking about exactly what is indicated in this figure.
In the video presented in this article you will find additional information on this topic.
A few simple rules
In what cases can we talk about the correct connection of batteries? When they work effectively. It's very easy to check. Place your hand on their surface, and you will immediately determine whether the radiator is heating up or not, and whether it is heating up enough. This can be done after completion of installation work, when the system is pressure tested. But there is one nuance in this moment.
Professionals touch not only the top or sides of radiator sections. They check all sections in a row, touching their lower parts. After all, according to the laws of physics, warm water rises to the top, so this part heats up the fastest. Then they check the uniformity of heating not only of sections of one radiator, but also of all radiators separately. This is very important, because one branch may fall out of the system.
To ensure uniform heat distribution across all batteries, specialists use thermostats or taps. They are installed directly on the heating device. Cranes are most often used due to their simple and reliable design. And they last longer. Experienced plumbers try to install them in such a way that they perform double duty:
The diameter of the pipes was changed, thereby regulating the flow of coolant, and therefore the temperature inside the radiators. Allowed the removal of air pockets. Of course, Mayevsky cranes are usually used for this, since they are more efficient. However, conventional flow-through taps last 3-4 times longer.
Air locks are most often the reason why batteries or entire branches of the system do not work. To quickly get rid of them, it is necessary to shut off the working branches, thereby directing the entire coolant flow to the faulty lines. Then you should open the taps on each radiator in turn, through which the air is squeezed out.
Attention! In heating systems with forced circulation of hot water, it is easier to remove air pockets.
DIY installation of cast iron heating radiators
- Required tools and materials
- Stages of installation work
Cast iron radiators are a fairly popular battery used for heating in multi-storey buildings. This is explained by the fact that cast iron batteries have undeniable advantages over other types of heating. In addition, most of the installed batteries in homes have already expired and now need to be replaced. That is why information on installing cast iron radiators is very relevant. Installing heating systems is not entirely simple, but for business owners it is quite feasible.
Radiator piping in a one-pipe system.
The site on which the cast iron radiators will be installed plays an important role.
The composition of the surface of the installation site will be reflected at the stages of heating installation. Installation of devices can take place on a wooden wall. In this case, you will need one strip and one stand for installation for each radiator. The batteries can also be installed on a plastered brick wall. Here you will need a bracket, a window sill and a niche.
A lightweight wall can also be used for installation. Here you will need a solid support on which the heating device will be installed. It should be noted that it is advisable to choose a place to install a cast iron battery based on convenience, not beauty. To add elements of beauty to heating devices, you can resort to simpler methods of decorating and decorating radiators, for example, using a rattan grille.
Heating system design
First, you need to decide which radiators will be used and how they will be connected: this will allow you to carry out the necessary preparatory work indoors in advance.
As a rule, the heating system consists of the following elements:
All of the above components are freely available at points of sale of plumbing equipment.
Installation of radiators includes the following operations:
- Selection of the optimal installation location.
- Organization of a pipeline network.
- Connection of batteries to pipes.
- Conducting testing.
- If the test is successful, full operation is allowed to begin.
Preparatory work
In order to correctly select the necessary parts and calculate their quantity, you should know the type of wiring of the heating system - one- or two-pipe. In a single-pipe system, the heated coolant rises through the riser, and the heating devices are connected to the downward line. In a two-pipe system, the coolant moves from the heater to the heating devices and back. One line is designed to supply hot water, the second - to return the cooled coolant to the boiler. There are two ways to connect system elements - horizontal and vertical.
All connection details should be clarified before work begins. Before installation, you need to drain the water from the system, dismantle the old heating devices, and remove the fasteners on which they were held. The supply of hot coolant to the system must be stopped until the work is completed.
Assembly of cast iron heating radiators
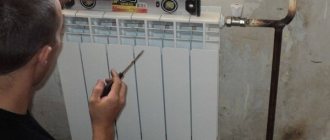
First of all, you need to group the sections. To do this you will need radiator keys. The device is mounted on a workbench; radiator keys must be inserted into the lower and upper holes so that they rest against the internal protrusions. Both nipples need to be deployed simultaneously to avoid skewing of the sections, so the manipulation is performed with an assistant. The nipples should be lubricated with drying oil and gaskets should be placed on them. The keys are rotated in the direction opposite to the thread. If it is left, then they turn to the right, and if it is right, they turn to the left. You need to screw in 1-2 thread strokes.
Hydraulic tests of the finished structure are carried out on a special stand, where a pressure of 4-8 kgf/cm2 is created using a press. The performance of the device is checked using a pressure gauge. If its performance begins to decline, it means that either defective sections are connected, or the work was performed poorly. In the first case, the elements are replaced, in the second, the nipples are tightened. If minor damage occurs, it can be repaired with epoxy glue. If the connections are not made correctly and the joints are leaking, the gaskets should be changed.
Painting the radiator after assembly
After testing, the heating device is painted and dried. To obtain a durable and even coating, it is necessary to apply two thin layers of paint. As a result, radiators must meet the following requirements:
- Heat-resistant coating of the device body. It must withstand temperatures of 80 degrees without softening or releasing harmful substances into the atmosphere.
- The painting must be of sufficient quality to protect the radiator from corrosion as much as possible.
- The selected composition should not change color.
Experts recommend using alkyd enamels as a coating, because... after drying, they are harmless and do not poison the air during operation. Option - acrylic compositions. They do not crack, do not change color and are resistant to heat. Both types of compositions have their advantages: alkyd enamels are cheaper, acrylic-based paints are more durable. You can also use water-dispersion paints, which have a manufacturer’s mark stating that they can be used for painting heating appliances.
How to correctly determine the location of the radiator
Heating devices are usually located under windows at a height of at least 6 cm from the floor and 5-10 cm from the bottom of the window sill. The distance to the wall should be at least 3-5 cm. The system pipes are placed at a slight slope, which is made in the direction of movement of the coolant. If there is no slope or distortions appear when installing a cast iron radiator, air will accumulate in the batteries, which will have to be removed manually. An “airy” radiator will not be able to warm up properly and give off heat. The center of the device should coincide with the center of the window opening plus or minus 2 cm.
What kind of piping can be made from polypropylene pipes
There are many schemes for piping radiators of a water heating system. From the existing methods, the consumer always chooses the one that, under the existing conditions, requires minimal material consumption with maximum efficiency in the location of radiators.
Examples of diagrams for one-pipe and two-pipe methods of piping water heating convectors
In fact, the situation is such that, unlike expensive metal pipes, polypropylene consumables are much cheaper and easier to install, so saving on the length of the pipeline at the expense of efficiency is not worth it. You should choose the type of strapping that will be most effective in a particular case.
Choosing a harness involves deciding on the following issues:
- what kind of heating system scheme will be used (one-pipe or two-pipe);
- what type of radiator connection will be used (diagonal, side or bottom).
As a rule, when using any heating scheme - single-pipe or two-pipe, you can use all types of battery connections.
Schematic illustration of methods for connecting (piping) water heating radiators
On a note:
According to experts, the pipeline must be laid with a minimum number of bends - straight sections of the pipe are more resistant to hydrodynamic loads and the formation of air pockets.
Installation of heating systems using polypropylene pipes, depending on the design, is carried out in compliance with certain rules.
For a one-pipe system:
- Typically, such a system uses a series connection of radiators;
- A bypass is always installed in front of the battery, connecting the supply pipe and the return pipe - during normal operation of the heating system, the bypass is not used, but during maintenance or in an emergency, the water supply to the radiator is stopped, and the coolant circulates freely through the bypass.
Scheme of serial connection of radiators with a single-pipe piping method
For a two-pipe system:
- Both parallel and serial connections of batteries are used;
- The radiator pipes are connected to different pipes - the upper one to the supply pipe, the lower one to the return pipe.
Typically, in two-pipe systems, radiators are connected in parallel, so installing bypasses is not required.
Schematic representation in plan of a two-pipe method for piping radiators of an autonomous heating system
Tying radiators with polypropylene pipes is done in two ways: soldering and using fittings. Depending on the chosen method, the batteries are connected using a special soldering iron or American plumbing wrenches.
Installation of cast iron radiators
When you mention heating, the first image that comes to mind is the large cast-iron radiators that used to be found in almost all apartments.
They were all the same, roughly shaped, gray in color, and it was simply impossible to lift them. The pipes leading to them ran across the entire room. They tried to improve their appearance by painting them with white paint. But it should be noted that these particular radiators could have been around almost forever, and, perhaps, they were and remain one of the most heat-conducting radiators among existing heating devices. Modern manufacturers have not stopped producing cast iron heating radiators. It's just that their design has changed radically. Now on the market you can see radiators made in both antique and modern designs.
In most urban heating networks, the pressure is usually very high, and the coolants, on the contrary, are not of very good quality. And cast iron heating radiators fit perfectly into this heating network. Thick cast-iron walls of radiators can easily withstand high pressure for several decades; their use is possible even if steam with a temperature of about 150 degrees is used for heating. And corrosion is not terrible for cast iron radiators.
Installation diagram of a cast iron radiator
When water is drained at the end of spring for maintenance work, they tolerate airing of the system well. In the event of a power outage, cast iron radiators continue to provide heat, since they cool much more slowly than other radiators made of other materials. Installation of a cast iron heating radiator. Video
Of course, cast iron radiators have some disadvantages, but nothing is perfect. The first disadvantage of cast iron heating batteries is their weight. They weigh a lot, which means their installation will require a lot of physical effort. You cannot install such batteries yourself. Since this type of radiator is usually hung on the wall, you should make sure that the wall can support the weight of the radiator, which will also be filled with water after installation. It may be worth purchasing a radiator model with additional legs.
The larger the cast iron batteries, the higher their heat capacity, the slower they cool. If you purchase narrow cast iron batteries, then their weight, of course, may be less, but heat transfer and inertia will also decrease.
Despite the disadvantages, the advantages are still too good to refuse to install these wonderful heating devices. In addition, modern manufacturers produce radiators of different shapes and colors. The design of modern radiators is not only the accordions familiar to us; models with a smooth surface and widened gaps between sections are produced. Expanding the gaps allows you to increase heat transfer to some extent. There are also models made in the form of columns.
Cast iron batteries will remain relevant for a very long time. And thanks to the design work on their appearance, they can easily complement any interior. But the most important thing is that the house will be very, very warm.
How useful was the information for you?
Connecting taps and subsequent connections
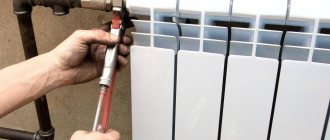
The taps are connected to the battery in this way:
- The tap needs to be disassembled, and then screwed onto the radiator with a fitting and a union nut.
- Tight tightening is ensured by using a special key for “American women”.
Connecting radiators with polypropylene, as well as their subsequent piping, will require the following materials:
- Threads for carving.
- Sealing connecting material.
- A set of keys.
- Tow and thread paste.
The quality and speed of connecting a radiator to polypropylene pipes will increase if you know the following details:
- The distance between the radiators and the window sill is chosen to be no less than 10 cm. If it is reduced, this will entail a change in the trajectory of the heated air flow, which reduces the heating effect.
- There should be 12-15 cm between the radiator and the floor to avoid sudden temperature fluctuations.
- The distance between the rear surface of the heating device and the wall is from 20 mm.
The most optimal location for installing a heating battery is the area under the window: this will ensure heating of cold currents penetrating from the street. If possible, radiators are left in an uncovered position, which, if other installation recommendations are followed, allows the efficiency of the device to approach 97%. If you place the device in a niche, its efficiency drops to 93%. Using a partially closed screen reduces this figure to 88%.
A completely closed decorative screen, used to decorate not very attractive cast iron radiators, can reduce the coefficient by up to 75%. As for the use of polypropylene pipes for connecting heating radiators, which are increasingly replacing traditional metal ones, this is completely justified. As a result, installation and maintenance work is greatly facilitated, which can be carried out independently.
In residential buildings of the old stock, both in the private sector and in apartment buildings, work is currently underway to re-equip heating systems. Physically and morally worn-out heating equipment (steel and cast iron radiators, pipelines, shut-off valves) are replaced with new heating systems. Outdated devices have been replaced by more advanced heating units, for example, bimetallic heating radiators with improved characteristics. Steel pipes, a familiar and durable material, are still in demand when installing heating circuits, but worn-out steel pipelines are increasingly being replaced with new materials, in particular, polypropylene, a polymer widely used in the production of pipe products.
Despite the fact that polymer pipes have been used in construction for decades, many homeowners who still use steel pipelines and are planning to modernize their heating circuits have questions about the technology for the upcoming installation - how to install polypropylene lines in their homes conditions, what does it look like to connect a heating system radiator to polypropylene reinforced pipes? To partially answer them, let’s take a closer look at how polypropylene pipe materials are connected to heating radiators.