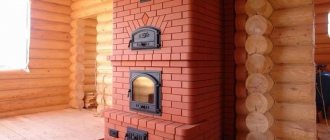
Operating a stove in a home requires the removal of smoke from fuel combustion to the outside. For this purpose, its design has a special pipe with access to the roof. Let's look at what a brick chimney is and how it works, what are its main advantages and disadvantages, what types of it exist, what main parts it consists of and how to correctly calculate them, what stages the laying procedure consists of and what are their features, and also what are the recommendations for its maintenance.
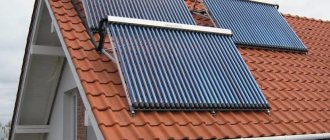
Brick chimney on the roof of a house Source etokirpichi.ru
Chimney - what is it, purpose, principle of operation
Any home stove must be equipped with a smoke exhaust structure. As a rule, this is a pipe made of the same material as the stove itself. The chimney is mostly vertical. In the upper part it opens onto the roof to release fuel combustion products into the surrounding space. The lower part is connected to the upper passage of the furnace itself.
The mechanism of operation of the chimney is based on a natural law - draft due to the difference in the density of heated and cold air. As you know, the denser always tends downward, and the less dense always tends upward. Therefore, the air heated inside the furnace with smoke particles rushes upward. At the same time, the smoke exhaust system additionally performs the function of ventilation of the room, since operation requires a constant flow of fresh air.
The intensity of traction is influenced by 2 main factors:
- The cross-sectional area of the smoke exhaust duct. It should be at least 10th of the area of the combustion opening.
Good draft in the chimney Source aqua-rmnt.com
- Pipe height. The higher its value, the better the traction. In addition, this allows you to compensate for the loss of draft in the case of an excessively wide chimney channel. It is considered optimal when the pipe outlet is located 5 meters or higher from the grate.
Note! A common cause of loss of draft in a chimney is condensation on the surface of the bricks inside the chimney. This happens due to hypothermia of its surface due to its large length and lack of insulation. Over time, this can lead to structural failure. The only correct solution to the problem is external insulation using plaster or thermal insulation materials.
What is a brick chimney and where is it used?
Chimneys are used to remove gaseous combustion products in stoves, fireplaces and heating boilers. Under the influence of draft, smoke, carbon monoxide and soot are carried from the firebox into the chimney and discharged outside. As they move, they cool down, giving off heat to the walls of the chimney.
To remove combustion products from a brick stove, you need to build a chimney from the same material, i.e. brick
Unlike metal pipes, a brick chimney has:
- Higher heat capacity coefficient. Because of this, the efficiency of such chimneys is higher. By accumulating heat inside itself, the brick gradually releases it into the living space, thereby prolonging the heating time of the air.
- High thermal resistance. The temperature of gases as a result of fuel combustion reaches 800 ° C. Metal chimneys, when heated to such a temperature, “burn out” over time, become deformed, and water condensation forms on the walls. Mixing with soot, water turns into an aggressive chemical reagent.
- Variety of architectural forms. The brick pipe fits organically into the style of the building and gives it additional design. The massiveness of the chimney makes the pipe resistant to mechanical damage and little susceptible to the effects of natural atmospheric phenomena. Metal pipes, on the contrary, must be carefully secured, in some cases even braces must be used.
A brick pipe can serve as an architectural decoration for a home and does not require additional fastening, regardless of its size
But a brick chimney also has a rather significant disadvantage. In country houses and country cottages it is not possible to fold cylindrical pipes, which are ideal for the passage of hot gases. The internal cross-section of a square or rectangular shape creates obstacles to the flow of smoke. As a result, a layer of soot quickly forms on the inner walls, which reduces traction. Accordingly, they have to be cleaned more often than metal ones.
Advantages and disadvantages
The main advantages of a brick chimney:
- The ability of the material to retain heat for a long time. This reduces the risk of condensation, which significantly extends service life.
- Classic style. Thanks to this, the chimney is combined with a wooden, brick, concrete, frame house.
- High strength.
- Low cost of material , especially in comparison with modern analogues made using sandwich technologies.
Brick is the most affordable material for laying a chimney Source oboiman.ru
- Fire safety. The passing gases do not have time to heat the chimney to a critical level.
However, this design is not without several significant drawbacks:
- The internal rough surface is an effective soot collector. Therefore, without regular cleaning, the chimney will simply stop functioning.
- Laying a brick chimney pipe is quite complex both technically and physically - delivering heavy material to the roof, preparing mortar, etc. procedures.
- Large weight of the structure - it is necessary to create a powerful foundation.
- Not the best aerodynamic performance of square and rectangular strokes with a rough surface, for example, in comparison with smooth round metal counterparts.
On a note! The average service life of a brick chimney is 10 years. However, with regular cleaning, care and proper protection, it can be extended several times.
Timely cleaning is the key to successful chimney operation Source mybuilding.tips
See also: https://m-strana.ru/brands/remont-krovli/
Did you call a chimney sweep?
It is also necessary to take care of cleaning the stove chimneys. For a flow chimney, one or two cleaning doors are sufficient; in a bell-type system, it is necessary to install from two to four such doors, because ash and fumes are deposited evenly over the entire surface of the dome, as well as in the places of transitions from one dome to another.
Gradually, row by row, raising the firebox and chimney passages, we are gradually approaching the moment of installing the cast iron stove. To do this, you need to select a groove in the bricks and mount the hob.
Types of chimneys
Based on structural characteristics, chimneys are divided into the following 3 main types:
- Mounted. It is a part and continuation of the stove itself. Mounted on top, it is compact and easy to assemble. It practically does not take up free surrounding space. Disadvantage - can only be used for one specific oven.
- Wall-mounted. It is located as part of a permanent external or internal wall. The purpose of such a chimney is to collect smoke from several sources simultaneously. In addition, having a large area, it can itself serve as an additional heat generator. The disadvantage is massiveness, heavy weight, the need to create a powerful foundation.
- Root. It is a free-standing brick pipe with side entrances into which the chimneys of adjacent stoves are connected through metal pipes. This design takes up a lot of space, so it is installed in cases where other options are not applicable.
Wall view of the chimney Source stroy-podskazka.ru
Recommendation! If one side of a wall chimney faces the street, it must be insulated. Otherwise, condensation will form on its inner surface, which will significantly reduce traction and reduce the service life of the structure.
Delivery of materials
I decided to do all the work on installing the stove and chimney myself during my vacation. And before that, he began to calculate how exactly to bring the chimney through the wall, and what type of chimney to choose.
There was still a problem - how to bring the stove, it weighs 100 kg? After much doubt, the Predatory Mouse decided to do everything alone. At the store, upon purchase, they helped load it into the Chevrolet Niva. And at the dacha he unloaded it himself, carried it without outside help and installed it in the house.
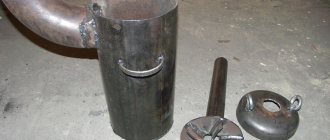
He went to pick up the stove and pipes twice. First I bought a stove and all the necessary components for the chimney. And then he had to buy a stove stand, glass for the stove. For the chimney I bought: pipes, adapters, a tee, a wall outlet, thermal insulating filler - cotton wool, fasteners to the wall and a cap. Everything metal he bought was stainless steel.
After walking around the market and comparing prices, the Predatory Mouse decided not to take a tiny metal reflector measuring 0.5m - 1m for 500 rubles, but purchased 2 galvanized sheets measuring 2m - 1m for 560 rubles each. This was enough for him to protect the wall from the heat of the stove, for the floor under the stove, and still remained to cover the roof of the well.
Device
As a rule, the chimney is an extension of the stove, passing through the ceiling, attic and roof and going out onto the street. It contains the following main elements:
- Fluff. It is a section of pipe at the point of contact with the ceiling or rafters. The thickness of its walls is 2-3 times greater than the standard one. The main purpose is to prevent the transfer of heat to easily flammable structural elements of the house.
- Riser. This is part of the chimney that goes from the ceiling to the roof in the attic.
- Otter. A thickened pipe element resembling fluff. It is located immediately after the chimney exits the roof and has an inclination angle similar to the roof slope. The bottom is framed by a metal apron. Designed to protect the pipe outlet from precipitation.
- The neck of the chimney is a continuation of the chimney after the otter.
Construction of a brick chimney Source hometi.ru
- Top protection. The brick cap acts as an umbrella for the lower part of the chimney.
The topmost part is covered by a cap. It protects the chimney channel from precipitation.
Chimney pipe design and operating principle
The classic chimney design is a vertical tower, inside of which there is a through hole that connects the furnace firebox with the open space outside the house. According to the laws of physics, air pressure decreases with distance from the earth's surface. As a result, a draft arises inside the pipe - the tendency of the air mass to move from bottom to top. If the air access from below is blocked, the draft disappears. Therefore, a smoke damper or view must be installed in the chimney, with the help of which it is possible to regulate the draft.
Using the damper, you can regulate the size of the smoke channel, and therefore the draft
Since the pipe is used in residential buildings, it should not pose a fire hazard, therefore the masonry is carried out taking into account maximum protection from possible fire. A certain terminology has become established among stove makers, which reflects the structure and functional purpose of individual pipe elements.
- Extension pipe. Placed directly on the stove, connected to the combustion chamber. Usually it does not reach the horizontal ceiling by 5–6 brick rows (35–40 cm). A valve is located in this part.
- Fluffing (or cutting). Thickening of the outer casing inside the ceiling. The goal is to prevent thermal contact of the floor material and cross beams with the pipe. In this place, the temperature of the bricks reaches its maximum values, so it is important to take all safety measures. The internal dimensions of the chimney remain unchanged.
- Riser. Part of the pipe from the fluff to the roof. The dimensions of the riser usually coincide with the dimensions of the extension pipe. The size of the internal section is maintained. If the attic space is equipped as a living space, the riser serves as a heater.
- Otter. Thickening the external dimensions of the chimney in order to block the hole in the roof from possible precipitation. The minimum overlap is 10 cm around the entire perimeter of the pipe. The height of the otter depends on the slope of the roof. Its upper part ends with waste areas made of cement mortar with increased moisture resistance.
- Pipe neck. Part of the chimney made by laying bricks on a waterproof mortar. It is located above the otter and has the same geometric parameters as the riser.
- Pipe head. Extension of brickwork at the end of a chimney. It has protective functions and prevents foreign objects from entering the pipe. Often reinforced with a metal frame, deflector or weather vane.
All brick chimneys are made according to the same scheme, consisting of several standard elements
In some cases, a combined pipe design is practiced. The brickwork ends in the attic and then a metal or asbestos pipe is mounted to it, leading to the roof. In this case, there is no need for an otter, neck and head, which significantly saves time and money. At the same time, we must not forget that the cross-sectional area of a metal pipe should not differ from the cross-section of a brick pipe in a smaller direction. The combination of a stainless steel pipe embedded in an asbestos pipe has proven itself well.
In the upper part of the chimney, where the temperature of the flue gases is not so high, you can make a transition from a brick pipe to a metal one
In both cases, the top hole must be closed with an umbrella (or deflector), which will prevent rain and snow from directly entering the pipe.
You can read in detail about the principles of choosing a suitable chimney in our article:.
Calculation of parameters
When building a chimney, first of all, the cross-section of the channel and the height of the pipe relative to the roof ridge are calculated. The first parameter can be calculated using the formula if the pipe serves as a heat generator and its power in kW is precisely known. For a conventional oven the following rules apply:
- A section of 125x125 mm is formed by a masonry of 4 bricks. Used for summer kitchens and low-power stoves.
- A section of 125x250 mm is formed by 5 bricks. It is used for heating and heating-cooking stove versions, as well as fireplaces.
- A section of 250x250 mm gives 6 bricks. Purpose - structures with maximum fireboxes - fireplaces, Russian stoves.
Depending on where the chimney is installed, the following rules for calculating the height apply:
- At least 0.5 meters above the ridge - when the pipe is no further than 1.5 m from the ridge.
- At the ridge level - at a distance of 1.5 to 3 meters from the ridge.
- At an angle of 10 degrees. between the upper edge of the pipe and the ridge - at a distance of more than 3 meters from the ridge.
Rule for choosing the height of the pipe above the roof Source odstroy.ru
Important! The cross-sectional size of the brick chimney channel and the height of the pipe above the roof directly affect the draft force, and therefore the overall performance of the stove and fuel consumption.
Tools for work
You won't need many tools for laying stoves. This is a trowel (a special trowel for laying bricks), a container in which the clay mortar will be mixed, a drill with a “mixer” attachment for mixing it (although you can do without it) and a building level to control the evenness of the masonry and check the geometry of the furnace.
Despite the fact that the stove is a fairly simple geometric figure, it is still worth keeping an eye on the level. because the mortar can be heterogeneous, its thickness can vary from row to row, and the brick always strives to “move” somewhere. When building “by eye”, the entire structure often “collapses” in one direction.
Stages of masonry, choice of mortar and brick
Installation of a mounted chimney is carried out according to the following algorithm:
- The necessary parameters are calculated, bricks, mortar and the necessary tools are prepared.
- The first row is laid around the furnace outlet opening.
- The 1st row is checked with a building level for compliance with the horizontal and vertical planes.
- The subsequent rows are being installed.
- After laying 3-4 rows, the channel is cleared of excess mortar on the walls.
- Before the 3rd row reaches the overlap, a fluff is formed while maintaining the internal cross-section of the channel.
- The laying of rows of fluff continues to a level slightly above the floor of the attic.
- Next, the laying of the riser continues along the original perimeter.
- When the roof masonry is reached, the formation of the otter begins.
- The laying of otter rows continues until its bricks go beyond the roof level located closer to the ridge.
Installation of a chimney on the roof Source legkovmeste.ru
- Afterwards, the laying of the finishing part of the chimney begins to a given height with a protrusion of bricks at the cut - to form the head.
- Finally, a cap is installed to protect against precipitation.
To install a stove chimney, a special masonry mortar is used - ordinary construction mortar will not work. Its composition depends on the location of the pipe section:
- From the pipe to the ceiling in the room, a classic clay-sand mixture is used - similar to that used for laying the stove itself. As a rule, 3 parts clay and 1 part sand are used for preparation.
Schemes and drawings
There are many different types of ovens available online. starting from the usual “Dutch” and ending with a fireplace stove. Naturally, each stove design is accompanied by a photo of the chimney and drawings.
“The devil is not as terrible as he is painted,” although this does not apply to the drawing of stoves and their installation. Usually a drawing of the general view of the furnace structure is given in section and the so-called “orders” - diagrams of the laying of each row.
You can’t do without spatial thinking here. If you find a design that suits you, do not be lazy and draw the entire drawing yourself several times in order to better understand the device and not get confused during the process of laying the stove.
Video description
Video about how a brick chimney differs from analogues made from other materials:
- Area in the attic - some cement and slaked lime are added to the mixture.
- The pipe above the roof is laid on a mortar consisting mainly of sand, cement, lime and a small addition of clay.
The composition of the masonry mortar must be such that the joints formed are able to withstand the loads occurring in the relevant area. Closer to the firebox there is a lot of heating, in the attic there is an effect of dampness and slight heating, above the roof there is precipitation and temperature changes.
Various types of bricks are used in construction, but which one is better to make a chimney from depends on the characteristics and operating conditions for which they are designed. For example, silicate and pressed ones, despite external suitable signs, are clearly not applicable, since they are not intended for the level of heat produced by a conventional stove.
All that remains is the red fired clay. Specimens of the 1st and 2nd grades, full-bodied with a standard single size, are suitable for masonry. Grade 3, as a rule, is not used due to its increased fragility and brittleness.
When can you start heating?
After all the rows have been laid out, the stove must be coated with clay, or, if it is a beautiful new brick, all the seams must be thoroughly coated and the stove must be allowed to dry completely.
After a week has passed, which is the minimum time the stove should dry out, you can begin to gradually heat it, adding firewood in very small portions. In order to “break through” the draft, it is recommended to burn newspaper while cleaning the stove before starting a fire in the firebox.
It's okay if the oven smokes a little the first three or four times. This only means that she is still a little damp inside. If the stove continues to smoke even after a week of constant firing, this means only one thing - a mistake was made somewhere. And then you will have to either shift the oven completely, or look for ways to troubleshoot problems with minimal losses. Based on this, it is best to carry out this work in the summer, and not just before the heating season.
In any case, the construction of stoves is a much more complex process than ordinary brickwork. It requires spatial, even mathematical, thinking. But if you give it the proper time and attention, the result will warm your soul and warm your home for many years to come.
Maintenance Recommendations
After installation, the chimney definitely needs maintenance. The first and most important procedure is cleaning. It can be done in several ways:
- Traditional. It is carried out by burning non-resinous wood, such as aspen.
- Reactionary. Along with regular fuel, a special block of combustible components is placed in the firebox. When burned, gases are formed that promote peeling from the walls.
- Mechanical. It involves cleaning the chimney channel with special brushes and brushes on cables. The method is characterized by maximum efficiency.
After the chimney laying is completed, you can heat the stove without problems for a whole season - then soot will begin to actively deposit on the surface of the bricks. Therefore, cleaning must be performed periodically, at least once - before the start of the heating season.
Reliability of masonry
When laying chimneys, the difficult issue of installing a closure or cap arises. Because It is customary to make passages one brick wide; to block it, you need to place two bricks end-to-end over it. In this case, the seam does not rest on anything. Such a ceiling device looks, at first glance, weak and unreliable, and one would like to lay a rail for support, but this is not necessary.
Firstly, the rest of the furnace array stands on the second half of these bricks, preventing them from falling through. And secondly, the overlap is done in two rows, in the first row the bricks are laid end to end, and in the second row the bricks are tied, and the brick is laid on the seam. Thus, a kind of “lock” is obtained that firmly seals the passage of smoke.
Briefly about the main thing
A stove chimney is an essential part of any stove. It has a vertical design and allows you to effectively remove smoke from fuel combustion to the street. The pipe operates on the natural law of draft, the force of which in turn depends on the cross-sectional area of the chimney duct and the height of its location relative to the roof ridge.
According to the type of construction, chimneys are:
- Mounted.
- Wall ones.
- Indigenous.
Their main parts are fluff, riser, otter, neck, head, cap. The main advantages of a brick chimney are the ability to store heat, stylish appearance, affordability, and fire safety. Disadvantages: heavy weight, accumulation of soot, difficulty in installation. The masonry must be carried out strictly in accordance with the instructions. The chimney duct must be cleaned at least once a year using effective methods.
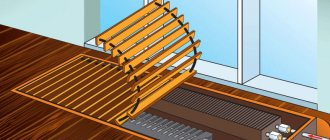
Do-it-yourself chimney for a stove: different installation options
A chimney for a stove can be built with your own hands if a diagram of its laying is at hand, and the home craftsman himself has at least minimal skills in working as a mason. The construction of this department requires no less serious approach than the construction of the furnace itself, since the efficiency of heating, the safety of those living in the house, and the overall service life of the entire heating structure will depend on the quality of its masonry.
Do-it-yourself chimney for a stove
When working on a chimney, you must remember that its internal surfaces must be as neat and smooth as the external ones, since this factor directly affects the creation of good draft.
Types of brick chimney pipes
Chimney pipes are divided into types depending on their installation location relative to the stove itself. So, they are root, mounted and wall.
Stove with a top-type chimney pipe
- The most common design of a brick chimney is the captive one. It is installed directly on top of the heating device and is its continuation. Such chimneys are often installed during the construction of a heating or sauna stove.
Chimney of basic design
- The second most popular is the root chimney. This type of pipe is distinguished by the fact that it is installed next to the furnace or is included in its structure and is placed on one of its sides.
Main pipes can be installed for both brick and cast iron stoves. In addition, one main structure is often used for several heating devices. For example, in a two or three-story house, one chimney is passed through all floors and stoves are connected to it. If you plan to use a pipe in this way, then in this case, an accurate calculation of its parameters must be made, otherwise there will be no normal draft, which means that the efficiency of the stoves will decrease and the risk of combustion products entering the premises will increase.
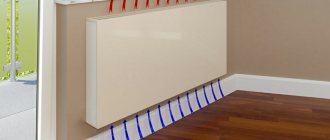
Wall type pipe
- The wall pipe is built into capital internal or external walls. But, in the latter case, the walls of the chimney will have to be very well insulated, since due to the large difference in external and internal temperatures, condensation will actively collect inside the channel, which will significantly worsen the operation of the stove, reducing draft and contributing to the rapid overgrowing of the chimney with soot.
It should be noted that although this structure is identified as a separate type, it can be either root or mounted.
Brick chimney design
The chimney has several sections. To understand its fundamental design, we can take as an example the structure of the mounted pipe, since most often this is what design engineers choose when drawing up furnace layout diagrams.
So, the design of the mounted pipe with its passage through the attic floor and rafter system includes the following sections and elements:
Schematic diagram of a typical brick chimney
1 – Metal cap or umbrella. It can have various forms, but its function is always to protect the internal space of the chimney from the penetration of various types of precipitation, as well as dust and dirt.
2 – The head of the pipe consists of bricks protruding outward, which will protect the neck of the structure from raindrops that will flow down the protective cap. The metal umbrella is also attached to the protruding parts of the head.
3 – Pipe neck.
4 – A cemented or otherwise waterproofed inclined surface of the otter, designed to drain water that gets onto the neck of the pipe.
5 – Otter. This part of the structure has thicker walls than the pipe neck. The otter should be located where the chimney passes through the rafter system and roof. The thick walls of the otter will protect the flammable materials of the sheathing under the roof from overheating.
6 – Roofing material.
7 – Lathing of the rafter system.
8 – Rafters.
9 – Pipe riser. This department is located in the attic of the house.
10 – Fluff. This part of the chimney begins under the ceiling inside the house, passes through the attic floor and ends in the attic, slightly above or flush with the floor beams. The fluff, like the otter, has thicker walls than the neck and riser of the pipe. The increased thickness also protects wooden beams and other combustible attic or interfloor materials from overheating.
It should be noted that in some cases, instead of fluff, a metal box is installed in its place around the pipe, filled with non-combustible materials, such as sand, vermiculite or expanded clay. The function of this layer, which has a thickness of 100÷150 mm, is also to protect combustible floor materials from overheating.
11 – Floor beams.
12 - Insulation, which is most often made from asbestos, is in any case necessary to create fire safety, since the walls of the chimney will come into contact with the wood of the floor beams and other materials that make up the floor and ceiling.
13 – Smoke damper, located indoors, in the upper part of the pipe, which allows you to regulate the intensity of the exhaust flows of heated air and combustion products.
14 – Pipe neck, which starts at the top of the furnace - the roof.
Calculations of chimney pipe parameters
The principle of operation of the chimney system is the movement of air masses from the combustion chamber to the exit to the street, that is, from the lower point to the upper. This process occurs through the creation of draft, which occurs due to changes in temperature and pressure. It is thanks to all these factors that the chimney system functions normally.
To create optimal aerodynamic processes, the size of the pipe channel must correspond to the power of the furnace, which, in turn, largely depends on the size of the firebox. The surfaces of the internal chimney space must have smooth walls along which air flows will slide freely without turbulence, and due to this no backdraft will be created. That is why quite often an insert made of a round ceramic pipe is built into a square brick chimney, which has an absolutely smooth surface and no internal corners.
Sectional size
In connection with the mentioned factors, it is necessary to very carefully calculate the internal size of the chimney, taking into account its length, since the larger this parameter, the higher the draft in the pipe.
Of great importance for creating normal draft and high-quality functioning of the heating device is the correspondence of the parameters of the chimney passage and the power of the boiler, as well as the size and number of channels provided for by the design and passing inside the stove.
If the parameters of the internal dimensions of the chimney in cross-section exceed the calculated value, this will lead to rapid cooling of the heated air in it and the formation of condensation, and therefore a decrease in draft. In this case, the necessary balance will be disrupted, and the flows cooling in the upper part of the pipe may return down, creating smoke in the room.
The size of the chimney opening is calculated as follows:
- The size of the chimney of a fireplace with an open firebox approximately corresponds to the proportions of 1:10 (chimney cross-section (f) / firebox window area (F)). This formula generally applies to both square or rectangular and cylindrical pipe types, but not directly, but taking into account the cross-sectional shape of the channel and the overall height of the chimney.
- The size of the chimney of a stove with a closed combustion chamber has a proportion of 1:1.5. In the case when the heat transfer of a heating structure is less than 300 kcal/hour, the cross-section usually has a size of 130×130 mm or half a brick (not less). When making calculations, it must be taken into account that the cross-sectional size of the chimney should not be smaller than the inlet opening of the ash-blower.
When calculating a fireplace chimney, you can use the following table.
| Pipe height N, m | 5 | 6 | 7 | 8 | 9 | 10 | 11 | |
| f/f ratio in % | ||||||||
| Pipe section | Round | 11.2 | 10.5 | 10 | 9.5 | 9.1 | 8.7 | 8.9 |
| Square | 12.4 | 11.6 | 11 | 10.5 | 10.1 | 9.7 | 9.4 | |
| Rectangular | 13.2 | 12.3 | 11.7 | 11.2 | 10.6 | 10.2 | 9.8 | |
Pay attention to the direct dependence of the chimney cross-section not only on the parameters of the firebox, but also on the height of the pipe. Probably, sometimes when making calculations it will be more expedient to start from this parameter. For example, a pipe 11 meters high on a one-story country house would look completely ridiculous.
The same dependence, but more accurately presented in graph form.
Graph of the relationship between pipe height, channel cross-section and firebox size
Let’s say you need to calculate the cross-section of a chimney pipe for a fireplace with a firebox, the window dimensions of which are 500×700 mm, that is, the total area is 0.35 m² . It is assumed that a pipe with a total height of 7 meters is allowed on the building.
- Let's look at the graphical diagram:
— for a round chimney cross-section, the optimal ratio is f / F = 9.9% ;
- for square - 11,1%;
- for rectangular - 11,7%.
- It is easy to calculate the optimal cross-sectional area of the chimney channel:
- circle: 0.35 × 0.099 = 0.0346 m² ;
- square: 0.35 × 0.11 = 0.0385 m² ;
- rectangle: 0.35 × 0.117 = 0.041 m² .
- Now, using the simplest geometric formulas, it is easy to reduce the areas to linear dimensions:
— round pipe diameter: d = 2×√S/π = 2×√0.0346/3.14 ≈ 0.209 m = 210 mm .
- side of a square pipe: a = √S = √0.0385 ≈ 0.196 m = 196 mm .
- the rectangle can have different options - for example 0.130 × 0.315 m or 130 × 315 mm .
The calculation will be much simpler if you use the calculator below, which already contains all the mentioned dependencies.
Calculator for calculating the linear parameters of the chimney cross-section
Go to calculations
Of course, these dimensions are obtained as a guide, and are usually “tied” to standard pipe diameters or brick sizes.
Chimney height
The height of the pipe was already mentioned above, but there the calculation was based on its already known value. What should be the optimal height?
To calculate the height of the chimney, you also need to take into account several factors. Hot air passing through the internal channels of the stove and chimney immediately cools down when leaving it, which means that the longer it stays inside the channels, the longer the heat will be retained in the stove.
The correctly selected pipe height helps to normalize draft and at the same time, to retain heat inside the structure for a longer period of time. So, if the pipe is raised a little higher than required by calculations, then the draft may increase to such an extent that the heat will not stay in the stove for a long time, which means that it will not have time to warm up and transfer heat to the rooms. In this regard, you will have to constantly add fuel, which will make the operation of the stove extremely uneconomical. Well, a pipe that is too low can lead to the creation of a reverse draft system inside, which will cause carbon monoxide to enter the living rooms. The same phenomenon can occur if the cross-section of the internal chimney channel does not correspond to its height.
According to existing rules, the height of the pipe (or rather, the vertical distance from the grate to the mouth of the chimney) cannot be less than 5 meters.
The height of the chimney above the roof is usually calculated separately, taking into account such design parameters of the house structure as the angle of the roof slope, the thickness of the roof covering and the distance between the chimney and the roof ridge. All calculations are carried out without taking into account the height of the protective umbrella (cap) covering the pipe from above.
If the chimney pipe is installed incorrectly on the roof, turbulence of warm air will appear at the outlet, which will significantly reduce draft. Therefore, the chimney must be raised above the roof plane, taking into account certain rules that relate to the level of its outlet relative to the ridge line:
Diagram of the correct location of the pipe relative to the roof ridge
- If the pipe exits through the roof at a distance of up to 1500 mm from the ridge, then its height above it must be at least 500 mm.
- If the pipe extends above the roof at a distance of 1500÷3000 mm from the ridge, then it must be raised to its level.
- In the case when the chimney pipe passes through the roof at a distance of more than 3000 mm from the ridge, its upper edge should be on a conventional line drawn at an angle of 10˚ from the horizontal from the top point of the ridge.
However, no matter how far the chimney pipe is located from the ridge, it must rise above the roof by at least 500 mm. This also applies to flat roofs.
It should be noted that a chimney is a serious engineering structure, and it is quite difficult to independently provide for all the nuances of its construction. Therefore, in order for the oven to function properly, it is recommended to use the services of a specialist, computer programs or ready-made diagrams. Typically, craftsmen post their development plans, which already indicate the optimal dimensions of the chimney channels. And there should be no amateurism in such matters.
Find out several possible options for how to make a chimney for a solid fuel boiler from our new article.
How to choose the “right” brick for laying a chimney?
In order for the constructed pipe to last a long time, and the brick not to be destroyed by temperature changes and the influence of external natural influences, you need to choose this material correctly. In addition, reliable brickwork must ensure complete fire safety for combustible materials surrounding the chimney.
If the brick is of poor quality, the pipe is unlikely to last long
According to its main characteristics, the brick must be solid, fire-resistant and fired.
For the construction of a chimney, the brick is selected according to its grade, which is determined by the level of firing, and is divided into three categories:
Separation of fired ceramic bricks by grade
- Grade I is a moderately burned building material.
High-quality, well-burnt brick of the first grade has the following characteristics:
— The color is bright red or with a slight yellow tint.
— Good clay density.
— Smooth ribs without signs of crumbling and smooth surfaces without scoring.
— When you tap a high-quality brick with a hammer, it should produce a fairly ringing sound.
- Grade II - unburned brick, can be characterized as follows:
— The color is pale orange, unsaturated.
— Low frost resistance, density and heat capacity.
— High porosity.
— When tapped, this brick makes a dull short sound.
— There may be small scuffs on the surfaces of second-grade bricks, and its ribs may have crumbled areas.
- Grade III - burnt brick. This material has the following characteristic features:
- Has a dark deep red, even brown color.
- Not frost-resistant.
— The structure of the brick is dense, but porous.
— High thermal conductivity.
— Strong in compression, but fragile and poorly withstand other loads.
— Its ribs may be crumbled, and its surfaces may be chipped.
— The sound when tapped is very sonorous.
From the presented characteristics we can conclude that first grade brick marked M150÷200 is suitable for the chimney pipe. It is recommended to completely exclude the unburned material from the chimney masonry, and the burned material can be used for foundation work during the construction of the main pipe.
Before using brick for masonry, some stove makers soak it in water, while others use it dry. Dry brick will absorb moisture from the mortar, which will make the masonry less durable, and the laid soaked material will take longer to dry. Therefore, each master chooses his own technology and the most convenient method of work for himself.
Find out how to make a chimney for a potbelly stove yourself from a new article on our portal.
Making masonry mortar
It is very important to choose not only the right brick for the construction of the chimney, but also the mortar for its laying, since the seams of this structure must be absolutely sealed and resistant to external influences.
Differences in solutions depending on the masonry area
This diagram shows the zones of the furnace structure, by which you can determine which solution is used in each of them.
Different masonry mortars can be used in different sections of the furnace.
Since only the chimney masonry is being considered, it is necessary to decide on the mortar used in zones numbered 7 to 11. If the stove design includes a main-type pipe, then zone No. 3 is also subject to consideration.
- So, zone No. 3 is the first two rows of a basic type chimney, which are laid on a concrete foundation and are located under the finished floor. Since these rows are the basis for the masonry of the entire chimney structure, they must have sufficient strength and resistance to high loads. Therefore, for their installation, a sand-cement mortar is used, which is mixed in proportions of 3:1 or 4:1. Some stove makers prefer to add ½ part of lime to it, which will make the mixture more plastic.
- Zone No. 7 is the first two rows of the shell pipe, which are located immediately on top of the furnace. This area is called the source of the chimney; the temperature in it reaches 355÷400 degrees. The source is laid on a clay-sand mixture.
- Zone No. 8 - the fluff of the chimney pipe is located in the living room, right under the ceiling, before the structure passes through the attic floor. Sometimes this structural element can cover the passage itself, but ends in the attic. The temperature in this area can also reach 355÷400 degrees, so the masonry is also made using clay-sand mortar.
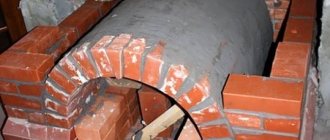
- Zone No. 9. For this area, you can use sand or expanded clay, as well as clay-sand mortar. This zone of the pipe is called cutting and serves to protect the flammable materials of the ceiling from overheating. To create a groove, a metal box is constructed around the pipe and then filled with one of the selected materials. Another cutting option is to thicken the pipe walls in this place.
- Zone No. 10 - the neck of the pipe is located in the attic and faces the street, therefore it experiences heavy loads from temperature changes and the influence of external factors. For this section of the pipe, a sand-clay solution with the addition of cement is most often used.
- Zone No. 11 - the chimney head is laid out from the same mortar as the neck of the pipe, or simply using a cement-sand mixture.
Composition of masonry kiln mortars
Materials for solutions must be well cleaned of various impurities. Clay is taken with medium fat content, sand is washed and sifted, lime must be slaked. Dry clay and sand are cleaned by sifting through a sieve made from a mesh with cells of 1×1 mm. Clay can also be cleaned after it has been soaked by rubbing it through the same sieve. This cleaning method is faster and more effective.
An approximate recipe for various solutions is given in the table:
| Types of solutions | Clay mortar | Mortar | Cement mortar |
| Materials used | Material consumption in parts | ||
| Sand | 4 | 2,5 | 3-4 |
| Fireclay clay | 1 | — | — |
| Regular clay | 1 | — | — |
| Lime | — | 1 | — |
| Cement M400 | — | 0,5 | 1 |
Since clay-sand mortar is the main one for laying a chimney, its preparation is worth considering in more detail.
The durability of the structure and the safety of its operation depend on the quality of the solution.
Before mixing the solution, the purified clay must be prepared. It is soaked and mixed well until smooth; it should sit and swell, absorbing water. This process will take 12÷14 hours. The soaked mixture is stirred periodically and water is added to it if necessary. At the final stages of soaking and mixing, sand is added to the clay according to the proportions. Mixing a regular clay solution is carried out in proportions 1:2, 1:3 or 1:4 - this parameter depends on the fat content of the clay; the fatter it is, the more parts of sand are added to it.
It is recommended to test different proportions of the solution - make prototypes - balls or ropes, and see which one will be the most stable after drying. Based on the results of such an “experiment”, it will be possible to choose the optimal ratio of ingredients.
The solution should have a uniform consistency, without lumps or inclusions, be plastic and easily slide off a clean metal spatula.
The masonry mixture is applied to the brick in a layer 8÷9 mm thick, and when pressed with the top brick, a seam of 6÷7 mm should form.
Chimney laying
The laying of the head pipe begins from the roof of the furnace, and the main chimney - from the foundation, which is laid out according to the same principle as the foundation for a heating structure.
It should be noted that the arrangement of the chimney is not as complicated as the layout of the stove itself, so it will be easy to understand.
Different versions of chimneys may differ in the number of rows and design features. Masonry is always done with bandaged rows.
Below in the tables we will consider one of the options for laying a mounted chimney, as the most common, with its passage through the attic floor and through the roof.
The order of laying the chimney
- Stage one is the construction of a chimney pipe from the roof of the stove to the roof.
| Illustration | Brief description of the operation performed |
| The first two rows of the chimney neck, each of which consists of five bricks, must be made carefully and perfectly evenly, as they set the direction and evenness of the remaining rows of the structure. | |
| All rows of the chimney neck are laid out in the same way. The number of rows in each case may be different, but this part of the pipe must be completed two rows before passing through the attic floor. | |
| Next comes the fluffing of the chimney. It can also consist of a different number of rows - from two to four. Each row of fluff is placed with a protrusion outwards of 30÷35 mm, resulting in a stepped structure that expands towards the ceiling. Despite the fact that this section of the pipe expands to the outside, the internal chimney channel remains in its original dimensions. | |
| In the picture presented, you can see the section of the pipe neck from above to the fluff. | |
| Shown here is the first row of fluff, which does not reach the surface of the attic floor by one row. It already consists of 6 solid bricks, two halves (the brick is divided transversely), 2 halves (the brick is divided lengthwise) and 2 quarters. | |
| The next row, also included in the fluff, brings the chimney to the level of the finished floor of the attic, and between the brick and the floor materials a gasket is made of non-combustible material (usually asbestos sheets cut into strips are used for this). This row consists of the same number of bricks as the previous one. | |
| The next row of fluff is the widest in cross-section, and its outermost bricks extend to the surface of the finished floor of the attic, approximately 30÷35 mm. This row consists of 12 whole bricks and 3 halves. | |
| 1 row of riser is laid on top of the fluff. Its length and width return to the original size of the pipe, and it is laid out from 5 bricks. | |
| Next, a hole is measured and cut in the roof through which the chimney will exit to the street. To accurately mark the hole for the passage of the pipe, you should use a plumb line. The hole is cut using the most convenient tool, for example, a jigsaw. | |
| When the opening for the passage is ready, the chimney riser is laid out completely, each row of which consists of five bricks. Strict control over the verticality of the masonry is mandatory. |
- Stage two - passing through the roof and the head of the pipe.
| Illustration | Brief description of the operation performed |
| The last row of the riser is laid half a brick above the bottom of the roof slope in a cut hole. Between the brickwork and the roofing material, as well as the sheathing, a gasket of asbestos strips is made. | |
| The next stage is the first row of the chimney section, called the "otter", which has an expanded size compared to the riser. The front of the row - the bricks move forward, blocking the underside of the passage hole. For this row you will need 5 whole bricks, 1 half, 1 part ¾ brick, 1 part - ¼ part brick, that is, one of the bricks can be divided into ¾ and ¼ parts. | |
| Second row "otter". The size of the external section of the pipe becomes larger due to its increase in the front part. The front two bricks move forward and to the sides 30÷40 mm above the previous row. For this stage, 5 whole bricks were used, 3 halves and one brick was divided into ¼ and ¾ parts. | |
| The next two rows are laid out according to the configuration of the previous one, but with the bricks tied together. | |
| The fourth row of “otters” is placed with a protrusion at the rear of the section - it hangs over the roof and covers the joint between the brick and the roofing material. For this row, 8 solid bricks are used, 2 parts - ¾ bricks and ¾ bricks divided into two parts lengthwise. | |
| Next, the first row of the chimney neck is laid out. The row consists of five bricks, which are shifted inside the masonry by 80÷90 mm, that is, everything returns to the original perimeter of the outer section. Next, in the same order, with the rows bandaged, the neck of the chimney rises to the required height, taking into account the fact that the head, consisting of two rows, will also be laid out. | |
| The next stage is the first row of the head. It is laid out with a protrusion outward of 30–40 mm, and thus will be one of the protective elements of the pipe neck from precipitation. The row consists of 5 solid bricks, 1 part ¾ brick, 2 parts ¼ brick, 6 halves of bricks cut lengthwise. | |
| The final row of the head, consisting of 5 bricks, is laid out with an inward shift by the same 30÷40 mm. The protrusion of the previous row is covered with concrete mortar with a slope towards the outside. A cap will be attached to this protrusion and to the last row to prevent precipitation and debris from entering the chimney channel. | |
| From the outside, the chimney pipe structure passing through the attic floor, rafter system and roofing material will ultimately look something like this. |
The gap between the pipe and the roofing must be sealed.
After laying the pipe itself, waterproofing must be installed around it on the roof, which will hermetically seal the joints between the walls of the chimney and the roofing material. One of the options for this passage design is shown in the attached video:
Video: How to insulate the passage of a pipe through an “ondulin” roof
In conclusion, it must be said that laying the chimney itself is quite doable even for a beginner, but when working at height, all safety measures must be taken into account. Of course, it is better to build a chimney together with a reliable assistant who can not only give sensible advice on masonry, but also provide the necessary insurance.
Video: Demonstration of basic techniques for laying a brick pipe
Make it yourself or order it
You can make some elements yourself for installing single-layer pipes or lay out a brick structure (if you have the skills of a qualified mason).
But the installation of prefabricated structures can be done with your own hands - this will help save a considerable amount from the family budget. You will have to pay a lot for the services of a qualified team - the amount is comparable to the cost of materials. There is a risk of running into unskilled workers.
When deciding whether to do the work yourself, you need to carefully analyze your capabilities:
- How accessible is the roof;
- do you have friends or relatives who can help;
- Do you have a fear of heights?
- What are your qualifications in performing repair work?
Fire safety requirements for chimneys
The distance from the surface of ceramic, insulated steel and asbestos-cement chimneys to combustible house structures must be at least 250 mm; for brick chimneys and sandwich pipe structures - at least 130 mm.
It is necessary to protect building structures made of combustible materials using cement or gypsum plaster on a mesh with a thickness of at least 25 mm.
If the roof covering can burn (roofing felt, bituminous tiles, ondulin), or leaves or fluff can accumulate on it, a mesh spark arrester must be installed on the roof cap.
Remember that the life and health of your loved ones depends on the quality of smoke removal.
Fire safety rules
When constructing chimneys, fire safety regulations must be strictly observed.
Particular attention is required to the chimney assembly diagram and the correct arrangement of the nodes for the passage of smoke exhaust channels through the ceilings and roof. You should also not overload solid fuel heating appliances with wood.
The chimney should be isolated from combustible structures by laying basalt insulation. If it is used for non-thermally insulated pipes, then the layer thickness is 300 millimeters; when brick or metal products are used, then 150 millimeters is sufficient.
Which one is better to choose?
The choice of chimney largely depends on the parameters of the installed heating unit (design, temperature, type of fuel used), the degree of readiness of the house (we are modernizing an old house with a stove and a wall pipe, the house is only “in design”, or the load-bearing structures have already been installed, or there is already finishing) ; heated volumes.
Features of various types of chimneys are given in the table:
Table 1
| Name | Advantages | Flaws |
| Brick | Durable and high temperature resistant masonry construction, durability depending on the liner material. | Complex installation requiring highly qualified masons; heavy weight, need for a foundation; long installation time, the need to replace the liner approximately every 10 years. When working with modern boilers and fireplaces, a brick without a liner can collapse in literally 10 years. Wall structures can only be installed during the construction of a house. |
| Ceramic | Service life up to 50 years, smooth internal surface, high installation speed; high acid resistance, good thermal insulation; withstands temperatures up to 550° | Expensive option; installation requires some qualifications; there is a need for a foundation; fragility |
| Single-layer steel (and asbestos-cement) | Smooth inner surface, lightweight, inexpensive, high speed of installation, easy to repair; resistance to corrosion and condensation | Insulation required; When passing through structures made of flammable materials, large offsets are required; They burn out in 10-15 years, there are no components - during installation you will have to make all the elements yourself. Galvanization will last five years (or less) |
| Steel sandwich type | Long service life, smooth inner surface, light weight, quick easy installation, easy repairs, high resistance to corrosion and condensation; can be installed/suspended outside the building; good thermal insulation | Quite expensive elements |
You should not use flexible steel corrugation - they burn out very quickly.
Despite the price, it is worth choosing modern ceramic chimneys or “sandwich”. If necessary, they can be installed both in a finished house and outside the house, they are durable, fairly easy to assemble, resistant to high temperatures, well insulated, and have a large assortment of ready-made factory elements.
If you want to use an old wall box from a conventional heating stove, you need to insert a stainless steel liner and insulate it. But perhaps you should choose a sandwich - there will be less hassle.
Safety Tips
If there is a possibility of a noticeable increase in pressure in the channel, the connection points are also closed with special couplings, just in case. Often, when installing steel pipes, heat-resistant sealants are used to cover the joints. The more insulated the chimney, the more correct the draft.
Despite the excellent insulating properties of “sandwiches”, when pipes cross floors, there is some likelihood of overheating and ignition of materials adjacent to the pipe. To guarantee a certain level of fire safety, it is recommended to increase the thickness of the thermal insulation layer at the joints.
Fixing a chimney with your own hands is not at all difficult; all you need to do is understand the device and know the basic safety rules. After installation, it is necessary to properly maintain and clean the chimney to reduce the risk of accidents when operating stoves.
There are effective folk remedies for cleaning chimneys. So, recently it is often recommended to occasionally heat the stove with aspen wood: the result is a powerful flame that burns sediments on the surface of the pipe walls
You should not do this often, you should be careful, because it often provokes fires
What does a standard chimney consist of?
In fact, there are a lot of different elements in the design, some have a direct effect, some of them are only related, such as clamps, fasteners, and the like. However, many people think that in the simplest channel configuration, some parts can be dispensed with. This is a misconception, because after a while, the absence of any element will make itself felt. You can’t do without banal clamps, sealant alone is not enough, and things are exactly the same with fastenings. So what does a proper chimney consist of?
- Knee. They are always needed, because the correct chimney may not go in a straight line, it needs a turn, a bend, and without this device you can’t go anywhere.
- Tee. Some builders include them in the same column as the knee, but this is not true. A tee is a full-fledged structural element that can include outlets for more than two pipes, while having a special maintenance hatch; as a rule, the correct channel is distinguished by this.
- The passage pipe is an indispensable element for overcoming ceilings and walls, especially in wooden buildings.
- Brackets, clamps, what they are and why, were disassembled above.
- The cutting of the roof is a full-fledged element of the system, which allows for sealed wiring and making the chimney correct and reliable.
Chimney elements
General installation rules
When figuring out how to properly make a chimney in a house yourself, you need to focus on certain rules. So:
- Installation of elements is carried out strictly from bottom to top.
- The pipes are fastened together only according to the principle of installing the inner part into the next one. Thus, we will protect the chimney from condensation.
- The use of clamps is mandatory when fastening parts with tees, bends, and the like.
- Please note that joints cannot be placed in the area of responsibility of the ceilings.
- To install tees, use brackets.
- Fastenings must be installed at least once every two meters.
- When installing and fastening sections, check for deflection.
- Do not allow the pipe to come into contact with communications.
- When laying the channel in areas of overlap, make indents of 150 mm. for insulated pipes, and 300 mm. for bare pipes.
- Do not allow the creation of “lying” areas of more than three meters.
Based on these rules, the question of how to build the right chimney will not cause serious concerns. In general, chimneys for a home may differ in parameters, but most of the listed rules apply to everyone.
Frequent errors and problems during installation
The most serious mistake is the lack of a condensate collector and elements with hatches for cleaning.
In places where structures pass through ceilings, it is strictly forbidden to install joints of individual elements - leaking hot smoke can cause a fire.
A very significant mistake is the absence of a deflector or at least a cap over the chimney.
Snow and rain should not get inside the pipe - they increase the formation of condensation, and ice can block the cross-section of the pipe.