Insulating walls with foam plastic does not solve the problem of thermal insulation of a private house. Heat will escape through the ceiling, and the loss of thermal energy through 1 m2 of ceiling space will be several times higher than through a wall or floor of the same area.
Here we observe the action of 2 factors simultaneously. The first is the smaller thickness of the ceiling, which makes it easier for heat waves to overcome such a barrier. The second is that warm air accumulates above, in the ceiling space (for those who forgot their school physics lessons, let us remind you that lighter warm air always rises upward). And the higher the air temperature, the more intensely solid bodies conduct thermal energy through themselves (also from the basic concepts of the school physics curriculum).
Insulating the ceiling with polystyrene foam will help solve the problem of energy saving in a house, country house or garage.
Characteristics, pros and cons of ceiling insulation with foam plastic
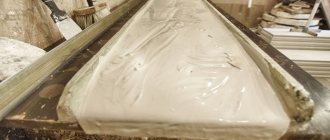
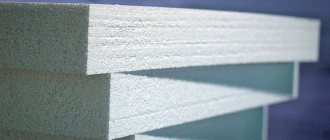
Foam plastic (chemists call expanded polystyrene) is a modern building material widely used in the construction industry. It is a light, white sheet made from polystyrene (styrene). It has a clearly visible granular structure, where each individual grain consists of many air chambers filled with carbon dioxide.
Produced using a non-press method. Many professionals confuse it with insulation made from the same raw material - polystyrene, but produced using a different technology: the extrusion method. A typical representative of extruded polystyrene is Penoplex.
Currently, liquid foam plastic - penoizol - has appeared on the building materials market. The technology of its use is fundamentally different from traditional methods of foam insulation. Therefore, in the opinion of the editors of StroyGuru, it deserves a separate material, and therefore will not be considered in this article.
Characteristics
The widespread use of polystyrene foam in various areas of the national economy is due to its technical and operational characteristics:
- low thermal conductivity coefficient - 0.037-0.043 W/(m×°K);
- light weight - 8-40 kg/m3;
- high level of compressive strength - 0.04-0.16 MPa;
- low level of water absorption - 2-4%.
Expanded polystyrene is produced in different thicknesses, from 10 to 100 mm, in increments of 10 mm. In case of a non-standard order, the equipment can be reconfigured to any sheet thickness, up to 500 mm. Dimensions have two standards: 500x1000 mm and 1000x1000 mm. On sale you can find, although rarely, a size of 1000x2000 mm.
Advantages and disadvantages
Like any building material, polystyrene foam has its pros and cons. Strengths include :
- durability - thanks to various additives, the service life is 20-50 years;
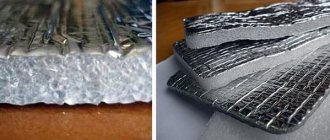
- low thermal conductivity;
Comparison of thermal conductivity of different materials.
- affordable price for mass buyers;
- ability to withstand frost up to 50oC and heat up to 75oC;
- simple insulation technology - all work can be done with your own hands;
- low density, as a result of which it is possible to insulate all structural elements of the building without exception;
- resistance to cement-sand and gypsum mortar, fungi and mold.
weaknesses :
- despite the addition of fire retardants, it burns well with the release of harmful and toxic substances;
- during a fire it melts and spreads over structures, increasing the area of fire;
- when heated above 30oC, it begins to release harmful styrene;
- contrary to popular belief about good noise-absorbing properties, it actually resonates, enhancing the sound flow;
- melts when most types of solvents come into contact with the surface;
- intensively deteriorates under sunlight;
- does not allow steam to pass through;
- has low bending strength.
Despite the introduction of various additives against mice and rats, it is still their favorite habitat.
For reference: this type of insulation is discussed in more detail in the work “Foam Insulation”.
Correct calculation
The beginning of each repair-related activity begins with a calculation. By measuring the length and width of the room and multiplying these two figures, you will determine the area of the room. As a rule, the ceiling of the room is insulated with polystyrene foam 4–5 cm thick.
The cost of work and materials will directly depend on the insulation method. Various additional materials will lead to additional costs, but the quality of insulation will be much better. The choice of method depends only on your budget and the time allocated for repair work.
Which foam is suitable
Trade offers five grades of foam plastic: PPS-10 (PSB-S-15), PPS-14 (PSB-S-25), PPS-16F (PSB-S-25F), PPS-25 (PSB-S-35) and PPS-35 (PSB-S-50). They all have different densities, purposes and prices. For example, PPS-10 (PSB-S-15) is used mainly for insulating walls using the “well” method or from the inside of the room (walls and ceiling) when using sheathing under a suspended ceiling or without it under a suspended ceiling. In addition, insulation with such a density has proven itself well when insulating roofs. Its price starts from 1900 rubles/m3.
And the specialization of expanded polystyrene PPS-14 (PSB-S-25) is thermal insulation of indoor walls under decorative plaster, paint and wallpaper, as well as ceilings outside and inside with an adhesive fastening method under paint, liquid wallpaper and decorative plaster. Price - 2390 rub./m3 and above.
Foam with markings.
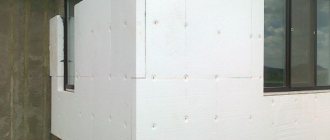
The grade PPS-16F (PSB-S-25 F) is offered especially for “wet” façades. The price starts from 2900 rub./m3. The insulation of the garage ceiling with polystyrene foam stands out separately: inside you can use PPS-10 (PSB-S-15) or PPS-14 (PSB-S-25) insulation, but outside the ideal option is PPS-16F (PSB-S-25 F ). But you can also use the PPS-25 (PSB-S-35) brand. In this case, price decides everything.
Summarize. For the ceiling from the inside of the room when using lathing or under a suspended ceiling, you need polystyrene foam with a density of 15 kg/m3 (PPS-10). For painting, wallpaper and decorative plaster - density 25 kg/m3 (PPS-14).
Outside under the laid floor with a ventilation gap - grade PPS-10 (PSB-S-15). If you plan to walk on the insulation (there will be no attic), then you need PPS-14 (PSB-S-25). For insulating the ceiling on top of a garage, the ideal option is PPS-25 (PSB-S-35).
Thickness
If everything is more or less clear with the brands of insulation, then with the thickness of the foam for insulating the ceiling in a private house, not everything is so simple. We need to count. It is difficult to do this on your own: even experienced builders do not know where to find many coefficient values for thermal formulas. In this case, what can we say about the owners who perform the work on their own?
There are two options: search for online calculators on the Internet (can be found here) or use the experience already accumulated:
- 50 mm when insulating the ceiling in a private house from the inside or outside;
- 20-30 mm for an apartment and the ceiling in a private house with a warm roof;
- 70-100 mm for insulating the ceiling of a cold cellar or basement;
- 100 mm for insulating the garage from the outside.
Causes of condensation
If, after insulation with polystyrene foam it drips from the ceiling , the thermal insulation is made poorly: the low surface temperature collides with steam and warm air rising upward, resulting in the formation of droplets of moisture that settle on the coating.
Drops appear when steam cannot escape, and the higher the humidity in the room, the lower the dew point . The formation of condensation leads to the appearance of mold and fungi and deterioration of thermal insulation.
The most common causes of condensation can be:
- ill-conceived ventilation design;
- lack of an insulating layer or its incomplete protection;
- incorrect placement of insulating layers;
- poor-quality insulation, which leads to freezing of the ceiling covering;
- with temperature changes resulting from different insulation in different areas.
Temperature changes can occur especially often:
- in the cellars on the ceiling;
- in detached garages and sheds;
- on balconies and loggias;
- in poorly ventilated areas;
- when insulating roofs with a large slope, where waterproofing or insulation can roll down, forming cold areas.
How to prevent condensation
To prevent condensation, you must:
- think through the ventilation ducts and air gap in the insulation layer correctly;
- when purchasing, do not skimp on the quality of insulation, waterproofing, vapor barrier;
- when purchasing a premises, pay attention to the design of the ventilation system and the consistency of its operation;
- determine the indicator of importance in the room: at levels above 40%, condensation formation is the norm.
If there is condensation, what can you do?
If there are already deficiencies in thermal insulation, the process of eliminating them is quite labor-intensive:
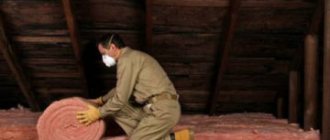
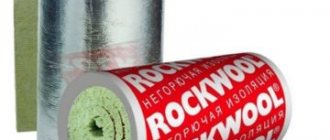
- insulate the finished coating from the cold ceiling: insulate with mineral wool, cover with expanded clay, apply a layer of brick chips, lay foam insulation;
- you should check the condition of the insulation: disassemble the insulation cake and carefully examine whether there are any breaks or damage, as well as whether there is water absorption;
- if moisture has penetrated to the inner layers of the finish, you need to clear the surface up to the main ceiling (concrete surface), dry the ceiling using a hair dryer, then replace the insulation.
In order for condensation to flow down, it is necessary to create an inclined surface . Depending on the location of the slope, a water drain is adjusted to the outside, under which a container is placed to collect water. Near single buildings, grooves are installed through which water flows into the soil.
To install an inclined condensate drain on the ceiling, you will need: polyethylene film material with a size equal to the area of the ceiling, sheets of galvanized iron, and plastic pipes.
Materials and tools
To insulate the ceiling you will need:
- polystyrene foam - the grade and thickness depend on the location of the work and the method of finishing the ceiling;
- roll-type waterproofing material for insulating the ceiling in the garage from the outside;
- vapor barrier membrane (type A or AM) and film (type B or C);
Attention: the rules for working with vapor barrier materials are described in detail in the work “Installing a vapor barrier with your own hands.”
- timber for sheathing 40x50 mm;
- rail 30 x 50 mm for installing a counter-lattice;
- reinforcing fiberglass mesh;
- deep penetration primer;
- fasteners for sheathing (metal corners, self-tapping dowels, wood screws);
- glue. For large areas, it is best to buy Ceresit ST 85, and for the ceiling it is financially justified to use synthetic adhesives based on polyurethane resins. But it should be remembered that the reinforcement of the insulation surface is carried out only with a cement-based adhesive solution. In this case, for financial reasons, it is better to buy dry types of glue;
- special fasteners for foam plastic - umbrella dowels or dowels with a rondole washer;
- polyurethane foam (be sure to check for interaction with the foam so that it does not melt) or polyurethane adhesive foam for sealing cracks;
- stepladder or strong table;
- hammer drill or electric drill;
- drill bits for drilling holes for dowels through polystyrene foam;
- mixing attachment if the glue is cement-based;
- container for glue;
- screwdriver;
- putty knife;
- paint brush (roller) for priming the ceiling;
- jigsaw or hand saw for wood;
- roulette;
- construction knife - needed for working with hydro- and vapor barrier materials;
- a hacksaw with a fine tooth for cutting insulation;
- pencil.
Laying methods
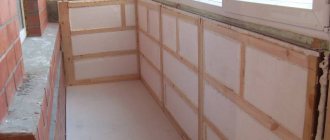
Optimally, it will use polystyrene foam as insulation on the outside. It can also be used inside, but in this embodiment, the boundary zone for condensation formation is between the foam layer and the ceiling. In reinforced concrete buildings, this can lead to dampening of the concrete and destruction of the foam itself.
In order to attach sheets of material from the outside, it is necessary to assemble a sheathing that is the same thickness as the foam parts, or make it thicker than them.
If it is impossible to lay a layer of heat insulation on the outside, then you can use it for the inner layer of insulation. However, in this case, it is advisable to glue the foam boards directly to the concrete base as tightly as possible. There are other options for securing the heat-insulating layer.
Preparatory work
Before insulating the ceiling with foam plastic, it is necessary to carry out preparatory work. For concrete floors you need:
- dismantle the overhead lighting, and then insulate the exposed ends of the electrical wiring with electrical tape or terminals;
- remove old finishes (paint, whitewash, liquid wallpaper);
- tap the joints between reinforced concrete floor panels. In places with “bubbling” plaster, remove it;
- also remove the loose plaster layer from the surface of the panels;
- seal joints and places with removed plaster with repair mortar;
- if new construction is underway, check the ceiling horizon. If there are significant deviations, the surface can be leveled with gypsum mortar, but this is expensive, labor-intensive, and it reduces the height of the ceiling or the sheathing frame;
- clean from dirt, soot and volatile fats;
- After the plaster solution has completely dried, the ceiling is primed twice. The first layer is applied generously until the concrete has absorbed water diluted 30-40% with primer. If it dries quickly, you can do 2 passes. The second layer is applied after about a day - it takes time for the primer to adhere to the base. For better adhesion of the glue to the ceiling for re-priming, it is advisable to use “Betonokontakt”;
- if fastening is planned using the adhesive method, it becomes necessary to install lathing. The frame manufacturing technology is simple: a harness is attached to the ceiling or wall using metal corners and self-tapping dowels (the size of the drill or hammer drill chuck does not allow attaching it through the top of the beam to the ceiling or wall). The internal sheathing slats are attached to the frame in increments equal to the width of the slabs.
Preparing a wooden base is easier:
- the chandelier is removed, the wires are insulated;
- the ceiling is freed from paint, whitewash or wallpaper;
- Dirt and soot are removed, and greasy areas are degreased with gasoline or acetone;
- the wood is treated with an antiseptic and fire retardant;
- if necessary, the sheathing is filled. It can be attached directly to the ceiling using long wood screws.
When insulating a garage from above the ceiling, the main preparation comes down to hydro- and vapor barrier of the ceiling. The work is performed in the following sequence:
- the ceiling is cleared of debris;
- all cracks, joints between floor slabs, sinkholes and cracks are sealed with repair mortar. The technology is completely identical to preparing a concrete base for a screed (“Preparing the floor for pouring a screed”);
- the surface is treated with a bitumen primer (primer);
The ceiling is primed.
- Rolled waterproofing (most often roofing felt) is laid over the ceilings with an overlap, extending onto the walls by 20-30 cm. Joints are treated with bitumen mastic or liquid bitumen;
- A polyethylene film is laid on top of the waterproofing layer. There is an overlap of at least 10 cm. The seams must be sealed with tape. The film itself is attached to the walls with a stapler or tape. Some experts suggest attaching a vapor barrier to roofing felt, and sealing the staples themselves with tape. Let us note that such an amendment to technology has the right to life.
Compound
*
The styrene content in foreign-made material is 0.02%. This indicates that the product is harmless. When choosing such a heat insulator, high-quality and safe insulation will be ensured.
An increased temperature is the main negative factor that leads to the release of toxic substances.
Polystyrene foam can be harmful in the following situations:
- Manufacturing technology was not followed during production. This leads to an increase in styrene content to 0.05%.
- Safety regulations were violated.
- Thermal insulation material is of poor quality.
It is also recommended to insulate the room with foam only from the outside.
Insulation technology
Insulation of the ceiling with foam plastic from the inside of an apartment, private house, cottage, etc. can be done in several ways. The most common: frame and glue. To insulate the ceiling outside in a private house and in a garage, completely different technologies are used. Let's look at all of them in more detail.
Glue method
Fastening sheets of foam plastic to the ceiling with glue, followed by doweling, is discussed in detail in the work “Wall insulation with foam plastic.” Moreover, each operation is illustrated there with a photo.
Let's briefly describe the technology:
- glue is prepared;
- An adhesive solution is applied to the surface of the foam with a spatula. There are important nuances here that the editors of the StroyGuru.Com website advise you to look at in the above work;
- the insulation sheet is glued to the ceiling;
- the second row is fastened with a shift in relation to the seams of the 1st row of at least 150 mm;
- inserts must be 15 cm or more in width;
- After the glue has dried, the slabs are additionally secured with umbrella dowels. The editors again refer their visitors to the work cited, because... there are some nuances there;
- The surface of the insulating layer is reinforced with serpyanka mesh.
This is enough for decorative plaster and liquid wallpaper. For painting and paper (non-woven) wallpaper, the ceiling surface is primed and then puttied. The goal is to get a smooth surface.
Attention: foam insulation under a suspended ceiling can be attached in any way. Cheaper and easier - glue. In this case, the surface of the thermal layer is not reinforced, but is covered with a vapor barrier film (type B).
Frame method
When using the frame method, the technology for installing thermal insulation is simpler. Firstly, double fixation is not needed, and secondly, you can use polyurethane liquid glue, which is applied either with a snake or a strip around the perimeter with several points in the middle.
Polyurethane glue is applied.
Subsequent work is performed in the following order:
- foam boards are glued to the ceiling;
The insulation is glued to the ceiling.
- the gaps (slots) between the polystyrene foam and the sheathing slats are foamed. To do this, you can use polyurethane-based adhesive foam or polystyrene foam compatible with polystyrene foam;
The gaps are foaming.
- the surface of the heat-insulating layer is covered with a vapor barrier film (type B) with an overlap. Attached with staplers to the sheathing. Connecting seams and staples are sealed with tape;
Important: many builders ignore this operation, citing the vapor-tightness of the insulation as the reason for this decision. However, they forget about wood, which actively absorbs moisture from the air. And there's enough steam at the top.
The foam is covered with a vapor barrier film.
- a counter-lattice is placed on top of the vapor barrier.
Advice from experts
If only one wall begins to freeze, it is still worth installing insulation around the perimeter.
It is better to insulate windows and doors immediately after their installation, and insulate walls after 1-2 years.
It wouldn’t hurt to leave ventilation gaps between the foam and the wall. They should be small. When building a house, it is better to immediately think about the ventilation system.
You should not stop only at insulating the walls, since a significant portion of the heat can escape into the atmosphere through the ceiling and floor.
Returning to the question of the possibility of insulating a wooden house with polystyrene foam, we can conclude that this is quite acceptable. The main thing is to do all the work correctly, in compliance with fire safety requirements.
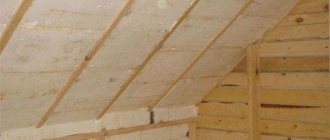
Insulating the ceiling from the outside
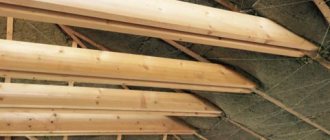
Installation of insulation from the attic is carried out according to the following algorithm:
- Expanded polystyrene slabs are laid on the prepared base (cleaned and covered with a type A vapor barrier membrane). Their fastening is not provided;
Vapor barrier of the ceiling from the attic.
- all gaps between the beams and the foam, as well as between the insulation sheets themselves, are foamed with polyurethane foam;
- a vapor barrier film (type B or C) is laid on top of the foam plastic;
- OSB or flat slate sheets are attached to the joists.
If you plan to build an attic in the attic space, then a screed is poured onto the foam plastic, after which the work is carried out using the finishing flooring technology, although nothing prevents you from installing the floor on top of OSB sheets or flat slate.
Insulating the garage ceiling from the outside
The practice of insulating the garage ceiling, also known as a flat roof, with basalt fiber on the outside is widespread. Is it possible to insulate the ceiling with foam plastic in the same way? Yes, there are several types of insulation. The simplest one:
- foam is laid over the film close to the walls;
- all cracks are foamed;
- a vapor barrier film (type B) or geotextile is laid overlapping;
- Two layers of roofing material are laid on top of the film perpendicular to each other. The joints are sealed with bitumen mastic. To prevent water from seeping into the insulation during rain, roofing felt is not simply placed on the wall, but is covered at the top.
According to the second technology, the surface of the foam is reinforced with a metal mesh, and the top is filled with a cement-sand screed. Sometimes a layer of expanded clay is poured under the screed. But this is only if you plan to operate the garage from above.
Scheme of insulating the garage ceiling from the outside.
On top of the screed you can lay porcelain tiles, special artificial mats for grass or a soft roof.
In conclusion, properly performed ceiling insulation with polystyrene foam can significantly reduce heat loss. According to various estimates, from 17 to 25%. All work does not require special knowledge, so it can be done on its own.
Advantages
Please note: in a wooden house, you can do without a vapor barrier only if the foam boards are laid without gaps: the seams between them are foamed or taped with adhesive tape. Moisture is harmful to both beams and rafters. However, sealing the seams is also desirable from the point of view of minimal heat loss.
Here, as you can see, the vapor barrier has been completed. And this is quite justified: it will protect the wood of the beams from moisture.
- Polystyrene foam does not cake over time, unlike glass wool. It fully retains its thermal insulation qualities throughout the entire period of operation.
- With the same thickness of the insulation layer, foam plastic is more effective than any mineral wool.
- Polystyrene foam is more expensive than mineral wool. With the same thickness - noticeably more expensive.
- Adjusting it to the size of the finished sheathing is somewhat more difficult. However, if the insulation of the ceiling from the inside with polystyrene foam is done from scratch, it is not a problem to make the sheathing according to the width of the sheet.
- Fire safety has already been mentioned: polystyrene foam is flammable.
Blue color in the interior: main characteristics
Before choosing a particular color to decorate your home, it is extremely important to study its features. After all, it will affect your mood and even your physical condition.
Therefore, it is best that the color suits you and does not cause negative emotions. To begin with, we note that blue color calms during emotional swings, reduces appetite and blood pressure. In addition, it has a beneficial effect on mood and the nervous system as a whole. However, many note that it also promotes concentration and can develop creative thinking. That is why, first of all, it is recommended to be used in the interior by emotional, impulsive and hot-tempered people.
As for kitchen design, blue is best suited for bright rooms located on the sunny side. This shade also helps to transform kitchens that are too narrow and small. Because it visually increases the space
It is important that it also goes well with many other colors. This allows you to experiment and make the interior design more stylish and unusual.
Most often, a kitchen in blue tones can be seen in Provence, country, shabby chic or Scandinavian style. But there are other, no less stylish options.