Since ancient times, our Slavic ancestors were famous for their cleanliness and health. There are many reasons for this - harsh living conditions, hardening from childhood, and even such a man-made miracle, known to us as the Russian stove. It is an important part of national culture and life, and is embodied in cinema and fairy tales.
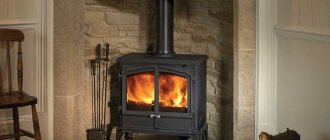
The classic Russian stove is a heating structure made of brick of impressive size and unique design. In the old days, Russian stoves were installed not only in huts, but also in bathhouses. The design of such stoves was different, as were some of the functions they performed.
How to make a Russian oven with your own hands
For a long time, our Slavic ancestors were famous for their cleanliness and health. There are a lot of reasons for this - harsh living conditions, hardening from childhood, and even such a man-made miracle, known to us as the Russian stove. It is an integral part of national culture and life, and has found its fulfillment in cinema and fairy tales.
The traditional Russian stove is a large brick heating structure with an unusual design. In the old days, Russian stoves were installed not only in huts, but also in bathhouses. The design of such stoves was different, as were some of the functions performed.
Fire safety rules for stove heating
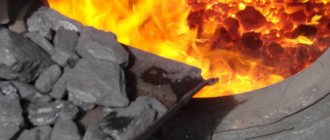
- Never use gasoline or other flammable liquids to light the stove. This may cause an explosion or fire.
- Carefully monitor the condition of the chimney. Soot deposited on its walls consists of oily compounds that can ignite. As a result, the pipe may collapse, which will lead to carbon monoxide entering the room. Sparkling soot can ignite dry leaves on the roof or wooden structures located close to the house, which will lead to a fire. If the view is closed before the carbon monoxide burns out, it can spread into the living room. Carbon monoxide poisoning can be fatal.
When using the stove, fire safety regulations must be carefully observed.
- If coniferous wood is used for the firebox, make sure that sparks and coals do not fall from the firebox door onto the floor - this can lead to a fire. A sheet of metal must be attached to the floor in front of the stove. This will protect it from fire.
- Do not allow the furnace to overheat, especially if your home uses hydronic heating. This can cause cracks to appear in the masonry, through which smoke can enter the room.
- Under no circumstances should you heat the stove at night. Remember that carbon monoxide has no odor. This can lead to unpleasant consequences.
If you choose the right firewood and follow the rules and recommendations for operating the stove, you will be able to use fuel economically, and your home will always be warm and cozy.
Building culture
Only clay and brick were used as construction materials, but this did not affect the operational period - the stoves served their owners for decades. One quote says: “They were so strong that it was difficult to destroy them with a hammer.” In fact, the strength of the brick, complemented by the properties of the clay to transform into stone when fired, the design features and the masonry technique - all this makes the heating structure almost eternal. This is actually why they are still popular.
This is what a modern Russian stove looks like in the interior. Photo of a real estate, working oven
Advantages and disadvantages
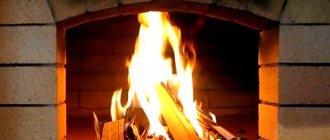
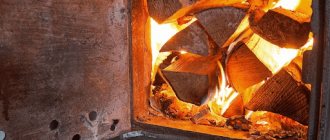
The Russian stove is a periodic heating device. During operation, the device accumulates energy, which is stored for a day. Models can be heated with any solid fuel, but it is better to use firewood and shavings.
You can distinguish a Russian stove from a similar design by its crucible. The firebox combines the functions of a combustion chamber and a cooking zone. Inside the element, food is not just boiled, but cooked without contact with flame. The result is very tasty and aromatic dishes, which can be recognized by their specific smell and richness. The products retain beneficial substances and do not create carcinogens.
Pros and cons Source zen.yandex.com
If the structure is correctly folded, then the Russian stove has a high heat capacity. The equipment accumulates and evenly releases the collected heat into the home. The temperature is maintained at the same level, allowing you to simmer dishes without harming the food. The device does not burn oxygen, which has a positive effect on the microclimate in the house.
Food near the fire Source zen.yandex.com
The Russian stove has a high degree of safety. All structural parts that come into contact with an open flame are protected from people by bedding. If the rules of kindling are followed, the walls of the device never heat up to a critical degree. Even novice stokers do not fall out with hot coals.
How does a Russian stove work?
Classically, a Russian stove with a stove bench was used to heat the house. Structurally, it consisted of the following elements:
- foundation (custody);
- furnace body (mass);
- crucible;
- mouth;
- pole;
- undercoat;
- underbake;
- stoves;
- roof;
- hello.
The crucible is a fuel combustion chamber (firebox), which can figuratively be called the “heart” of the furnace. Also used to cook food. Its upper part is called the arch, the lower part is called the under or flank, and the front wall is called the cheek.
Fuel is inserted through the mouth; it is a hole in the Russian stove in front of the furnace, having a height slightly less than the roof of the firebox. In front of the mouth there is a shelf - a spare platform on which dishes or other items are placed as a result of or after use. It is disconnected from the mouth using a valve. The unheated part under the shelf (sub-rack) is used for storing dishes and kitchen items. Firewood was stored in the oven - an internal niche under the ledge.
The Russian stove was equipped with a hail, a specialized device that forced smoke into the chimney. Small niches (stoves) were made from inside the stove body, thanks to which the heating surface was increased, herbs, berries and mushrooms were dried in them, and dishes were stored.
Russian stove with fireplace and stove bench
The bed was built on the top of the stove, in other words, on the roof. Its continuation was the polati - a boardwalk between the surface of the house wall and the stove, where one could comfortably sit, sleep and enjoy the warmth of the bricks, and in the summer, dry vegetables, fruits and mushrooms.
If you have a cast iron stove
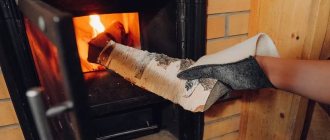
Cast iron models have average inertia and are not inferior in durability and strength to brickwork. Optimal conditions for burning firewood in them are achieved by tightly closing the fire door and the ash pan (fresh air is supplied in small portions or is shut off; in addition to firewood, pyrolysis combustion of flue gases occurs inside the sealed cast-iron firebox). Laying a new portion of firewood is carried out using special gloves, after carefully and smoothly opening the door and closing it the same way; the less the internal pressure fluctuates in such stoves, the better.
How to do it yourself: technique and subtleties
It should be remembered that the construction of such a massive structure is a difficult task even for a skilled craftsman. However, if difficulties do not scare you, then let's begin.
Depending on the dimensions, there are large (231x160 cm), medium (213x147 cm) and small (178x124 cm).
Drawing of a Russian stove
Very often a Russian stove is built with dimensions of 180x213 cm and a width of 142 cm - this design is capable of heating a room of 30 sq.m.
To build it you will need:
- brick - approximately 1650 pcs.;
- sand, clay to prepare a solution in the amount of 70–80 buckets;
- valve having a hole 260x240 mm;
- view equipped with a half-door.
The drawings show the appearance and structure inside, the dimensions of the furnace with a special level scale for a row of bricks
From these images it is clear that the roof of the furnace and the underside have a slope towards the mouth (drawing A). Also shown are the installation locations of the stove fittings - valves, views, half-doors, how the chimney is arranged, where there is a protrusion-threshold that prevents the spark from escaping into the chimney and collecting soot from the stove (Drawing B). How the vaults of the oven and furnace are made is demonstrated by drawing V.
Scheme of a Russian stove
An excellent idea of the design of a Russian stove can be obtained using horizontal sections - ordering, which provides comprehensive information about how to lay a specific row, what bricks to use (whole, fractional) and where to place the set or various devices.
Order of the Russian stove
Following the diagram exactly, you can assemble a Russian stove with your own hands. But you need to understand that the brick sizes are original and vary. This will definitely give results on the 4th–5th row of masonry. You'll have to do different tricks to level the walls.
Cleaning the oven
Once a year, before the start of the heating season, the stove must be cleaned through special openings closed with cleaning doors. Using a poker, soot and fly ash particles are removed through these holes. If possible, it is good to scrape the inner walls of the stove with a poker or broom to remove settled soot and ash. After cleaning, the cleaning doors must be closed tightly. Clean the chimney as needed.
With proper combustion, virtually no soot is formed, and the furnace becomes clogged only with fly ash. But for prevention, it is useful to periodically heat the stove with aspen wood. Or, in an already heated oven, make the last load of firewood from aspen. Aspen and alder help burn out soot.
Remember, proper operation of the stove will save your time and money!
21.01.2012
Author: A. Batsulin
Selecting materials for construction
For laying a Russian stove, a simple red brick is usually used, which can withstand open fire for a long time and is especially durable. The main thing is that it has straight edges, the correct shape and high-quality firing, has no chips or empty spaces, and makes a ringing sound when tapped.
To connect the structure, a mortar was used, which was prepared from sand and clay - there were no other materials for construction in the old days. You can read about preparing materials for mixing and the proportions of clay mortar here. The use of high quality materials will ensure the reliability of the heating structure and ensure that the desired temperature in the room is maintained for a long time.
Choosing firewood for heating
Different types of wood differ in their properties, and the choice of firewood for firing a Russian stove should be based on studying the characteristics of solid fuel:
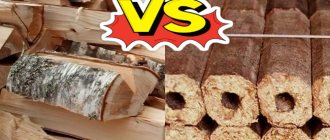
- Birch burns with great heat and has a pleasant smell. It is rarely used to fire home stoves. Due to the high tar content, birch firewood flares up very quickly, which makes it possible to use it for kindling.
- Oak firewood is superior to wood in heat transfer, has healing properties and burns for a very long time. The breed is considered elite and is usually used to light fireplaces or barbecues.
- Alder firewood can be stored without losing its qualities; it reaches the required humidity on its own, and due to its low resin content, it produces little smoke. Alder firewood is excellent for heating the stove.
- You can use aspen wood to clean the stove. They are able to reduce the density of soot in the chimney, due to which it simply crumbles into the firebox. However, this fuel is not suitable for constant use, because wood burns in a matter of minutes and does not emit very much heat.
- Firewood for kindling must be stored in a dry and well-ventilated place, and before placing it in the stove, remove rotten or beginning to rot logs.
Temperature in a Russian oven
The peasants determined the temperature in the furnace in an original way - using a piece of paper. They put it inside and watched how long it would take for the paper to char:
- if right there - the heat in the combustion chamber is more than 300 °C;
- after 5 sec - 270 °C, 15 sec - 250 °C, 30 sec - 230 °C;
- 1 min – 200 °C, 5 min – 180 °C, 10 min – 150 °C;
- not charred - less than 150 °C.
The photo cannot convey the warmth and comfort that comes from a Russian stove
If you have a steel stove
With the exception of models with double walls, stoves made of heat-resistant steel are generally not intended for constant heating of residential buildings with wood, but as an additional source of heat and comfort they have no equal.
Steel fireplace stoves, air heaters, models with hobs, due to their low weight, do not require a separate capital foundation and quickly warm up cooled rooms.
In order to extend their service life and maximize heat transfer from firewood, it is recommended:
• Monitor the condition of the walls and eliminate the risks of their deformation and overheating. Small portions of firewood are placed in metal stoves (no more than 2/3 of the volume of the firebox or the value specified by the manufacturer); the heating time for models with thin walls is limited to several hours.
• Ensure a sufficient flow of oxygen into rooms with air-heated metal stoves such as “Buleryan” or “Pobelly stove”. When planning to use such models for constant heating of residential buildings or frequent use, a method for laying additional air ducts and ventilation ducts in wooden walls is thought out in advance.
• Preheat very cool metal chimneys before adding the main portion of splinters and wood chips for ignition.
Tip: When installing a new metal kiln, the first firing is carried out outdoors if possible. In addition to checking its operation in a safe place, this action protects the walls and premises of wooden houses from absorbing the unpleasant odor of burning thermal paint.
How to heat properly
The only fuel was always simple firewood and wood shavings. In the steppe regions of Russia, where wood was in great short supply, only wealthy families could afford to use firewood as kindling material. Others adapted in their own way: peat, manure and straw were used. In addition to them, weeds and sun-dried reeds were actively used.
How to properly heat a Russian stove
There are the following methods for the combustion chamber of a Russian stove:
at the beginning of the kindling, remove the dishes from the furnace, clean it and the ash pan from ash, and open the valve on the chimney.
The first method is successful, the entire system heats up.
The fuel is tightly placed in the furnace (furnace) to a level slightly below the combustion chamber door. So much firewood is placed only in the first stack, then 1.5–2 times less. Ignition of firebrands is done from below or from above.
- The lower one (kindling under firewood) is more common and productive. It makes it possible to dissolve even wet fuel, but the rapid spread of flame can lead to incomplete combustion of the firebrands and unnecessary thermal loads on the firebox.
- It is better to use the top ignition, but only if the wood is dry. With this method, the flame spreads slowly, moving from top to bottom. The fuel burns more fully, and the combustion chamber experiences lower thermal loads.
When igniting a Russian stove, the mouth and ventilation valve are tightly closed, and after intense combustion begins, the latter is opened slightly, adjusting the draft.
Attention! A Russian stove cannot be heated in the smoldering mode created with a completely closed ashpit. Such work entails the rapid formation of soot and contamination of the furnace channels.
Modern Russian stove with a stove bench
Method two, “in Russian”. It is used when it is necessary to prepare food and there is no need to heat the entire room.
Firewood is placed under the furnace. At the beginning of the mouth, a few firebrands are stacked and they are ignited with the stove valve closed. Afterwards, the hearth is carefully moved in the center of the furnace to other logs. The stove valve, the furnace and blower doors are closed, only the ventilation door is open.
With this method, the heating structure does not fully heat up, but it is quite possible to cook food or watch an open fire (fireplace stove).
After the combustion chamber, the mouth and valves are locked to reduce heat loss and gentle, gradual cooling of the furnace.
Modern Russian stove with a stove bench
With a combustion chamber it is prohibited:
- use flammable liquids to light firebrands;
- placing various garbage and glossy magazines in it - this can lead to clogging of the stove channels with resinous soot, which is difficult to remove;
- use raw firewood;
- design the combustion chamber with an open damper;
- leave combustible materials on the roof that could cause a fire;
- keep flammable objects between the wall surface and the stove for the same reason.
Attention! The combustion chamber of a Russian stove should not last more than 2.5 hours. The walls of the furnace must not be allowed to overheat, in other words, their heating temperature should not exceed 70 °C. Failure to comply with operating rules will result in destruction of the furnace masonry, which will require repairs.
The Russian stove can also be installed outdoors
Throughout the work, the following unpleasant moments may appear:
- small cracks;
- deep through cracks;
- there is no traction.
In the first option, the reason is hidden in the wear of the stove solution or its poor-quality composition. During the repair, the old putty is cleaned off, the area is moistened and sealed with a new solution. You can significantly reduce the likelihood of trouble in the form of cracks by finishing the stove with heat-resistant tiles or plastering.
Deep cracks can be caused by various reasons: errors in stove masonry technology, thermal shocks, poor operation, ceiling pressure, and others. Such problems can be eliminated by partially dismantling the masonry and replacing the damaged area, eliminating the impact of the remaining parts of the structure.
Russian stove with fireplace in the corner
The reason for the lack of draft may be blockage of the chimney channel with combustion products or brick fragments. Repair in this case consists of cleaning the inside of the chimney using specialized cleaning holes. If the draft has disappeared due to the furnace being idle for a long time without operation, then you should first of all burn the paper in the oven until a humming sound is heard in the pipe, which is characteristic of the elimination of the air lock and the appearance of draft.
How to avoid getting burned by the stove in your home
After the wood burns out, quite a lot of coals remain. They can smolder for quite a long time, while carbon dioxide is released no less than during combustion. Therefore, at this moment you cannot completely close the chimney damper.
Open chimney damper
On the other hand, if the view is open for too long, the stove will quickly cool down due to heat leakage through the chimney. This problem can be solved by afterburning coals:
- To do this, they are raked onto grates in the middle of the combustion chamber, the combustion door is tightly closed and the damper is half closed. Then open the blower door for free access of air. The coals will smolder on their own.
- If the design does not have a grate, the remains of burnt firewood can be raked to the stove entrance. In this case, the firebox door must be closed, and the holes in the lower zone of the door must be open. Air is blown through the lower holes.
- If the design of the furnace does not allow you to quickly burn out the fuel and there is no time, small-sized coals can be removed from the combustion area and collected in a metal bucket. The main thing is to close it tightly with a lid and immediately take it outside.
It is unacceptable to extinguish the coals in the firebox with water, this will lead to damage and reduce the service life of the heating device.
Only after complete combustion of the coals can the valve be closed. Following this simple rule will help preserve your health, yours and that of your loved ones. Or maybe even life.
What does a modern Russian stove look like?
The modern Russian stove has changed very much compared to the “classics”. Its structure has changed, because there is no need to cook food in it. Its most popular varieties are now the Russian stove with a boiler for a bath, the Russian stove with a fireplace and a stove bench. There is growing interest in the Russian mini-stove, which fits perfectly into almost any modern style of architecture and in our time has gained great demand among fans and admirers of the foundations of our great-grandfathers.
Methods for warming up a frozen pipe:
- The first method is to eliminate the difference in air temperature inside the pipe and outside - in the room. The method is suitable for rooms with positive air temperatures. Open the door of the combustion chamber of the hearth, as well as the windows and doors in the room, so that warm air enters the room, and a draft provokes the movement of air masses inside the firebox and chimney.
- The second and main method is to warm up the chimney route. The material and design of the pipe do not matter, the process itself is important. A lit newspaper or paper should be placed in the chimney sweep door. To get the effect, you need to burn several newspapers or sheets of paper at once. The achievement of the effect should be noticeable by the behavior of the newspaper and the flame - they should be actively drawn into the smoke channel using the draft force activated after heating the pipe.
- You can also warm up the chimney using the furnace or fireplace itself. Instead of firewood, newspapers or paper should be placed in the firebox and several batches of this simple fuel should be burned. A slight but warm flame from a newspaper or paper will warm up the pipe, expel cold air into the street and normalize the draft level. As in the second method, the achievement of the effect will be noticeable by the behavior of the flame - it should tend inward and upward, towards the chimney.
- After the chimney has warmed up, you can try to carefully begin the lighting process. To do this, place a small amount of wood chips (be sure to be dry) in the firebox and light them. If the wood chips are well burned and the smoke goes up the chimney, you can start lighting the main fuel - firewood.
Attention! After heating the smoke channel through the inspection, cleaning holes and doors, they should be closed to prevent smoke and carbon monoxide from entering the room. https://www.youtube.com/embed/KJ4OA9LUoeE
Temperature in a Russian oven for cooking
Rules for cooking in the oven
There are legends about the taste of dishes cooked in a Russian oven.
And the secret is simple: the main argument influencing the taste of food is the temperature regime and cooking time.
In a Russian oven, due to its bulkiness and thermal inertia, dishes are cooked over low heat and simmered.
This option is considered the most suitable in terms of preserving the maximum number of nutrients, and also adds an amazing, beautiful and very homely taste to familiar dishes.
The shape and material of the Slavic pot absolutely corresponds to the properties of the Russian Stove.
Ceramics have low heat conductivity compared to metal, and this facilitates slow, almost boiling-free cooking.
A small bottom area ensures that the required thermal conditions are maintained, and a narrow neck reduces vaporization and contact with air, and helps preserve volatile substances.
The thick bottom of the pot means that heating occurs mainly along the walls.
For this purpose, the pots are made pot-bellied, with a developed surface on the side.
With long, smooth and uniform heating through the ceramic wall, boiling almost never occurs.
And if the broth boils, it boils mainly along the walls.
As a result, steam rises along the walls of the pot, and the main mass of the product is heated without boiling.
Steam does not pass through the thickness of the product, and essential substances will be preserved in the product.
The full bouquet of natural aromas of fresh vegetables is actually preserved.
And this without any frying, without any oil! However, the price to pay for such a delicious dish is a very long cooking time.
After all, without boiling, the layers of liquid in the broth do not interfere with each other, and the thickness of the products heats up very slowly than with boiling broth.
And lowering the temperature of the product leads to a significant increase in cooking time.
From the theory of pasteurization it is known that reducing the temperature of milk by just 15 degrees requires extending the heating time by an order of magnitude!
Cooking in a Russian oven is not difficult. You just need to practice for some time, looking closely and studying the properties of your stove.
The key rules of Russian cooking are:
1 - they begin to cook after the stove is well heated, there is no longer any fire, there are only coals and hot brick walls of the stove,
2 - liquid and semi-liquid dishes are in most cases prepared in cast iron or ceramic pots - specialized containers without handles.
3 - real pancakes in a Russian oven are baked on only one side, without turning over,
4 - in most cases, all the prepared dishes are placed in the oven at once (okay, the size allows you to cook in too high volumes): soup, porridge, roast, and pies - in other words, everything besides bread,
5 - bread is placed in the oven separately from all other dishes, in most cases when they are already cooked; the baking sheet with bread is placed in the oven using a specialized wooden shovel, after which the damper is immediately closed and not opened again until the bread is baked.
In addition to preparing familiar and popular dishes, in a Russian oven you can very easily smoke and dry fish, as well as berries and herbs.
It’s also quite convenient to cook lye on a Russian stove for washing clothes.
With a properly designed oven, you can store all your kitchen utensils in it.
And, of course, it’s so wonderful to sleep on a warm stove with the whole family!
Any recreation, processing, copying, dissemination of information in text form
or graphics on any other website or their arrangement for future reproduction
or distribution is prohibited and will result in civil or criminal liability
respectively with the civil or criminal code.
How can you heat a brick oven?
The efficiency of a furnace structure largely depends on the quality of the fuel supplied. Even not the best designs will heat rooms better than a properly built stove in which garbage is burned. Therefore, use the type of fuel for which the furnace structure was designed.
A wood stove must be fueled with wood. If it is planned to use another type of fuel, the structure must be designed accordingly. For example, a coal stove differs from a classic stove in a more developed smoke circulation network. During their passage, the flue gases manage to transfer a sufficient amount of thermal energy to the walls of the structure, and the heat does not immediately go into the chimney along with the combustion products.
The following fuel is also used for brick stoves:
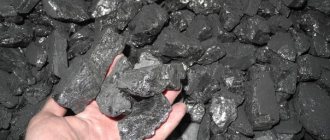
- Coal, hard or brown. This fuel has maximum heat transfer with minimal consumption, and is characterized by long and uniform combustion. When it burns in a stove, the temperature is much higher than from firewood. Therefore, the walls of the fireboxes in such structures are made much thicker and must be lined with refractory bricks. It has a number of disadvantages - coal dust is very corrosive and harmful to health. Fuel is sold in tons, which is not always convenient when the stove is used infrequently. In addition, without the same firewood, it will not be possible to light coal.
Furnace fuel
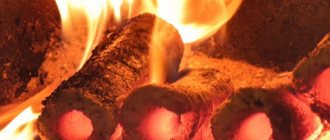
- Euro firewood or fuel briquettes. There are two types: RUF, formed by pressing wood chips and sawdust under pressure and glued together with a natural composition. Pini-kei, the same briquettes, but fired at the last stage of production, which makes them resistant to moisture and ensures long-term storage. Fuel briquettes burn for a long time (3-4 times slower than ordinary firewood) and heat the walls of the stove well. But they produce little external heat, so it is better not to use them in a fireplace. High-quality briquettes are quite expensive, but cheap briquettes crumble and do not produce long, slow combustion with a long heat release.
- Peat briquettes consisting of peat and sawdust. When burned, such material does not emit toxic substances, does not spark during combustion, and is easy to store as it takes up little space. Forms a small volume of ash (it can be used as a mineral fertilizer due to the increased content of potassium and phosphorus). Among the disadvantages, the most significant are low heat transfer and increased soot deposition.
- Pellets are cylindrical granules of wood waste of the same size. They are most effective when burned in a special boiler, but can also be used in a wood stove. Environmentally friendly fuel with a minimum content of ash substances, high dryness and high density, which transfers heat well, but is expensive.
Despite the fairly large selection of fuel types, firewood remains the most popular option.
At what approximate temperature is it cooked in a Russian oven?
Alyona
Guru (2705), closed 8 years ago
Sergey Afonshine
Connoisseur (283) 8 years ago
However, the main purpose of the oven has always been and remains cooking. To bake bread, when only coals remain in the furnace, the view in the smoke passage is closed, and the combustion chamber damper is slightly opened. The oven is kept in this state for 10-15 minutes, after which the temperature of the hearth is checked by throwing a little flour on it. If the flour turns black, it means it is overheated; it continues to be cooled. Brown color indicates normal heating, when bread can be placed in the oven. Anyone who has ever tried bread baked in a Russian oven, stewed cabbage soup or porridge will never forget their wonderful taste and aroma. It bakes pies very well, stews vegetables, meat and fish. All our very modern stoves cannot be compared in any way with the Russian oven. And the secret is that the heat from the Russian stove is divided quite evenly and the temperature of 250-ZOOOS remains stable for quite a long time. Heavy oven walls with a thickness of 250-390 mm provide good heat accumulation and thermos results. Even on the harshest winter days, the Russian stove could maintain a normal temperature in the hut for 24 hours with one fire.
Source:
Website of the Nizhny Novgorod Diocese of the Russian Orthodox Church
Yaric_t
Guru (4760) 12 months ago
Regarding the blackening of flour, this is a controversial issue. When my great-grandmother baked bread, she would throw a handful of flour under the oven. If the flour flares up, it’s still hot, if it’s just starting to smoke, then that’s what you need. Some people threw a piece of newspaper (the paper was smoldering - they were planting bread). I tested this technology in a gas oven. The temperature was measured with a laser thermometer on the walls and on the floor. The paper caught fire at a temperature of 230 degrees, the flour - 240. Everything smoldered at approximately 190. The borscht was put in the oven after the bread, even very much later. The temperature was much lower. And they first placed it further away while the cast iron was heating up, and then moved it closer to the damper, where the temperature was lower. In the end, the borscht did not boil, did not gurgle, but simmered for a couple of hours. I think that given the general salinity and acidity, the temperature inside the cast iron would hardly have exceeded 110 degrees. Pancakes, by the way, were baked a little earlier than bread.
Prohibited
- Use gasoline and other flammable liquids to light the stove. This leads to an explosion and fire.
- Burn household waste, polymers, roofing felt, roofing felt, old shoes, etc. in the stove. This leads to clogging of the stove with difficult-to-remove resinous soot and an unpleasant odor in the house.
- Heat with raw wood. A significant amount of heat is expended to evaporate the moisture contained in the firewood. Firewood is considered air-dry if it has been stored under cover for 1 year. If there is no dry firewood, then a two to three day supply of wet firewood is dried in the house (near the stove).
- It is prohibited to heat the stove with the combustion door open.
- Burn in the oven color magazines on coated paper such as “Liza”, “7 days”, “Relax”, “TV Park”, “Cosmopolitan”, “Men’s Health” and similar Russian and foreign publishers. The abundance of printing ink on their pages prevents the complete combustion of the paper - the ash from them does not fall into the ash pan, but remains in the firebox, clogs it and prevents the normal combustion of firewood. In addition, such ash should not be used to fertilize the garden for environmental reasons.
- Heat the stove with sawdust, shavings and similar woodworking waste. This fuel completely covers the grate. Continuing to smolder in the absence of air, it releases flammable gases that fill the entire convective system of the furnace. And then, with the subsequent entry of air and the breakthrough of the flame, an EXPLOSION may occur. It is especially dangerous to put sawdust into an already heated firebox.
- Cover the roof (top) of the stove with combustible materials. This leads to fires.
- Fill the space between the stove and the wall with combustible materials (firewood, clothing, etc.). This causes a fire and also reduces the heat transfer of the oven, preventing convection. In addition, drying is ineffective in a confined space without air movement.
- Reheat the stoves. The temperature of the furnace walls should not exceed 70 °C. If necessary, it is better to fire the stove more often than usual rather than use a forced firebox. This leads to destruction of the oven and creates a fire hazard.
- Lighting a stove in an unfinished house. The absence of a proper thermal circuit of the room will inevitably lead to overheating of the stove.
Fun facts about the Russian stove
Good afternoon friends.
Today I decided to talk about the Russian stove; of course, nowadays it’s quite difficult to find a real Russian stove, but in certain villages we can still find it. Such a stove was most common not only in the Russian Federation, but also in Ukraine and Belarus, and played an important role in the life of the Slavs.
What is a Russian stove? This is a massive structure with beds or a couch; the stove was located in the hut and served to heat the room and cook food. Polyata is a similar bed, a wooden flooring that was located under the surface of the ceiling between the stove and the wall of the house.
You know that our ancestors did not always eat potatoes, carrots and tomatoes; all this was brought from overseas countries. They also knew nothing about rice porridge. What did our ancestors eat, what was on their tables?
Almost all the food was prepared in a Russian oven, where it simmered, boiled, and fried. Those who have at least once tasted food cooked in a Russian oven will never forget its taste.
So our ancestors cooked everything in the oven. And then there was no concept: first, second and compote, one dish was both first and second. For the most part it was a variety of cabbage soup and hodgepodge. Moreover, in non-poor, wealthy houses, soups and dishes were prepared using meat; in poor houses there was lean cabbage soup.
It’s interesting how they prepared hodgepodge in certain villages. They cooked it in a very large cauldron over a fire and the neighbors brought everything they could eat from home. You see how rich and nutritious the hodgepodge was.
They prepared a variety of vegetables: turnips, pumpkin, zucchini. All this was baked, languished in the oven and then butter or sour cream was added to the finished porridge.
In addition to hot dishes, frozen vegetables, sauerkraut, pickled cucumbers, pickled apples, and dried fruits were very popular.
Drinks in use included fruit drinks, kvass, jelly and sbiten. As is clear, tea was not a common drink among our great-grandfathers until a certain time, and sbitni were made in samovars. Sbiten is a drink made with honey and spices. During the winter it was hot, and in the summer it was cooled in the cellars.
Despite the lack of some vegetables and cereals, in our time the diet was not meager, and people were healthy and well-fed. Many dishes from the menu of our great-grandfathers are now prepared in traditional ovens.
However, the oven also had its own rules and advice, just like today there are instructions for a wide variety of ovens for baking baked goods, microwave ovens, and so on.
I will provide you with certain rules that our ancestors primarily followed before cooking in the oven.
They always started cooking only after the stove had been heated quite well, there was no longer any fire left, but only coals and the red-hot walls of the stove;
Any liquid dishes were always prepared in specialized cast iron, clay or cast iron, placed in the oven using specialized grips with a long handle; they were of unequal width in diameter.
When pancakes were cooked in a frying pan, they were never turned over, but only baked on one side.
Very often, all dishes were cooked in the oven at the same time, almost everything except bread; bread was always baked independently of other dishes.
Here is a similar informative and, I hope, entertaining note today. If after reading this article you really want to make a Russian stove at home, then on the World Wide Web you can find many different methods and guides, the main thing is to treat this strictly and with all your heart, then everything will work out for you.
There are no recipes today, but in the “All Blog Posts” you can find many recipes that you can then use to prepare your dishes in the oven and more.
Yes, I almost forgot, it turns out that on May 19 they celebrate Russian Oven Day . why exactly 19 and how this holiday is celebrated there are many different rumors and guesses, but there is no documentary evidence.
Maybe someone knows what and how to write in the comments, it will be interesting for me and our readers to know.
Kindling the stove
With regular use of the stove, problems with kindling do not arise. However, if the stove has not been fired for a long time and is damp, or if it is warmer outside than in the house, then the stove may smoke when lit - this is due to the occurrence of reverse draft in the pipe. In this case, it is necessary to warm up the pipe by burning paper, birch bark or splinters in the cleaning area (closest to the stove valve). At the same time, light a fire in the firebox. You can first heat the stove in the Russian way, burning wood in the crucible, and then, when the pipe warms up, flood the firebox. You can just wait, perhaps in the evening it will get colder outside, and the stove will be easy to light. If it is not possible to melt and smoke comes into the room, then there is no need to continue heating - you can only smoke the stove and the room; you need to understand what the reason is (check whether the necessary valves are open, whether the cleaning doors are closed, etc.).
Features of the design of the Russian stove, variations in demand among forum users.
Despite their great age and great competition, Russian stoves are still popular among cottage owners. They are also used in homes, as a basic or additional heating unit, and also in a variety of outdoor complexes. On the FORUMHOUSE portal there are many examples of the implementation of both conventional options, with beds, and modified ones, focused exclusively on the preparation of pickles. Consider:
- What is a Russian stove?
- What are its design features?
- What kind of furnaces do our craftsmen build?
Russian stove - there would be no happiness...
Until approximately 12, Rus' was heated by smoke stoves - structures without a chimney, gaseous, liquid and solid substances from which came directly into the space of the room and were vented only through the door. Otherwise, this option was called black, since soot was deposited on the surface of the ceiling and other surfaces. In addition to this unique “decor,” the huts also had a distinct aroma.
In the next century, they tried to improve the method by adding an exhaust window with a wooden shutter in the wall above the stove, and then an exhaust pipe appeared in the ceiling. First of all, it was just a hole (smoke duct) with a valve; later it was equipped with a wood smoke vent (hog). And only after another couple of centuries, in the eighteenth century, did the first Russian stoves with a full-fledged chimney arose, which was greatly facilitated by the reform of Peter I. As in the case of beards, he did not confirm anything to anyone, but simply banned house-building with chicken stoves in first of all in St. Petersburg (1718), and in addition a couple of years later - in Moscow (1722).
This ban became an excellent incentive for theorists and practitioners of that time, who hastily improved the “smoking room” to a more effective multifunctional heating design. Now the stove not only heated the house, it also provided warm sleeping places, served as a dryer for food preparations, and also cooked food in it and kept it hot. And this is not to mention aesthetics and convenience.
Layout schemes (ordering) and calculation tables of the main components of Russian stoves were developed by architects I. I. Sviyazev and N. A. Lvov. The first printed publication devoted to the theoretical foundations of furnace business was published in the second half of the 70s of the nineteenth century. However, stove makers, most of whom were illiterate at that time, built good stoves on a whim.
Construct, financial base
Thanks to its large heat capacity, the stove collects heat and releases it into the room for a long time after heating. Thanks to this, the room does not get cold, even if it is not possible to constantly maintain a fire. The typical dimensions of a Russian stove were tied to arshins, but when converted to ordinary centimeters, they are rounded off in most cases.
- Length – 3 arshins (about 213 cm, now 210 cm).
- Width – 2 arshins (about 142 cm, now 140 cm).
- The height to the bed is 2.5 arshins (about 178 cm, now 180 cm).
Could a Russian stove of this size heat a room of about forty meters? With the use of modern energy-saving technologies, this area can be significantly increased. What then, what now, the shape can be whatever you want, but the design of the traditional Russian stove is unchanged.
- Ward - a foundation (stone, brick, concrete, wood); if the guard was wooden, it was combined with an under-furnace.
- Podpechek (podpechek) is a cavity under the stove, which is intended for storing and drying fuel.
- The hearth (vault) is the base of the furnace, insulated with backfill (sand, brick chips, expanded clay concrete), which ensures a good temperature in the cooking/oven zone.
- A stove is a small cavity for storing dishes; if it is located in the front, it is called a substack.
- The shelf is a platform in front of the furnace, where cooked food is left after being removed from the oven.
- Under - the base of the cooking zone, is made with a smaller slope forward (so that gases collect under the arch, and it is more convenient to move the dishes).
- Furnace (cooking area, combustion chamber) - fuel combustion and food preparation take place in it.
- The vault (sky) is the upper part of the furnace, square, arched or barrel-shaped, with a backfill on top to prevent direct heating of the stove bed.
- A bed (floor, roof) is a platform above the furnace, which is intended for resting or sleeping, one of the main components of a classic type structure.
- Overpipe - the top, a chamber above the pole, ending with a tapering nozzle (hail), in which smoke collects, giving off heat to the house before being discharged into the chimney.
- View - a valve with a hole above the hilum, located behind the flap, with the help of which the flow of cold air from the pipe is changed.
- Pipe (chimney).
- The valve is located in the pipe, above the view, making it possible to fully close the chimney.
And an example of a stove with a rubble concrete base.
In the usual version, Russian stoves are bell-type structures with a channelless convective system. Since the heat source is located almost a meter high from the floor, and the oven not only has no channels, but it is also insulated, the temperature difference in the room can be more than ten degrees. In modern stoves used for cooking and heating, this kind of problem is solved by installing chimneys instead of the oven, which provide equal heating of the room at all levels. Yes, and there can be several combustion chambers, depending on the required functionality.
Very often, outdoor complexes are built on the basis of Russian stoves, the main task of which is to cook dishes in a variety of modes. These stoves no longer have a bench, they are much smaller in size, and thermal insulation materials are used to very effectively maintain the temperature in the cooking zone during construction.
Another modification is to create a small combustion chamber under the hearth so that you can cook during hot periods without having to heat the entire oven and room. Very often, in such furnaces, the hearth above the combustion chamber is equipped with grates in order to obtain a barbecue, or an iron hob is installed.
As for the masonry material, a suitable option is specialized oven bricks designed for strong heating. But structures made of solid red brick, in a configuration with fireclay in the area of the combustion chamber and mouths, are also quite viable.
Decorative bricks with chamfers and arched ones are available for sale, but many process simple ones - both economy and manual work.
Currently, there are no problems with various special mortars for masonry, although our predecessors made excellent use of mixtures based on fatty clay and river sand. Before use, the clay was thoroughly crushed and sifted, and the sifted quarry sand was calcined. The proportions varied - either sand and clay in equal parts, and water one part of the volume, or more sand (up to five parts). Since difficulties in most cases arise with the proper clay, not only mixtures that are ready for use are available for sale, but also oven clay separately. A stove made of brick without further finishing also looks beautiful, but if you wish, it can be covered. Stoves plastered with clay and whitewashed will look great only in a room designed accordingly.
Experience of FORUMHOUSE masters
Among the participants of our portal, mostly outdoor variations of the Russian oven are popular, intended for preparing pickles in open air or in closed complexes. The use of a classic type design as a heating unit is very rare: its theme cannot fit into all interiors, it is not easy to use, its efficiency is low, and it takes up more space than modern solid fuel units. But the taste of dishes cooked in ovens of this type is superior when compared with derivatives of gas or electric ovens and metal grills. As a result, outdoor stoves or complexes have become most widespread.
Mini Russian ovens for outdoor kitchens
Not long ago we finished laying a mini-Russian stove for the kitchen for the summer. Stove dimensions along the foundation: 130x130 cm; there are three rows of masonry under the hearth as a heat accumulator. The volume of the vault was increased by reducing the depth of the hearth, the pipe is a typical “six”, the distance from the front wall of the furnace to the outer wall is 14 cm, between the mouths (arches) of the furnace and the hearth is 19 cm.
The stove is based on a brick, the furnace and mouth are made of refractory brick; for frying shish kebab, the grate is placed directly in the furnace, on the coals, and it comes out great.
In the next structure, located on a closed terrace, there is a barbecue directly on the grate, under the grates there is an ash pan/ash pan with a flap that changes the draft. The size of the stove along the foundation is 130×150 cm. Brick consumption:
- Vitebsk (stove) - three trays;
- fireclay – 100 pieces sha8, 75 pieces sha44;
- solid simple (on the outer pipe) – 60 pieces.
Mini-Russian stove: 4.5 bricks deep, 4 wide, plus a stove for a cauldron, also, as miniature as possible. New and used refractory bricks were used. According to the plan, the consumption is calculated in terms of a whole brick without a pipe and underground foundation:
- Typical stove (or something like that) - 850 pcs.
- Fireclay No. 8 – 100 pcs.
- Wedge No. 48 – 50 pcs. (or No. 45, 55 pcs.).
In reality, more material was used, as the quality of the brick and geometry were let down.
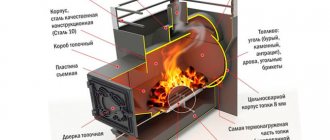
Design and principle of operation of a heating furnace
In its simplest form, a wood-burning stove for a home consists of a firebox, a blower, an economizer and a chimney. In the firebox, wood, when burned, gives off radiant heat to the walls. The heated flue gases cool down as they pass through the economizer and give off heat. Cooled to a temperature of 150-200°C, they exit into the air through the chimney under the influence of draft, which is formed due to the difference in pressure inside and outside the house, as well as the tendency of heated air to move upward. The draft can be increased by the wind.
Heating furnace design
The heated furnace body releases heat into the room long after the combustion ends. So that it does not cool down, and the heat is retained inside it for as long as possible, a valve is installed at the top of the pipe, which is closed after all the wood has burned. A better effect can be achieved if two valves are installed in series.
Combustion of fuel is accompanied by the release of even more heat if it occurs in the presence of oxygen contained in the air. It is for this purpose that a blower is installed in the furnace - a small chamber with a door located under the firebox. Under the influence of draft in the chimney, air is drawn through the ashpit, which is supplied to the firebox through grates - steel or cast iron grates on which firewood is located.
An economizer consists of several smoke turns - channels in the masonry that increase the distance that flue gases need to travel in order to reach the exit from the chimney. The intensity of the air supply is regulated by opening and closing the blower door, and the intensity of the draft is regulated by opening and closing the pipe valve to the required amount.
General instructions
Buleryan's kindling scheme:
- Open the chimney gasifier regulator.
- Open the blower damper.
- First, lay down wood chips or medium/large-sized firewood, add some crumpled paper/newspaper;
- Light the wood, check combustion and close the stove door;
- Check for traction after 15-20 minutes;
- Approximately every 5 minutes you need to close the damper a little, but you cannot close it completely;
- Do not move away from the stove while lighting;
- When the temperature decreases, you can add the next batch of firewood (use only large, dry firewood);
You can also watch detailed video instructions on kindling Buleryan:
https://youtube.com/watch?v=CW3h3NpJwRk
After some time of use, you will gain the necessary experience and melting buleryan will become a simple task.
The stove is lit
What kind of wood to burn?
Before using the stove, you should figure out how to properly heat Buleryan with wood, because not everyone is suitable for this purpose. Any hardwood firewood is suitable for heating.
It is not recommended to use coniferous varieties; they quickly clog the chimney. If you heat the stove with apple, pear, cherry, etc., little heat will be released.
The best fuel for buleryan will be oak or acacia due to its hardness
An important condition is that the firewood should not be too wet.
Can I use other fuel?
- Coal. Buleryan stoves come with special operating and fire safety instructions. If you follow these instructions exactly, it is prohibited to heat the stove with coal alone; a large amount of heat from burning coal can melt the metal. You can use brown coal, but only together with firewood. Many sources on the Internet describe many ways to heat Buleryan with coal, but you should not rely on them, these methods may not be safe.
- Workout. According to the instructions, the waste cannot be used as fuel. Its use will lead to burnout of the pipes and failure of the furnace.
- Briquettes. Peat briquettes are an ideal type of fuel; they have good heat transfer and do not impair the performance of the stove. Briquettes are difficult to purchase in a store; they are usually ordered on the Internet, but suppliers mainly sell only in large quantities, which is inconvenient for personal use.
- Sawdust, wood chips and tree bark. Kindling with sawdust, wood chips and tree bark is not prohibited - this is a good way to save money, allowing you to reduce the use of good firewood. In order to use this type of fuel, you must first light the stove with wood, and then add wood waste.
- Pellets. The method of melting with pellets is similar to that used when melting with sawdust, wood chips and bark. Since pellets are made from wood, they are also suitable for buleryan, but before that a special mesh is installed.
How to properly stack firewood?
First of all, wood chips are laid for kindling. You can set fire using different ignition means. Afterwards the firewood is stacked. The furnace operates in normal mode or in gas generation mode. Continuous operation in normal mode reduces the service life of the boiler
It is important not to use wet firewood, as this will damage the chimney over time.
For a longer service life of the stove, it is necessary to periodically clean it; to do this, it is enough to burn special briquettes if the chimney begins to clog.
How to reduce consumption?
- Use dry firewood.
- Clean the chimney regularly.
- Heat the stove with wood from acacia, oak and aspen - they are the hardest.
- Insulate the chimney.
Optimal temperature
Before purchasing a Buleryan stove, you need to decide on its size. This affects how much area the boiler can heat. The period between laying firewood is long - 8-12 hours. To always maintain a comfortable temperature, it is enough to periodically add firewood.
The optimal temperature depends on the size, power of the stove and the volume of the firebox. The principle of operation is similar to a conventional potbelly stove, but the efficiency is higher, so the bullerian will quickly warm up a large room.
General fire safety rules
- Do not add too much firewood.
- During heating, do not move away from the stove, constantly check for draft.
- Do not use only coal as fuel, this may cause the metal to melt and spread the fire.
- Watch the stove closely while it is burning.
- Clean your chimney regularly.
- Please read the instructions carefully before use.