Leaks in water pipes are an extremely unpleasant matter. And if there is also pressure in the system, then the accident can develop into a real flood. Let's look at how to fix a leak in a pipe with pressurized water in various ways. We will also analyze the nuances of working with plumbing and heating.
A pipe burst Source olvia-servis.kh.ua
Is it even possible to do this?
It is quite possible to patch up a pressure pipe that unexpectedly leaks on your own using improvised means.
The only caveat is if the leak is insignificant , and the water oozes slightly, and does not gush in an endless stream.
When the accident is more serious, you will need to urgently tighten the valve that controls the water supply to the coolant, and then call a repair service.
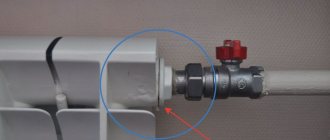
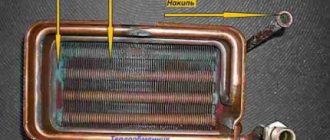
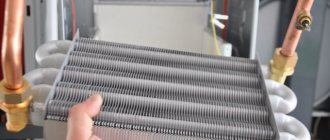
Radiator plate leak
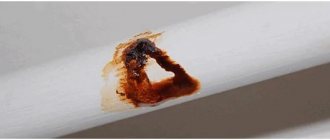
The problem with plate radiators is the thin metal, which is susceptible to corrosion, and over time fistulas can appear in it. In this case, cold welding is needed.
You need to drain the water, clean the leak area from rust and paint, and then degrease it. Then apply glue following the instructions. After the glue has hardened, this is about 30 minutes, you can start the risers, not forgetting to bleed the air.
Rules for choosing a material to solve a problem
When the cause of the pipe damage has been established, it is necessary to look for acceptable repair methods. There are several of them. Only most are suitable for low water pressure in the water supply circuit or heating system.
The most common way out of a difficult situation is to use an industrial clamp (screed). This is a metal ring with thick walls, a rubberized inner surface and a fastening nut for a tie.
If you don’t have such a device at hand, then any piece of rubber (for example, from a bicycle inner tube) and wire or something similar will do .
But other methods of eliminating leaks when it comes to heating or hot water supply systems are unlikely to work. Thus, often used cold welding and special sealants are not relevant for wet surfaces.
Other instantly hardening composites (epoxy resin, dichloroethane) are also excluded, since they can be used on dry and disconnected water supply routes.
A minor leak in the pipeline can be repaired on your own . But this will only be a temporary measure. At the end of the heating season, it is recommended to carry out major repairs so that the system no longer fails.
Use of special sealants
Unlike mechanical means, the use of sealing compounds does not provide a 100% guarantee of eliminating leaks. On the other hand, it is impossible to use clamps and tape on the flat surface of the radiator when the fistula is located directly on the front panel. There are 3 options left: try a chemical, weld the hole, or replace the battery.
Undoubtedly, sealant for pipes and radiators is the most convenient tool for the average user. Before throwing the heating device into a landfill, you can try to seal it. What sealants are usually used in such situations:
- two-component plastic composition called “cold welding”;
- liquid agents added to the coolant;
- adhesive heat-resistant plastic that hardens after ultraviolet radiation.
Reference. High-quality cold welding from Loctite costs about 27 USD. e., 1 liter of liquid sealant “Aquastop” – 72 USD. e., light-curing plastic Bondic – 32 cu. e. per set.
Two-component waterproof glue will definitely help if you strictly follow the technology - dry, clean and degrease the defective area before applying a patch. See the video below for cold welding tests on water pipes.
Liquid sealants are offered for different coolants (water, antifreeze) and types of heating systems. After adding the product, chemical compounds fill the fistulas from the inside within 2 days. Of course, large defects and through holes cannot be repaired; you must first use a mechanical method. For example, hammer a wooden chop into the hole.
Note. Aquastop liquid is mixed with the coolant in a ratio of 1: 100. That is, it will take no more than 0.5 liters of product to seal the closed system of a one-story house.
Bondic plastic gel is sold complete with an irradiator and is applied to the damage in small portions. Each subsequent drop is illuminated by ultraviolet light and instantly hardens. An indispensable condition is a dry, grease-free surface; the type of pipe material does not matter.
Plastic becomes solid after irradiation with ultraviolet light, before which the material remains liquid indefinitely.
Hot and cold H2O - is there a difference in the way the gap is sealed?
It's all about the difference in coolant temperature. It is this factor that is decisive when choosing a material.
With hot pressure, minor damage can heal without outside intervention . Larger gaps can be easily repaired with regular salt and a bandage.
But when the water cools, the flow will resume. It will not be possible to fix a leak in a cold water pipe with salt and a bandage. It is easier to repair a failed hot water pipe in the summer when it is turned off. Then you don’t have to control the temperature in the room while fixing the leak.
The main causes of leaks and their locations
The most common reason for damage to any steel heating pipe is caused by oxidation of the material, when a fistula appears in the pipe. From the inside, water is almost constantly in motion, but from the outside, the metal is often exposed to moisture, air and temperature fluctuations, which contributes to the rusting of the pipe. This is the reason for the appearance of a leak in the most vulnerable place of the heating system.
Many of you may be wondering whether polyethylene pipes leak, because they do not oxidize like steel pipes. Naturally, in this case, the chance of leaks occurring is much less - the reasons for their occurrence will be of a slightly different nature. For example, heating pipes made of polypropylene and polyethylene may leak if they are incorrectly selected, that is, if they are used for other purposes.
This problem often arises among people who, for a number of reasons, decided to save money when building a heating system. Quite often, people buy PP pipes for cold water, which is a gross violation. The fact is that under the influence of high temperature, pipes undergo deformation, swell or burst. This in turn can greatly damage your home and your neighbors. As a result, there is no need to talk about any savings; on the contrary, at the end of the heating period, a significant part of the system will need to be replaced.
However, such a problem can arise even for those craftsmen who decide to use metal-plastic pipes for heating systems. In fact, even such heating pipes leak, and again the problems will need to be solved quickly so as not to harm anyone.
As a rule, the heating pipe leaks in the following places:
- on a flat section of the pipeline;
- in places where pipes are joined (on fittings or threads);
- at the junction of pipe sections.
Based on where the heating pipe leaked, the sealing method will be determined.
How does the pipeline material affect the solution to the problem?
Metal pipes are distinguished by their enviable resistance and durability. Almost their only drawback is their susceptibility to corrosion. This is often what causes a leak in the circuit.
Less commonly, other pipelines also fail: plastic, polypropylene (mainly in places of threaded or fitting connections).
Metal pipes are the most difficult to seal, since electric welding is not applicable to them. After such exposure, corrosion processes only become more active.
It is enough to compress the plastic pipe in the problem area, and all manipulations can be carried out under water pressure. The main thing is not to overdo it with the screed, otherwise the plastic will crack, and then you will have to replace the entire pipe.
A polypropylene pipeline can be easily repaired by soldering a separate fragment; a metal-plastic pipeline requires inserts . In the latter case, if the damage is not extensive, wrapping with electrical tape or treating with an adhesive (polyurethane, epoxy) will be sufficient.
Options for repairing holes in a plastic pipeline
When carrying out repairs, it is not always possible to use high-temperature connection technology and therefore it is necessary to use other methods:
- Using a clamp clamp. A temporary measure to solve the problem of how to eliminate a leak in a polypropylene pipe is the use of clamps (for more details: “Types of repair clamps for pipes and rules for their use”). The part with screw clamps is supplemented with a layer of plastic waterproof material, thanks to which it is possible to almost completely eliminate leakage. This method does not interfere with the liquid moving through the system, so there is no need to turn off the water supply. But it also has a drawback - over time, the fastening points of the clamp weaken and the connection loses its tightness.
- Cold welding technology. Before repairing a leak in a plastic pipe, you should prepare the required amount of the component for the work: knead it in your hands or mix it in a certain proportion. Then the composition is applied to the damaged area, the crack in the pipeline is sealed and the required time is waited until the mixture completely hardens.
- Application of adhesive bandage. Using a pair of clamping clamps together with a material that is impregnated with glue will help you quickly deal with a leak with your own hands. This can be a two-component composition plus rubber for polypropylene pipe products or a bandage plus cement for sewer pipes. The advantage of this method is that there is no need to shut off the water flow. But for systems operating under high pressure, the use of such a bandage is not allowed.
- Sealing tape overlay. The method allows for quick repairs if it is not possible to seal a small leak with sealant. Several layers of adhesive tape are wrapped around the damaged area.
- Using a special sealant. It will be possible to eliminate a leak if a plastic pipe bursts quickly. But this solution is temporary.
There are three types of sealant on sale:
In cases where the water supply or heat supply system is partially laid using a hidden installation method, before proceeding with the repair of the plastic pipeline, you should find out exactly where the damage to the line occurred. To do this, unfortunately, you will have to either dismantle the decorative trim or open the wall covering.
How to solve a problem?
When water circulates under pressure in the pipes, most major repairs cannot be done. Therefore, you have to act in other available ways in order to at least temporarily stop the leak and wait for emergency services.
Using a self-tapping screw
This option is applicable only for minor holes with a diameter of no more than 3-4 mm .
To plug the hole, you need a galvanized self-tapping screw, which is additionally equipped with a press washer.
It is simply screwed into the hole and secured . As a result, the water is blocked. After such repairs, the pipe can last up to 3 years, but it is better to replace the burst fragment as soon as possible. In addition, a self-tapping screw inside the pipeline leads to clogging of the system.
Cementing
Cast iron or steel pipes can be easily patched using cementation.
The sequence of actions is as follows:
- Using a special hard metal brush, carefully remove the layer of rust in the area of the fistula. The metal that is being painted is also removed, even if this leads to an enlargement of the hole.
- Cut the bandage to a certain length and dip it in the cement solution.
- They wrap it around the crack in several passes to form a kind of cocoon.
- The top is coated with cement to secure the result.
After completing the repair work, the pipe must be given time to dry completely. Usually a day is enough.
Clamp
A clamp is a fairly simple design consisting of a metal ring, a rubber gasket and a tightening bolt.
This device is sold in stores, but in emergency situations you can quickly make it yourself. You will need a piece of plastic rubber, scissors and a metal clamp corresponding to the diameter of the pipe.
Further actions:
- clean the damaged area from rust;
- put on a clamp, and slip a rubber gasket under it;
- The coupling is pressed tightly.
If the pipe is very rusty, a clamp will be almost the only way to disguise the leak. This is because welding cannot be used here.
Bandage and table salt
Salt is ideal for sealing leaks in hot water pipes under pressure. Step-by-step instruction:
- Distribute digestive salt over the bandage in as large a layer as possible.
- Wrap it around the hole, preferably more tightly.
Once wet, the salt sets into a crust, which prevents further water from flowing out. The method is not particularly convenient to implement, but it is suitable if nothing else is at hand.
Sealant
Using sealant (also called “cold welding”) to eliminate leaks in existing pipelines is not productive, since there is no guarantee that the problem will be solved 100%.
This is due to the fact that such compositions are designed to work with dry surfaces , and condensate is present on pressure pipes.
But if there is a small crack, you can try to seal it with a heat-resistant sealant. Outwardly, it is similar to plasticine.
Break off a small piece, carefully crumple it with your fingers and insert it into the hole, followed by smearing it to the sides . Large holes cannot be masked this way; first you will need to insert a wooden chip.
Glue
Here you will need fiberglass fabric and BF-2 glue.
Step by step steps:
- the problem area is thoroughly cleaned of rusty particles and degreased with aviation gasoline (acetone is an alternative);
- wait 15 minutes until the surface dries;
- cut a tape from the fiberglass of such a width that it completely covers the area of the leak;
- an adhesive composition is applied along the edges, and epoxy resin is applied to the center;
- apply to the crack, press with your hand and wrap;
- fixed with copper wire.
The patch will take about a day to dry if the batteries are hot. In the summer, when the room is cool, this takes about five days.
Wire or harness
A method somewhat reminiscent of the one with a clamp . Only instead of it they take a medical tourniquet and any metal wire. Rubber is tightly wrapped around the damaged pipe fragment and tightened with wire.
Wooden chop
It is necessary to quickly plan a wedge-shaped peg of a suitable diameter from any piece of wood. Then they hammer it into the hole with a hammer.
The pipe is leaking - what to do at the first stage
In the event of a fistula appearing on the central heating riser, from where water is gushing out, we offer the optimal plan of action:
- Organize the coolant drain into a bucket or basin by quickly wrapping the pipe with any rag. This way you will preserve the flooring, personal belongings and furniture, and prevent flooding. Proceed with caution - in winter the temperature of the network water reaches 90 °C.
To prevent your neighbors below from forming such a bubble, collect water in a bucket - Spend 2-3 minutes calling the dispatcher of the heating supply organization. Report the accident, call the plumbers.
- While the repairmen are getting there, try to close the riser yourself. Too hot a coolant will still not allow you to close the fistula under pressure.
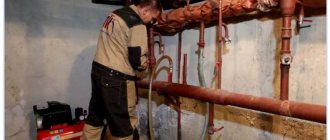
- Taps should be found in the basement heating point located under the entrance. Observe where the riser penetrates the ceiling and close the nearest valve. As a last resort, turn off the main house tap during repairs.
An example of the location of shut-off valves in a heating point
Advice. If, before the plumbers arrived, it was not possible to tie a rag around the riser and stop the flow of coolant, throw an old blanket or a thick coat over the pipe that absorbs water well.
In the current reality, craftsmen often have to wait 2-3 days (reasons: holidays, weekends, accidents at other facilities). It is impossible to leave residents without heat for a long time, so in case of delay, make an improvised clamp from scrap materials:
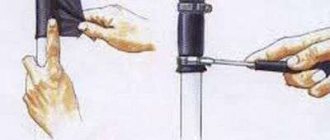
- Find a rubber glove, a bicycle tube, or a ready-made medical tourniquet. The second component of success is soft steel wire with a diameter of 2-4 mm.
- From a glove (bike inner tube), cut a strip 4-5 cm wide, as shown in the photo.
- Applying the end of the strip to the pipe 1 cm below the fistula, wind it with tension. The goal is to tightly seal the hole with several layers of rubber.
- Hold the “bandage” with your hand and secure it with wire. It is better to wind the latter tightly, turn to turn, helping with pliers. Now the common valve in the basement can be opened.
Note. On a water supply system, the described procedure is performed under pressure, if it was not possible to cut off the riser from the main line. It is not necessary to wind many turns of wire; the main thing is to temporarily stop the leak.
Also use the procedure described above when a cast-iron central heating radiator is leaking heavily and there are no shut-off valves. Typically, radiators leak at the joints between sections, and a temporary clamp should be applied there.
When a leak forms from under the nut, the connection must be repacked
If a trickle of water is observed at the place of the threaded connection of iron pipes, you need to unscrew the fixing nut from the coupling with a gas wrench. Wrap the exposed thread with a braid of fresh flax (clockwise) and tighten the nut again. The plumber will show the considered sealing options in the video:
In a private home, eliminating a leak is greatly simplified - just shut off the required valve or quickly empty a section of the heating network. It is not necessary to wind the rubber; it is better to repair the hole using a more reliable method. When the leak in the apartment is temporarily fixed, you don’t have to wait for locksmiths - choose the right time and finally seal the hole using any of the methods presented below.
How to stop a leak in a hidden pipe?
You won’t be particularly happy when a pipe hidden under a building structure starts leaking. Especially if the renovation has only recently been done. Since it is not always possible to quickly reach the source, you need to know how to temporarily stop the flow.
Here are a few techniques that are suitable for a water supply system in a private home:
Powdered mustard is poured into the expansion tank.
Then the water circulation is resumed. In just a couple of hours, mustard will seal microcracks from inside the pipeline. When the leak is fixed, the circuit should be flushed.- The heating system is temporarily filled with industrial sealant. It will settle on the internal surfaces of the pipeline and thereby stop water from seeping through microscopic gaps. After a major overhaul, the coolant is replaced with a new one.
Large holes cannot be sealed this way. Then they turn off the system, drain the water from the riser and begin straightening. Namely, it will be necessary to dismantle the structure and replace problematic spans. If you live in an apartment building, neighbors are warned about the upcoming event.
Leak at the junction of the hose to the radiator
In this place, a leak may appear as a result of a violation of the tightness of the connection, a burnt-out winding, or the destruction of the thinnest part of the pipe on the thread by corrosion.
The sequence for fixing the problem yourself:
- The first step is to turn off and drain the water, and you should not neglect this point, as the consequences may not be very pleasant.
- Next, you need to unscrew the lock nut, then inspect the threads and clean the remaining parts of the winding.
- Rewind the locknut and tighten it. You can rewind it with special sealants (polymer thread, linen with sealant or paint).
- Next, you will need someone's help to monitor the location of the leak while starting the riser - the assistant can report the problem in a timely manner.
- If the leak stops, then the problem is eliminated; otherwise, the risers need to be reset again. This means that there is a fistula in the thread.
- The radiator cap and locknut must be unscrewed, after which the liner is disconnected from the radiator.
- Next, you need to clean the pipe from paint residues, apply any oil to it, this will allow the die, which needs to adjust the threads on the pipe to the required size, to go easier and not leave burrs on the metal, and you still need to cut 6-7 threads.
- Cut the pipe to the damaged area where the leak was, and smooth out the sharp edges with a file or abrasive wheel, then re-thread the threads with a die.
- You can connect and start the generator.
Preventing the problem from recurring
It is easier to prevent problems in the heating circuit than to suddenly look for ways to eliminate them. So before the start of the heating season, communications are checked by testing, especially focusing on dangerous areas.
These include:
- level spans;
- threaded connections and welds;
- zone of joining sections at radiators;
- places of implantation of heating equipment;
- near fittings;
- hard-to-reach areas.
First, everything is checked by eye, then with the circuit running.
