From the author: hello, friends! A well-functioning heating system guarantees uninterrupted heat supply during the cold season. Radiators are replaced in the summer, when the heating season has ended. The reason for this may be an old leaky element or a complex repair that includes lining the section of the wall behind the heating device. Apartment owners are interested in how to remove the heating radiator in an apartment without flooding and causing damage to neighbors.
When you need it
Owners are required to monitor the condition of the heating system in their apartment. If a breakthrough occurs, not only this room will suffer, but also the neighbors below. In the event of flooding, they have the right to demand compensation for repair work in their home. Replacing radiators is necessary if:
- they flowed from age and rust,
- do not generate enough heat
- the temperature differs in different parts of the battery,
- the wall behind the heating element needs to be repaired,
- they do not fit into the new interior of the room.
To prevent an emergency from occurring, it is necessary to periodically carry out preventive inspections of the heating system, especially in old houses where cast iron batteries are installed. Timely measures will make it possible to extend their operation at least until the end of the heating season.
Radiator placement rules
Batteries are most often placed under the window to compensate for heat loss when cold air enters through the opening.
In this case, the following distances must be maintained:
- from the wall - 20 mm;
- from the floor - 120 mm;
- from the window sill - 100 mm or more.
It is advisable that the window sill does not overlap the radiator too much for effective air circulation in the room. These figures are guidelines only and may be higher or lower, although noticeable changes may affect the heat output of the structure.
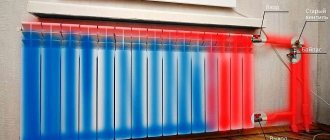
The heat output of the battery may vary depending on the installation method. If the distances are maintained correctly, the device will give off more heat
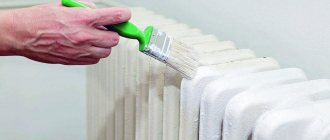
To improve the situation, it is recommended to cover the wall behind the radiator with a reflective material, such as penofol. Although some masters consider this measure useless. But a beautiful decorative screen will become an obstacle to warm air, it is better to refuse it. Modern batteries look quite attractive; there is no point in hiding them.
We eliminate leaks without turning off the heating
A small problem where water leaks slightly and begins to drip onto the floor can be eliminated by tightly wrapping the rubber. Strips of sufficient width are cut from bicycle inner tubes, rubber gloves, etc. and wound tightly around the problem area of the pipe or battery. To secure it from above, clamp it with a clamp or rigid wire, twisting its ends with pliers.
You can purchase special clamps with a rubber gasket in the store. By securing them to the damaged area, you can temporarily fix the problem. Experienced professionals advise using:
- winding fabric impregnated with epoxy resin. The only disadvantage is that this requires a dry surface, sometimes you have to turn off the heating system and drain water from it,
- zinc white is used in the same way,
- in some cases, a heat-resistant sealant will help, but you need to know that this acid-based product increases damage to an aluminum battery and is only suitable for cast iron products,
- Another way is to cover the hole with so-called cold welding. It comes in two types: liquid (the fabric is impregnated with it) and in the form of plasticine. The latter is kneaded in your hands until soft and smeared on the damaged area.
Important! Follow safety precautions! Be sure to use rubber gloves and work in a ventilated area.
Preparatory work
The most crucial moment in installing a radiator is the preparatory activities. The outcome of the replacement procedure depends on how correctly the battery is dismantled and what tools are at hand.
Selection of radiators
The first thing you need to do is decide which radiator will be installed instead of the old one. The choice is made based on:
- appearance;
- pressure indicator in the heating system;
- chemical composition of the coolant;
- prices;
- heat transfer level;
- heating time, etc.
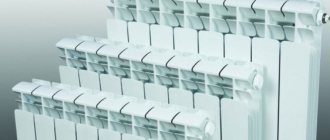
Improved models of cast iron batteries have become especially popular in recent years. Buyers highly value the ratio of cost and quality of the device. But the choice can be made between steel, aluminum and biometric batteries.
Necessary tools and consumables
Installation of heating radiators is carried out in several stages. For each you will need the following tools:
- Two wrenches: wrench and adjustable;
- Apparatus for cutting metal pipes;
- A die for cutting threads or a die with a holder of the required circumference;
- Welding for polypropylene pipes;
- Scissors or hacksaw for cutting polypropylene pipes;
- Level, pencil, ruler;
- Plumbing flax;
- Material for sealing joints;
- Cement solution.
When installing the radiator, you will need the following components:
- the heating battery itself;
- Ball Valves;
- brackets for hanging the radiator;
- plugs;
- Mayevsky valves for bleeding air;
- pipes: can be made of metal-plastic, polypropylene or steel;
- accessories for pipe installation - tees, adapters, bends and fittings.
Removing old batteries
The procedure for dismantling a battery that has become unusable depends on the plan for further work. If you only need to replace the radiator, then unscrew the threads from the battery or use a grinder if the threaded connections are knocked down and do not function.
If the heating pipe needs to be replaced along with the heating device, cut off the entire structure. The procedure is carried out at a distance of 15-20 cm from the floor covering and ceiling.
Transferring markings to the wall
Prepare the base by transferring the markings to the wall. For this:
- Outline with a pencil the place where you plan to place the battery.
- Make a hole for the holding brackets.
- Take a level and check that all lines are even.
At the last stage, you can glue foil (or other foil material) to the wall over the entire area of the radiator. This increases the heat dissipation of the battery.
Where to begin
First of all, you need to determine where the valve is located to shut off hot water and heating. In old high-rise buildings it is located in the basement. To block it, you need permission from the local housing office. The owner of the apartment writes a statement addressed to the head of this institution. After examining it, a master comes to the named address. He has the right to shut off the required valve and discharge water from the heating system. In newly built houses, taps are turned off in the apartment itself.
After this, you can begin to dismantle the battery. This is not difficult to do; anyone who knows how to use simple tools can handle this task:
- grinder,
- screwdriver,
- wrench,
- masking tape.
If the owners have started a European-quality renovation of their apartment, then the old heating system with Soviet-era finned radiators is dismantled. Instead, they install more efficient heating devices that fit better into the interior of the renovated premises.
Let's sum it up
People with repair experience often write to us in the comments. We strongly recommend that you read them to know how to remove a heating radiator in an apartment yourself.
If you have experience in dismantling batteries, we ask you to share it. We hope that your knowledge will be useful to our readers.
Do you want to get help from a master, a specialist in this field? Go to the professional search portal. This is a completely free service where you will find a professional who will solve your problem. You do not pay for posting an ad, views, or choosing a contractor. If you are a master of your craft, then register on Pro and receive a flow of clients. Your profit is just one click away!
Method of fastening heating elements
To dismantle the battery, it is necessary to determine how it is attached to the general heating system. The most popular options:
- on bends, when pipes are connected from two parts - a pipe with an extended thread and a lock nut. The heating system can be disassembled, radiators removed and washed or replaced,
- welding of joints was used when installing convector-type radiators in the form of a tubular coil. All issues are resolved with the help of an angle grinder. The pipe is simply cut and the battery is dismantled,
- fitting system, which includes quick-dismount fittings with union-type nuts. These mounts are used when installing the latest batteries. With their help, it is easy to disassemble pipe connections and remove the radiator.
Sometimes you have to remove the entire heating system, cutting out old pipes and heating elements.
Non-standard situations
An unpleasant situation can happen when, when dismantling cast iron batteries, the bottom of the plug breaks off and the thread remains inside.
Proceed as follows:
- the collector is heated;
- put a chisel to the part in the direction of unscrewing it and try to turn it with a hammer;
- As soon as the edge of the thread is stuck out, it is turned out with pliers.
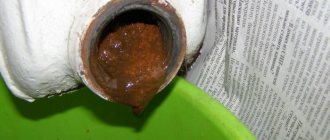
It is often necessary to remove old rusty batteries in which the threaded connection is corroded or even perforated.
In this situation, you need to do the following:
- “arm yourself” with a coupling made of brass or cast iron of the required diameter;
- cut off the thread from the liner, but leave the first five turns;
- drive the thread with a die;
- wrap the threads with plumbing linen soaked in paint (organic solvent), which dries quickly;
- screw on the prepared coupling;
- Now the wound thread is screwed into the coupling, and the problem is solved.
Replacing an old cast iron battery
A prerequisite for carrying out the work is the coordination of your plans with the neighbors living on the same riser below and above your apartment. They must agree to connect a new heating system to your home. If their rights to supply heat to the apartment are not violated, there should be no problems.
In an emergency situation, when a heating pipe or radiator breaks in the winter, it is more difficult to fix the problem. In this case, you have to disconnect the entire riser or the entire house from the heat supply.
Heating in multi-storey buildings is supplied from below or from above, so each battery has a pipe inlet and outlet. The coolant is connected to it from one or both sides.
Replacement of a cast iron battery is carried out using a pipe lever wrench. The technician unscrews the locknuts and separates them from the flanges. When this procedure fails, simply cut the pipe before this connection. Then the radiator is removed from its mounts.
Important! When dismantling the heating system or one element, place a wooden block under the radiator to avoid damaging the flooring if it falls.
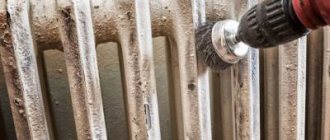
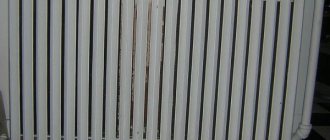
The negative side of such heating elements is their heavy weight and out-of-date appearance. Therefore, apartment owners are trying to get rid of them. The only way to change its appearance is by painting. Technical characteristics improve if you carry out timely cleaning and rinsing.
After all procedures have been completed, the battery can be assembled and replaced.
Different schemes
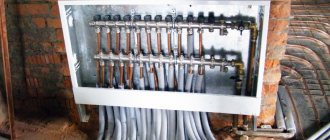
There are fundamentally different coolant bottling schemes. With the top filling method, the supply is taken to the attic of the house. With this system, the risers will be independent and are disconnected in the basement and attic. For bottom filling, the supply and return distribution pipes are located in the basement technical floor. You will have to disconnect the supply and return risers.
The type of wiring is determined as follows: when in the basement along the perimeter of the building there are two horizontally located pipes, covered with heat-insulating material, pouring the lower circuit. If there is only one pipe - the top one.
You need to find the riser that goes to the apartment, while you can navigate by the flights of stairs between the entrance and the landing of the 1st floor, and in the attic - by the windows.
Temporarily removing the battery
When renovating an apartment, the owners decide what to do with the radiators. They are replaced with new ones or removed for a while.
Important! To avoid damaging the floor covering, place old rags made from fabrics that absorb moisture well under the radiator being removed.
Follow the correct sequence of actions.
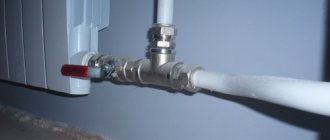
- In the upper right corner there is a tap for regulating the flow of water into the battery and its heating temperature. It is twisted by hand, without using tools.
- There is a shut-off valve in the lower left corner. It regulates the intensity of water outflow and balances its movement in all batteries of the apartment. It is closed with a hex key.
- In the left corner on the right there is a Mayevsky tap. It is necessary to remove air from the heating system.
Important! When turning off the shut-off valve, remember the number of full turns of the key that you made. When installing the radiator in place, you need to turn the key the same number of times in the opposite direction.
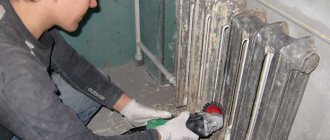
To remove the battery, you need to unscrew the nut of the foot connection and separate it from the tap. To do this, use a gas sliding and ring wrench. One holds the American fitting, and the other unscrews the nut.
After disconnecting the valves, the battery is carefully removed from the brackets. Due to the fact that the radiator is heavy, it is advisable that two people perform this work. Don't forget to wrap the unscrewed parts in paper or cellophane so as not to stain them with paint or clog them with construction dust. Place the battery itself in a remote corner to avoid scratching it.
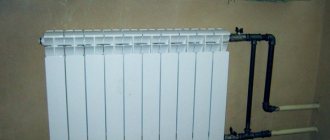
New types of heating elements do not need to be disconnected from the general system. They have special jumpers along which warm water moves while the battery is turned off
Why is this necessary?
Dismantling is necessary in the following cases:
In case of intersectional leaks of a cast iron battery at a short distance from the connections. If there are many sections, the length of the radiator wrench is often not enough to reach the required pair of nipples on the side of the blind plugs. The only solution is to disassemble the radiator from the supply side;
Leaking between sections is a typical disease of cast iron batteries.
- In case of fistulas on the connections to the radiator. To replace the hose (on threads or welding), you need to completely remove the heating device;
- When replacing radiators with new ones (with higher thermal power or more aesthetically attractive);
- When restoring radiators by annealing them;
Cast iron sections clogged with petrified silt can be brought into working condition by heating them (for example, in a fire) and tapping them with a wooden or rubber mallet. The burnt dirt is poured out through the collectors. Of course, after annealing, the intersection gaskets must be replaced.
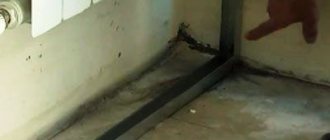
When renovating a room. Plastering a wall or wallpapering behind a radiator, you will agree, is quite problematic.
To wallpaper a window sill niche, it is better to remove the battery.