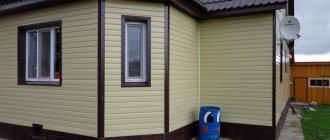
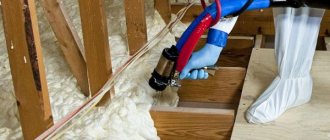
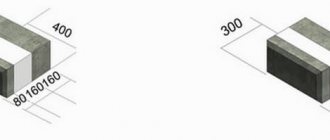
Production Features
Modern companies in most cases use technologies that first appeared in Germany.
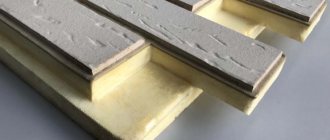
Such solutions were first developed more than 20 years ago. Clinker panels have always been considered a good insulation material; they are suitable for the restoration of buildings, public or simply with dilapidated facades. Expanded polystyrene PSB-s - 35 is considered the basis for such products. This high-density material is also called self-extinguishing. The thickness of one leaf can reach 50-80 millimeters.
The base and tiles are connected to each other by pressing. Polyurethane glue is also involved in this process. The total service life of the material is up to 30 years, but with proper care it can last much longer.
The panels have two main functions:
- Warming.
- Decorative.
Inside rooms decorated with such panels, a high level of temperature is maintained. For some time the indicator remains the same.
Design nuances
A weather- and mechanically resistant material that provides thermal insulation and protects the walls of the house from wear and tear is not all that is usually needed to enjoy looking at the house. Otherwise, everyone would live in houses covered with simple sandwich panels. Aesthetics are important.
Brick finish
It is affected by the location of the panels:
- Vertical. It will make the house visually taller, which is useful for small, squat houses.
- Horizontal. Will make the house appear lower and wider, which is useful for tall houses that look too narrow.
- Brick. It is used for base planks - they are not laid exactly on top of each other, but with an indentation, just like bricks are laid. It looks good and does not bring any special visual changes to the shape.
Vertical products will make the house visually taller
It is influenced by colors:
Bright white looks good, but it needs to be washed constantly, otherwise it will fade and turn gray very quickly. Bright black is usually not used for houses unless it is a Gothic style house.
The exception is a black background with a bright pattern or accessories that attract attention. But still, it is generally considered that the effect is too dark. Shades of yellow
The sunny color will attract attention to the house, making it visually cozier and more pleasant. A common color that looks good in a garden setting. Shades of green. They are rarely used for summer cottages, since a green house surrounded by greenery will look a little strange. But for a country cottage surrounded by other buildings, a garage and a neat garden, soft shades of mint or light green are well suited.
Bright white looks good but needs constant washing
- Shades of red. They are usually considered too bright and therefore undesirable, but muted options, such as brick, fully correspond to the classic ideas of a country house.
- Shades of brown. They look good and remind you of village houses. But it is not recommended to take cold or too dark ones.
- Delicate shades. Beige, pink, peach. They will make the house a little larger and more comfortable in appearance. Well suited for small houses where coziness is the main idea of the design.
- Cool shades. They will also make the house look larger, but at the same time more austere and darker. Pairs well with glass or metal inserts.
Types of panels by imitation and design
The products have both smooth and textured surfaces. The latter can imitate stone, wood or brick. Thanks to the development of technology, such insulation is as similar as possible to the original. Upon completion of the finishing work, the house looks as if it was really built from stone or wood.
Under the brick
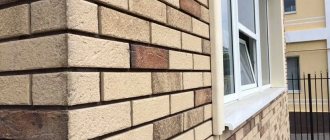
Insulating facades with brick panels is a popular solution. It is universal and suitable for most architectural styles. The imitation is achieved thanks to vinyl, a more practical material that can retain its original appearance for a long time. Manufacturing companies offer their own brick imitation options, which differ not only in texture, but also in color. The surface of the slab may even be rough or uneven, which will resemble the original even more.
Under the stone
This is a material that makes the appearance of the house more “noble”. Since finishing with natural stone is an expensive pleasure, it is associated with prosperity. Vinyl panels that imitate masonry are cheaper, but even visually it is sometimes difficult to distinguish them from the original. And it’s easier to care for such walls - just wipe with a sponge soaked in detergent. Products imitating stone do not lose their properties at the following temperature ranges: from -50 to +50 degrees Celsius.
Not all houses can be faced with real stone. But vinyl imitation can be installed on top of a concrete, wooden or brick structure.
Under the tree
Natural wood is considered a noble material that makes a home more comfortable and atmospheric. However, it has an important disadvantage - low resistance to moisture. And this despite the fact that the tree is so loved by microorganisms that strive to make their burrows in it. Fiber cement facade panels with wood imitation do not have such disadvantages.
The color and structure of the material is preserved for many years. The appearance is selected based on the customer’s wishes: painted or natural wood. In addition, fiber cement outperforms PVC in terms of environmental friendliness, and wood imitation evokes “cozy” associations.
Composites
This category includes fiber cement, porcelain stoneware, clinker and aluminum composite facade panels. The most popular are fiber cement.
Facades made of fiber cement panels can imitate the surface of wood, stone, marble or brick
Porcelain stoneware products are durable, resistant to moisture and ultraviolet radiation. They look solid and attractive and are easy to clean. As for aluminum composite panels, they are not cheap, but they are very durable and resistant to various kinds of negative influences. They consist of 2 sheets of aluminum separated by a polymer layer.
Porcelain stoneware facade panels Mayor Ceramic
Clinker panels can have a thermal insulation layer, the thickness of which reaches 80 mm. They weigh a lot, which makes installation difficult. Can be:
- self-supporting (large solid blocks with openings for windows and doors);
- decorative (used to decorate insulated walls, do not have a heat-insulating layer);
- insulated.
Clinker for facade finishing
Clinker looks beautiful, is durable, environmentally friendly, easy to repair and maintain. Often used for finishing industrial facilities, garages, and plinths.
Fiber cement panels are characterized by the presence of special polymer fibers in their composition. They are not cheap and have a long service life. They increase the level of noise and heat insulation of the building and protect against severe frosts.
Application of fiber cement panels
You can install them yourself; there is nothing complicated here. However, the weight of the panel is significant and it is easy to drop it and damage it. It is also worth mentioning the environmental friendliness of the material - the slats do not emit any harmful substances into the air when heated.
Fiber cement panels
Finally, such panels can be mounted on any base.
Brick-like façade panels
Brick buildings are traditionally reliable and aesthetically pleasing structures. They speak about the decent material level of the residents and good taste.
But building a brick building has never been cheap. The brick itself is an expensive material, and the work of masons is also expensive.
Brick-like facade panels give the building the same appearance as a completely brick building. But the price, for example, of a panel house lined with brick is several times cheaper.
But the external difference between a brick building and a building lined with brick-like wall panels can only be seen close up or even just determined by touch.
Brick-like panels for exterior wall finishing are manufactured in monolithic and combined structural designs.
Combined panels consist of two layers - outer plastic and inner polystyrene.
Facade panels under brick need to be fastened with an adhesive composition. If hot glue joints are used, they are practically inseparable and long-lasting.
The panels can be used to cover entire walls, or to decorate only the basement floors or levels of a building.
To give the base a natural protrusion on the wall below, a special sheathing is made of metal profiles or wooden beams.
Scope of application
Sheathing is used for exterior finishing of buildings or structures. These can be residential, industrial or public buildings, single- and multi-storey. The material is suitable both for direct installation on the wall and for forming a ventilated façade, i.e. as a protective layer for external insulation.
The material of the walls does not matter; the low weight of the cladding allows you not to strengthen the foundation. Some samples can be used for interior cladding of walls in residential apartments, premises, shopping centers, and public buildings. This versatility has become the reason for the wide distribution of the material among homeowners or entrepreneurs with large buildings.
Facade panels for home
Facade structures for a house are separate elements that are attached to a frame made of metal or wood. There are parts that are attached with glue and do not provide ventilation gaps between the wall and the cladding.
IMPORTANT! The panels are fastened together with special fasteners in such a way that there are no gaps between the cladding elements for moisture, debris and dust to enter.
The decorative effect of façade structures lies in the fact that the material imitates wood logs, boards, brickwork, natural or artificial stone.
Wall-mounted cladding does not require additional leveling or preparation of the walls of the house. In addition to a variety of textures, facade slabs can be made of various materials (metal, ceramics, PVC, wood), and they can be installed in a vertical or horizontal position.
The assortment of sheets includes not only a variety of textured patterns and designs, but is also presented in a variety of colors.
Advantages and disadvantages
The main advantage of thermal panels used to decorate the facade of a house is the effective thermal insulation of the building - 50 cm of polyurethane foam replaces 1 meter thick brickwork.
Moreover, even after several years of operation, when the plastered surfaces are already changing color and crumbling, the thermal panels retain their color, strength, and thermal characteristics. This material does not require any special cleaning or special care. Withstanding any weather conditions and mechanical stress, it will last at least 30 years. Installing heating panels is easier than other materials used for finishing the outside of a house. For this purpose, they are equipped with special fasteners that minimize the possibility of damage to thermal panels during installation. The process of insulating walls in this way can be called an investment in the future, when, with minimal investment of time and money, subsequent savings are created on both repairs and heating.
The owner of a private house will certainly benefit from the advantage of the material, such as its aesthetic appearance. Moreover, the wide range of the modern market allows you to choose panels whose surface imitates both brick and natural stones. Materials are also available in various colors. As a result, the decoration of the facade also increases the uniqueness of the building.
Cladding panels with insulation have few disadvantages:
- Possibility of installation only on perfectly smooth enclosing structures. Even a slight unevenness can lead to distortion of the panel and a decrease in its heat-insulating properties;
- increased cost compared to other materials, both of the thermal insulation itself and its installation. Basically, these are approximately the same amounts - you should not save on installation, since if it is carried out poorly, the junctions of individual elements may separate in just a few years;
- condensation formation under the panels if a small gap (at least 4 cm) is not left between them and the walls of the house. It is also worth taking into account the vapor transmission coefficient (the ratio of thickness to vapor permeability) of the enclosing structures, which should be higher than that of the insulation.
Advice from professionals
Experts in laying clinker thermal panels recommend following certain actions when working with products. For example, before starting the cladding process, it is advisable to treat the base with an antibacterial primer to prevent mold and mildew. The entire house can be finished with panels, and not just its lower part, while the base, as a rule, is highlighted with slabs of a different color to give a more interesting look.
A wide range allows you to play interestingly with the color and texture of clinker to give the house originality and add a little zest to the external facade. Certain types of thermal panels have special requirements for the installation process. To avoid mistakes, you should carefully read the instructions and follow them.
Installation Features
All types of façade panels can be installed on flat and smooth surfaces without prior preparation.
In cases where the walls have unevenness due to the properties of the material (logs, brickwork) or defects associated with long-term operation without repair, installation of a leveling frame is required.
The material for it can be wooden slats, bars or galvanized metal profiles.
The sheathing pitch corresponds to the size of the panels. Their mounting holes should be in the middle of the bar. The profile creates an absolutely flat vertical plane so that the facing parts are attached without distortion or kinks.
The presence of the frame provides a gap between the main wall and the facing layer, which improves ventilation and removal of excess moisture.
Installation is carried out from the bottom up and from the corners to the center. If there are special corner parts, they are installed first.
Some types of thermal panels provide the ability to cut and adjust the material directly at the work site.
The corner connection of such parts is formed by sawing their ends at an angle of 45°. The joint is then covered with a corner strip or rubbed in dry weather with special compounds at the stage of sealing the seams after installation.
Most decorative products for outdoor use have hidden fastenings. Insulated wall panels for exterior finishing are attached to wooden surfaces and metal profiles with self-tapping screws.
For concrete and brick foundations you will need dowel nails. The length of the fasteners is selected based on the thickness of the insulating layer, taking into account the required depth of penetration into the wall.
It is recommended, if possible, to install each subsequent row of thermal panels for the facade with a horizontal offset from the previous one so that the vertical seams do not coincide.
To do this, use additional parts or divide whole ones in half. Thermal panels for the facade are cut with a grinder with a corresponding disk, and the polymer insulating layer is cut with a knife.
The result of proper installation of insulated facade panels will be a beautiful exterior finish of a dry and warm house. All work will be completed quickly and with noticeable savings.
You might be interested in reading about plinth panels and panels for brick (stone).
Insulation options
The installation of insulating panels for external walls depends on how flat the surface is on which the slabs will be installed. The cladding of other areas of the house, in addition to the facade and sides of the building, has certain features.
Insulation of uneven walls
To level the walls, the frame method of laying panels is used
When installing slabs on walls, you need to take into account unevenness leading to deformation of thermal panels. To avoid this, a frame installation method is used. The sheathing is made of wood or metal, the second option is preferable. If wood is used, the beams are treated with an antiseptic.
The length of the horizontal and vertical steps of the frame lattice is selected in accordance with the dimensions of the wall slabs; the location of the fastening holes must coincide with the centers of the bars or metal profiles. In order for the panels to fit well, the frame must create a flat plane. If there is a risk of heat and moisture retention in the space between the lathing base and the panels, it is filled with construction foam. If it is impossible to install a frame grid, the wall is leveled with cement. This method is less economical.
Fastening panel elements to the sheathing:
- Thermal panels are laid from the bottom corner to the top.
- If corner parts are available, they are secured first. If not, the end parts of the slabs are sawed down to join at an angle of 45 degrees.
- Installation of the main panels on the sheathing is carried out using self-tapping screws. Their length should exceed the thickness of the product by 4–5 cm.
- Each subsequent row is mounted with offset vertical seams to improve tightness. To save money, they take extra material from panel scraps. To adjust it to size, the front part of the slab is sawn with a grinder with a disc corresponding to the external material; the insulation is easily cut with a knife.
Insulation of a flat facade
With smooth walls, installation with glue or dowels is possible
The slabs can be installed without lathing. If installation is carried out directly on a wall made of brick or concrete blocks, the panels are attached to the supplied dowel nails. Their length should be 4–5 cm greater than the thickness of the cladding. The locations for drilling holes in the slabs are usually already marked.
Begin laying from the bottom wall corners upward. In general, the process is similar to installing slabs on sheathing.
Before installation, the space between the wall surface and the slabs can be filled with polyurethane foam to provide additional heat-insulating properties. You need to find the most protruding place on the wall and level the surface along it. But it takes a lot of time, effort and money. It’s easier to install the frame and attach the slabs to it, and then either foam the space inside or leave a ventilated layer.
Pros and cons of using thermal panels for wooden houses
Finishing the facade of a wooden house with thermal panels has certain advantages and disadvantages. The advantages include:
- Comfort during installation. The panels are light in weight and have a large area, which makes work faster. The material can be easily lifted to a height and cut. The panels have locking joints, which ensures easy joints and strength.
- The panels provide high-quality insulation of facades. Their use makes it possible to protect walls from freezing. It is possible to speak about the effectiveness of such insulation by comparing the type of insulation used.
- They are moisture resistant. But water can still penetrate under the finish if installation work is of poor quality.
- Low weight of panels. As a result, the walls of the building do not experience strong additional load.
- The decorative part of the material will not react to moisture. In fact, it does not absorb it, destruction does not occur under the influence of ultraviolet rays, which makes it possible to maintain its original appearance for a long time.
- Easy maintenance of thermal panels. There is no need for periodic processing and cleaning.
- A significant range of thermal panels. It is possible to choose options that imitate masonry made of brick, stone or logs.
Disadvantages of such products:
- Overpriced thermal panels. Compared to competitors, the difference in cost is 3 times. In this regard, it is advisable to make the walls thick with high-quality cladding.
- Duration of operation of thermal panels. The manufacturer indicates 50 years, which is possible with extremely careful use. It should be borne in mind that such deadlines are forecasts of marketers. The product appeared on the market about 10 years ago, so it was not possible to verify this judgment.
- For installation you will need flat walls or a leveled frame.
Advantages of facade panels with insulation
By choosing insulated facade panels, you get several advantages:
- The load on the foundation will be small, because thermal panels weigh little (10 times less than brickwork of the same area). You don't have to worry about the reliability of the foundation and the strength of the walls.
- Installation can be carried out all year round - there are no restrictions.
- The palette of colors and variety of textures will please even the discerning homeowner.
- In winter, the figures in housing and communal services calculations will be up to 40% lower. This means that after overwintering for several winters, you will recoup the cost of the cladding.
- The fastening of the panels to each other is so strong that the facade is not afraid of slanting rain.
- The panels do not burn and do not support the growth of mold and fungi.
- The service life of such panels is at least 50 years, and if you choose products from the ABC-Klinkergruppe concern, the warranty on the panels will be 100 years.
Have you chosen? Are we editing?
Insulated facade panels are mounted on an adhesive mixture or guides. But, before this, you must brush the side edges of the panel with a brush. This is done for better grip. If you have chosen an adhesive mixture, apply it to the back side of the panel, making sure that one thin layer covers the entire panel, as well as in several places - in the corners and in accordance with the facade relief. Place the panel against the wall and let it stand for 5-10 minutes. After the panel has hardened, you can begin making adjustments. Align the panel using horizontal and vertical levels.
You need to start installation from the corner of the bottom row, and it is worth mentioning that there are special corner panels. Carefully level them even before applying the adhesive mixture - estimate it, and only then mount it more thoroughly on the glue.
A day after shrinking onto the glue, the panels with insulation are fastened with umbrella dowels into pre-drilled holes between the seams.
The video below shows how guys from one Sumy company deftly handle the installation process:
Carrying out installation
External walls must be leveled before installation. If they are even, then small errors will help level out gaskets made of plywood or similar materials. Next, the most convex point on the facade is determined and beacons are placed on the mounting foam along it. This is a labor-intensive job, which can be simplified by the construction of sheathing. The frame system will not only save time, but will also help create a ventilation gap that helps remove moisture.
The installation technology has its own nuances depending on the design of the insulated slabs, but in general its diagram looks like this:
- A line is drawn along the perimeter of the house, which will be the starting mark for the cladding;
- When starting installation work above the plinth level, you must first install a plinth profile on which the panels will rest;
- A wooden sheathing pre-treated against fungus and mold is attached to the wall. The pitch of the sheathing must correspond to the size of the panels.
Figure 5. Important point
- Installation of thermal panels is carried out from the corner of the building from bottom to top. The ends of the façade elements are either sawed off and joined to each other at an angle of 45 degrees, or are formed with a corner. In the second option, you need to start fastening from the corner element.
Features of the design of panels with insulation
Common to all types of thermal panels is the presence of at least two layers: an external decorative coating and an internal thermal insulation layer. Decorative coating performs the same functions as classic façade panels: protection from mechanical damage and from the effects of wind and moisture, giving the walls a complete appearance.
IMPORTANT! There are three-layer versions of products called sandwich panels. In them, the heat-insulating material is located between two facing layers made of metal. For operation in conditions of increased fire hazard, four-layer thermal panels are produced, in which there is a fire-resistant material between the outer tile and the insulation
For operation in conditions of increased fire hazard, four-layer thermal panels are produced, in which there is a fire-resistant material between the outer tiles and the insulation.
The main stages of production of insulated products with a decorative coating: preparation of block molds, foaming and drying of insulation granules, laying a decorative layer in a block mold, adding granules, heating the structure with hot steam (necessary for the granules to expand and form a layer of insulation), cooling panels.
The main purpose of using warm panels is to save on heating the building, allowing you to recoup the costs of their purchase and installation in the shortest possible time, provided that the house is located in a region with relatively cold winters. They are more expensive than conventional panels, but in most cases you will have to spend even more money purchasing siding and insulation separately (and installing them).
The products can be installed on most plastered and unplastered surfaces, including block and wooden walls, adobe brick, and expanded clay concrete.
NOTE! Thermal panels not only retain heat inside the building during the cold season, but also prevent it from heating up in the summer.
Decorative finishing is made from the following materials:
- Clinker.
- Porcelain tiles.
- Aluminum.
- Cink Steel.
- Compressed wood chips.
- Pressed marble chips.
The main insulation materials are polyurethane foam, mineral wool, and expanded polystyrene foam. The average density of this layer is 40 kg3/m, thermal conductivity is 0.020 W/m*C, thickness is 6 centimeters or more.
The high density of the material not only allows for better heat retention, but also increases its resistance to mechanical damage. The operating temperature range is between – 170 / +170 C. Despite the high fire resistance, the possibility of fire of the insulation is not completely excluded.
The weight of the panels varies between 10-25 kilograms. The approximate service life depends on the climatic conditions of the region, as a rule, it is 10-30 years.
Varieties
Thermal panels are classified according to types of decorative finishes and insulation materials.
Insulation materials vary in density and operational features.
Four materials are used in production:
- Extruded polystyrene foam . Density – 35 kg/m3. It has a relatively high coefficient of moisture absorption, coupled with the presence of internal voids, this feature can lead to moisture getting into the insulation and the development of colonies of microorganisms. Service life – 15 years.
- Polyurethane foam (PPU) . Density – 40 kg/m3. It is characterized by non-flammability and does not have the disadvantages of expanded polystyrene. The service life of foamed polyurethane is 50-60 years.
- Styrofoam . Density – 20 kg/m3. The most affordable and common option. Due to its low density, it has the lowest thermal insulation characteristics. The advantages of foam panels include high elasticity.
- Mineral wool . Density – 145 kg/m3. Due to its very high density, it loses its shape over time, so it is advisable to use this insulation with a metal decorative layer.
The following decorative finishing options are available:
- Clinker tiles . It is made from highly plastic clay, characterized by increased wear resistance and low water absorption coefficient. Clinker tiles create an additional protective layer that reduces the load on the insulation. The only drawback is the high price (imported products are especially expensive). As a rule, polyurethane foam insulation is covered with clinker.
- Porcelain tiles . It is made from a special powder under pressure at high temperatures. The powder contains quartz sand, clay, dyes and other additives. It has good performance characteristics, but has a significant drawback - its heavy weight , which does not allow it to be used for finishing houses with a weak foundation.
- Aluminum and steel . Used in the production of sandwich panels. They are the only options used in conjunction with mineral wool insulation . Aluminum is lighter but more expensive, while steel is a relatively budget option.
The most popular textures of thermal panels are brick and natural stone.
Manufacturers
Both domestic and foreign companies are represented on the market. German manufacturers specialize in the production of high-quality and expensive clinker tiles.
These include:
- TM ADW – Klinker.
- TM Stroeher.
- TM Ammonit Keramik.
The prices of their products start from 1800 rubles per square meter of tiles.
Russian companies also produce clinker tiles, and you can find other finishing options from them.
- "Workshop of facade materials." Produces tiles that imitate natural stone, brick and German clinker. Expanded polystyrene with a layer thickness of 50 mm is used as insulation. The average price of products is 1500-1800 rubles.
- FTP Europe. Manufactures clinker and porcelain tile thermal panels. The insulation materials used are polystyrene foam and polyurethane foam with a thickness of 60 or 80 mm. Product prices range from 1100 to 3600 rubles.
- "Forska". Specializes in the production of budget options priced from 1000 rubles. for 1 sq. m. Uses ready-made decorative finishing purchased from Western companies and combines it with insulation made of polystyrene foam or polyurethane foam.
- "Ermak". It specializes in mid-price thermal panels (RUB 1,800 – 3,000) based on expanded polystyrene (40 mm thick) and clinker tiles.
Main types of insulated panels
Facade panels made of polyurethane foam with clinker tiles glued to the outer surface are very popular.
They are distinguished by a wide variety of designs, imitating brick, ceramics, various types of natural stone and even wood. The panels are installed interlocking one behind the other.
The high quality of the parts makes the joints almost invisible. Plastic or metal bushings are pressed into polyurethane to strengthen the material at the point of attachment to the wall.
Sometimes an internal load-bearing layer of OSB is added. The choice of panel thickness depends on weather conditions. In temperate climates, insulated wall panels with an insulation thickness of 60-80 mm are used.
Thermal facade panels with an outer layer of porcelain stoneware have excellent consumer qualities. They usually imitate stonework, giving the building an impressive appearance.
Their protective properties against all types of mechanical, chemical and thermal influences exceed anything that other types of finishing materials can show.
Insulated facade panels made of expanded polystyrene with decorative plaster, which includes marble chips of various colors or fine-grained fractions of other types of stone, provide a smooth, seamless surface during installation.
They are easy to cut and fit, quickly installed, have a beautiful appearance and a low price. They are equally well suited for cladding office buildings and individual cottages.
Large-area facades with a minimum of architectural elements can be quickly and efficiently insulated using sandwich panels.
They are three-layer thermal plates of a large area made of two sheets of corrugated sheets with a layer of mineral wool, polyurethane foam or expanded polystyrene placed between them.
The metal is galvanized and has additional protection in the form of colored polymer coating. The design of the panels and the method of their fastening prevents moisture from entering the insulation.
SIP panels used in frame construction are arranged according to the same principle. But their outer layer consists of oriented strand boards, which, in addition to high strength, also have heat-shielding properties.
The main insulation is glued between two sheets of OSB. A wall constructed in this way requires additional decorative finishing.
Glass panels
An excellent modern material, which is rarely used to decorate private homes - glass panels are mainly used to decorate office buildings. The material includes fiberglass - tempered, reinforced or laminated. The strength of the coating depends on the processing method. A good option for insulating a house, because such panels accumulate part of the thermal energy of the sun.
Exterior Wall Panels for Home
The peculiarity of glass panels is that they are perfectly combined with other coatings, including wood, metal, and concrete. They also allow you to implement any design solution, but installing them is quite difficult.
Stone-like glass on the façade
Installation of thermal panels on a wooden house
Like many modern building materials, panels are installed using various methods - using a frame and on the wall. The best method for installing such material would be the second option. However, it is not possible in all cases - for example, when the walls have a significant deviation from the level, it is optimal to mount the frame.
- Installation without frame. Can only be carried out if there is a flat wall surface. The meaning of this installation method assumes that the thermal panel is nailed to a brick wall using dowels through holes made by the developer.
- Installation with frame. It is carried out in almost the same way, but the panels are screwed or nailed to the supporting beams. The difference is insignificant; apart from the ability to level the surface of the walls, the frame does not provide anything. It is possible to say that with the type of installation in question, the frame is harmful. Air circulates in the space between the panel and the wall, taking heat from the home - this is precisely why after attaching the 1st row, this cavity is sealed using construction foam.
Otherwise, finishing work is carried out in the same way as with other building materials.
Thermal panels have a tongue-and-groove edge where the exposed insulation backing is visible. In such areas, mechanical fixation is performed with dowels. In addition, the panels are fixed using EEPS adhesive used during the installation of a wet facade. The glue must be prepared in accordance with the instructions, mixing the mixture with the required volume of water. Installation of thermal panels on a wooden house:
- The product is tried on dry and the holes are prepared where the dowels are fixed.
- The thermal panel is removed and glue is applied to the ends of the insulation, maintaining a thickness of 2–2.5 cm.
- Special glue is applied in large lumps to the inside of the tiles, which protrude from the tongue-and-groove edge.
- The glue is applied in a continuous layer to the main part and rubbed in one direction with a comb with a tooth pitch of 1–1.5 cm.
- The panel is applied to the installation site and mechanical fasteners are attached.
- The thermal panel is pressed firmly but evenly directly against the wall. It is necessary to ensure that the glue protrudes along the contour of the insulation substrate.
- Using a long rule, the product is aligned with adjacent elements and the control cord.
- The thermal panel is tapped using a wooden block: in the place where a muffled, booming sound is heard, the glue has not properly adhered to the base of the wall. Consequently, the product in question needs to be pressed down a little more tightly.
- Expansion nails are hammered into the dowels.
- The excess amount of glue is removed and the installation of the next panel begins.
When the glue has completely dried (sometimes this takes 35–40 hours), the tile seams are rubbed down. For such purposes, basic facade plaster is used, which is painted in the required color by adding dispersed pigment. The plaster is hydrophobic and effectively protects the substrate of thermal panels from water penetration.
Grouting is carried out as follows: initially, the material is introduced into the seam using a thick bag with a cut corner, and then the remains are pressed firmly and the residue is removed with a knife for jointing the brickwork. After several hours of grouting, the finish is thoroughly washed with soap and water and a brush, preventing the formation of efflorescence in the future.
Calculations
To understand what the need for a building material is, it is necessary to find the total surface area. From the resulting value, the sum of the area of doors and windows is subtracted and 10% is added, which is taken away by cuts and overlaps during the work. The resulting figure is divided by 4.55, which is exactly how many square meters. m is in one package of plates.
The amount of required starting strip for insulating panels is calculated based on the perimeter of the building. The width of the doors is subtracted from the resulting value and divided by 3. To avoid mistakes, add 5% of the resulting number.
External angles are determined by the sum of the heights divided by 0.45 m. To be correct, it is worth adding 5% of the obtained value.
When making calculations, it is worth taking into account not only the area of the walls to be covered, but also heat loss, according to which in the future the material of the required thickness will be selected
- The U-value is a measure of how much heat is lost through a given thickness of a particular material, but includes the three main ways in which heat loss occurs - conduction, convection and radiation. This is a measure that always applies in the Building Regulations. The lower the U-value, the better the material is as a thermal insulator. The U-value provides insight into the consequences that thermal performance has when aimed at meeting current building codes.
- The R-value is a measure of the resistance to heat flow through a given thickness of material. Thus, the higher the R-value, the higher the heat resistance of the material and, therefore, the better its insulating properties. Heat moves in and out of a building in several different ways, and the R value only takes into account conduction and does not include either convection or radiation.
Dimensions and design of thermal panels
Exterior finishing of a wooden house with facade thermal panels is carried out using their 3 varieties: ordinary, additional and corner. They have a total size of 70 by 114.5, 70 by 64.5 and 70 by 24.5 and 70 by 26.5 (cm). Regarding the design, 2 types are known: 2-layer and 3-layer.
Double-layer panels
2-layer thermal panels are considered the most affordable type of this material. The base will be extruded polystyrene foam, on top of which decorative components are glued. The rigidity of the structure itself will be given directly by the insulation.
The service life will be approximately 15 years (provided there is no influence of external factors). The material is unstable to aggressive environments, which results in the possibility of deformation.
Three-layer panels
3-layer panels have many advantages. The basis is an OSB panel, which significantly increases the reliability of the material. In the middle there is a polyurethane foam layer, which is quite durable and dense. There are locks along the perimeter of the thermal panel, which make it possible to prevent the occurrence of cold bridges. The insulating characteristics of such products are higher than those of 2-layer ones.
