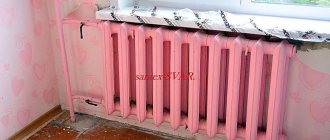
The appearance of heating radiators, even modern ones, does not suit everyone. Some people want to make bright and beautiful radiators, others want to disguise them so that they are not noticeable. It is possible to get rid of radiators completely, but it is too expensive; hiding them behind decorative screens is impractical and will also cost a pretty penny. Creative people who know how to draw can solve the problem cheaply and cheerfully by painting the battery the way they like. What should ordinary homeowners do? There is an option for them - to decoupage the battery with your own hands, and this article will tell you how this is done.
Master class on decoupage of a battery or radiator with your own hands
The simplest and most accessible type of decoupage for everyone is pasting. It doesn't require any special talent. All you need is accuracy and the ability to choose the right materials. Such work will not require much time. But the result will certainly please you and become a source of pride.
We use napkins
For decoupage you will need napkins
- First you need to prepare the battery: wash it thoroughly using detergents. A brush will come in handy for this work, since the radiator has many hard-to-reach places.
- Then, using sandpaper, you need to clean all the places where the paint has peeled off so that the surface of the ribs becomes smooth.
After this, the battery will have to be washed again. The battery must first be cleaned with sandpaper. - In decoupage, ready-made images printed on rice paper are most often used.
You can choose the type for your battery at your discretion. But please note that the standard sizes of this paper are: 34*100. If such an image is used, it will not be enough to completely cover the edges. We'll have to complete the picture. Therefore, you should choose options where the top and bottom are not difficult: earth, grass, sky. Think in advance about the design you want to apply. - First, the base is created using oil-based white paint.
The painted battery should be left for a day to dry completely. After cleaning, the battery must be painted with oil paint and wait until completely dry. - Then you need to measure the width of the section, draw and cut the design into appropriate strips.
They are glued using regular PVA glue. The stripes must be carefully smoothed, removing air bubbles. When the glue has dried, you need to start finishing the drawing, painting the remaining parts of the ribs, mixing paints to obtain the desired shade. You need to glue the fragments with PVA glue - In order to give the decoration strength and a more attractive look, after the paint has dried, the battery is coated with heat-resistant varnish in two layers.
After all work is completed, the battery is varnished
You can cover the radiator with ordinary multi-layer table napkins. They are offered in a large assortment, allowing you to choose any pattern. Before gluing, you need to separate the top layer from the napkins and cut them into strips of the required width. The work also uses PVA glue. You can cover the surface with decoupage varnish.
Coloring
Drawing abilities open up great opportunities in decoupage. You can bring any creative idea to life, create images of any subject on the battery. Luxurious roses or modest daisies may bloom on the sections of the radiator, ladybugs, butterflies, birds or reptiles may “settle”, ethnic ornaments, ornate patterns or futuristic symbols will appear. It all depends on personal preferences and imagination.
Acrylic paints are used in this work. They are durable, resistant to external influences, and dry quickly. These paints differ in density and purpose, so when purchasing them you should make sure that they are suitable for indoor work. The beauty of the applied design will last for many years. No additional varnish is required.
You can also create voluminous decorations on the radiator. Craftsmen who have skills in modeling and have creative abilities should use them to decoupage the battery. On sections you can create elements of stucco from the Renaissance or ancient times, use floral, plant, and animal motifs. In a children's room, fairy tale and cartoon characters can become excellent decorations.
This type of decoupage uses a self-hardening mass. It easily takes any shape, attaches well to metal, and has high heat resistance. The completed decorations will dry quickly. They can be painted with acrylic paints to give the necessary brightness, and then covered with a double layer of heat-resistant varnish.
Creating a decorative lattice
General characteristics of the product
The design is a three-sided fiberboard box with a lid on top and legs on the bottom. This option is an inexpensive and compact way of decorative finishing of a heating battery that does not interfere with the spread of heat in the room. Warm air exits through the side walls and front panel of the box, on which windows are cut out and a decorative metal coating is installed.
To create a decorative lattice with your own hands, you need to have the following tools:
Tools for battery decoupage: drill, drill and countersink, circular saw, miter, hacksaw, stapler, tin scissors, tape measure, pencil.
- Drill.
- Drill and countersink.
- Circular saw.
- Cutter, hacksaw.
- Construction stapler.
- Shears for tin.
- Tape measure, pencil.
Materials you will need:
- Screws (4cm).
- Furniture tape.
- Staples.
- Wood glue.
- Finishing nails.
- Fiberboard board.
- Adjustable legs - 4 (2) pcs.
- Protective screen.
There are two ways to achieve structural stability. The first is to completely install it on four legs, which can be adjusted if there are uneven floors. The second method is to create support on one side on two legs, and on the other on the baseboard. In this case, it is necessary to cut the material taking into account the length of the box to the baseboard. As for the legs, in this case you can use both metal and wooden products.
Technology for creating a decorative lattice with your own hands
The decorative grille is made of wood and attached to the battery using a drill.
- Measure the dimensions of the heating battery: width, height for the front, depth and height for the sides, width and depth for the top. When cutting material for the front panel, add 10 cm to the width and 5 cm to the height. For the sides, add 2.5 cm to the resulting depth dimensions. The top cover should be 1.2 cm wider than the sides and 2.5 cm larger than the front parts in width.
- Mark the future windows on wooden surfaces and cut them out.
- Attach furniture strips to the cut pieces using wood glue and finishing nails.
- At this stage, it is necessary to cut out the protective screen (mesh) for the front and side panels of the decorative grille, since this process is best done before the structure is fully assembled. Place the cut out front panel on a horizontal surface. Then place a metal mesh in the top center of the window and cut it with a margin of at least 5 cm around the entire perimeter. The protective screen is cut out on the side panels of the grille in the same way. Set the resulting parts aside.
- Start assembling the box. Connect the side parts and the front panel using fasteners and glue.
- To install the legs to the structure, cut triangular blocks from plywood. Then secure them to the front and sides of the box. The legs are fixed to the triangular blocks with screws, maintaining the required height for the required position of the box. If necessary, the sides near the baseboard can be trimmed a little.
- Place the top cover on the box in the center and mark the location of the front and side panels on it. Then fill the inside of the lid with strips so that they do not protrude beyond the edges of the markings. This will allow the lid to be in a stable position and not slip off.
- Using a stapler and staples, fix the screen to the front and side panels.
- Place the box on the radiator, adjust the legs and cover with the lid.
The production of the decorative grille is completed. Paint and varnish can be used as finishing. You can also decoupage the surface, which will be discussed later.
Manufacturing materials
The products can be made with your own hands using various types of materials. The characteristics of the material determine its technical features.
For example, metal shutters can be painted any color. They perform their protective functions excellently and look great.
Using the perforation technique, you can create an unusual and interesting effect. The steel and aluminum model is very easy to install. A wooden product looks very impressive in any interior.
For those who want to create a similar decoration element with their own hands, it is better to use available materials:
This is an inexpensive material with low thermal conductivity. It heats up unevenly and has little strength. Working with plastic is quite difficult. The plastic should be thick, since thin material has low strength.
May release toxic substances when heated. Products made from such raw materials are light in weight, resistant to moisture, not susceptible to corrosion and do not heat up very much.
When choosing a material for a decorative product, you should remember not only the attractive appearance, but also the microclimate in the room. Therefore, it is necessary to select a damper with a minimum surface area and leave a small space from the floor for air movement.
Wooden products can be painted in any color and decorated with artistic painting. Four types of sheathing can be made from wood. For example, a diamond, circles, a cage and in the form of blinds. An interior with wooden elements looks very aesthetically pleasing and goes well with other materials.
The best types of wood for such products are beech and oak. They are durable and reliable. They can be either tinted or painted with enamel. To prevent the grilles from impeding the circulation of heat, they are mounted not on the floor, but at some distance above its surface. For better passage of warm air, certain holes are made in the upper part of the box.
Fences can be made from slatted fabric at an affordable price. This is an excellent stylish element that perfectly allows warm air to pass through and performs a protective function.
Metal has increased thermal conductivity, but you need to know how to work with it. This is an excellent material for homemade construction. Two types of products can be made from it: stamped and welded.
Stainless steel dampers look more elegant and beautiful. They can cover either part of the battery or the entire radiator. They are divided into 3 types: with two sidewalls, with one and without sidewalls. The choice of option depends on the method of connecting the heating device.
The metal element does not interfere with high-quality heat transfer. The box, made of aluminum or steel mesh, perfectly transmits heat. Such products are very easy to install. They are decorated with various designs. For example, an openwork lattice or a solid canvas with open space.
MDF panels provide a wide variety for decoration.
They are created from perforated parts equipped with a decorative frame. These models are suitable for different heating systems. They can be used to decorate both cast iron and bimetallic radiators.
Decoupage. Technology
Decoupage is an imitation of painting. And any painting requires a flat base. New radiators are produced with smooth-walled sections, so the pattern will fit perfectly. But you will have to work on old cast-iron rarities to level the surface as much as possible and remove layers of old paint, drips and rust stains.
Old batteries require preparation for decoupage
Step one. Removing old paint
Old paint is not easy to remove.
You can try using a solvent, applying it to the surface of the radiator and scraping off the softened enamel with a metal spatula. But if there are too many layers of paint, the option is too tedious. Plus, the pungent odors of solvents have a detrimental effect on health.
Another way is mechanical. Sandpaper with different grain sizes and an angle grinder with abrasive attachments will be used.
Many craftsmen advise cleaning the surface of batteries using a drill and a brush attachment (wire or polymer-abrasive). Old paint will fly off in no time, but it’s worth coordinating noisy work with your neighbors.
Repair and auto repair shops often offer sandblasting services. This method is highly effective, but will require dismantling and transporting a heavy radiator.
And another option is thermal. Old paint can be removed by heating the surface of the radiator with a hair dryer, and then scraping off the peeling enamel with a spatula. If there is an opportunity and desire to dismantle the radiator and take it out of the room, then a burner is used for cleaning. All that remains is to lightly sand the cast iron surface.
After removing the old paint, the radiator should be degreased with white spirit and then coated with a layer of anti-corrosion alkyd primer to improve the adhesion of the paint layer to the metal. The drying time of the putty is from 20 minutes to several hours.
Step two. Radiator painting
First of all, you should choose a paint that will meet the following requirements:
- wear and heat resistance;
- non-toxic;
- no change in the shade of the coating over time.
In addition, it is recommended to choose paint that matches the wall located behind the radiator. Plus, it is advisable to purchase matte water-dispersion paint (labeled “for painting radiators”), decoupage will look more impressive on it, and during the painting process unpleasant chemical odors will not bother you.
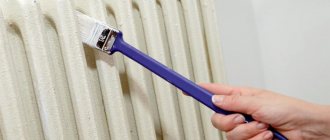
The most convenient way to apply paint is with a fur double-sided mitten. A rubber glove is put on the hand, and a fur mitten is placed on top. This makes it very convenient to paint hard-to-reach areas. Don't forget to place oilcloth or newspapers under the radiator so as not to stain the floor.
Step three. Preparation of materials
To begin, take a napkin with the desired pattern and separate the layer with the pattern. We measure the battery sections (length and width) in order to cut the napkin exactly to size. We cut the napkins based on the measurements obtained.
If you don’t have ready-made napkins, you can make them yourself. To do this, find the desired drawing on the Internet. Take a two-layer white paper napkin, place it on top of the printed design and secure it on one side with masking tape. We cut off the excess napkin. Now print out the design you like on a sheet of paper with a napkin attached. Peel off the tape and the napkin is ready.
Video - How to make a napkin for radiator decoupage
For the living room, it is best to select images of nature and abstraction, for the nursery, cartoon characters are appropriate, and in the kitchen, floral motifs and still lifes will look best.
This completes the preparation. Let's get started with creative design.
Step four. DIY decoupage of a heating battery
We take a strip of napkin and glue it with the wrong side to the section of the radiator coated with glue. Smooth the napkin with your hand or a wide brush with soft bristles. If some areas of the strip do not stick, coat these areas with glue directly on top of the napkin. We make sure that no bubbles or unevenness are formed during the process.
We rinse the brush from glue and open the acrylic varnish for decoupage, which can be glossy, matte or with various holographic effects. Using light, precise movements, coat the battery with varnish. The varnish will fix the design and give the work a finished look.
If desired, you can use acrylic paint to apply any lines or additional drawings on top of the napkins to make the work truly exclusive.
We wait until the varnish dries and turn on the heating. The work is completed.
Decoration method 1
Decorating radiators is not such a difficult task, and you will soon see it. The first method is the most common staining. You don't have to paint your radiators white. Indeed, today you can find paints in a wide variety of shades and colors on the market.
Places that do not need to be painted should be sealed with masking tape. If the radiator has not been painted, then it must be treated with an alkyd base primer with pigment.
Decorating radiators using painting is almost an ancient method. And previously, a mitten was used for this; such a device helped to do such work efficiently and without unnecessary smudges and layers. The paint also mixed well.
Let's tell you a little about this method: the mitten itself is made from fur - you take a piece of it, fold it in half, and sew it together to make a bag. Now you need to put the mitten on your hand - but first put on a rubber glove so as not to stain your hand. Next, you can use a mitten to paint the batteries - the paint applies evenly and in a thin layer.
Black and red colors are taken, mixed, the resulting bronze color is applied with gauze to the places that are marked. So, we will get a heating radiator that looks like a piece of jewelry. And such decoration of heating radiators can be additionally decorated with drawings.
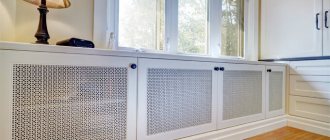
Flat screens
Often such designs are used for radiators built into a niche. They are popular because they have many stylistic options:
- in the form of a lattice;
- with a floral or geometric print;
- threaded;
- forged.
If the radiator is mounted in a niche, then by building a wide window sill, the owners can organize a small work area. Models of this type have gained popularity due to their versatility and high technical performance. The choice of flat panels is incredibly huge. Models with carved design, various forged parts and patterns are presented. If the heating device is located far from the wall, you can install a bench in its place.
All the indicated advantages allow flat screens to become popular not only for the purpose of decorating heating devices. Batteries hidden in this way look unusual, attractive, and certainly do not leave anyone indifferent.
Heating battery decor
Basically, in our apartments, heating radiators have a slightly unesthetic appearance. Of course, you can make repairs and replace all metal surfaces with your own hands with more modern radiators that have a beautiful shell. Since such work is costly and time-consuming, you can get out of this situation using battery decoupage.
Work such as decoupage on metal is not too difficult, but it will take your patience and work. In this article, a master class will be offered, which is intended for beginners. Here is a list of materials that will be useful during work:
- decoupage cards;
- glue;
- acrylic paints;
- decoupage varnish;
- light-colored enamel;
- sandpaper;
- brush.
The first stage of battery decoupage, which the master class recommends, is to thoroughly wash the batteries and then sand them. Do not try to remove the entire layer of paint, just try to make the surface smooth.
Wash the battery again with your own hands and wait for it to dry. Now, we begin to paint the battery with white enamel, as shown in the photo. At this time, you need to open the balcony and windows, as this paint has a strong smell.
While your batteries are drying, you need to prepare decoupage cards. Measure the size of the battery and draw a pattern to cut out.
We glue the picture so that it is located in the center of the battery, as in the photo.
PVA glue is diluted with the required amount of water. This is done so that it fits more correctly on the decoupage paper.
Look at the photo of the battery decoupage; your picture should be glued in exactly the same way.
We paint the top and bottom of the battery with selected shades of acrylic paint. If your artistic abilities are very developed, you can continue the image on the map. After the metal has completely dried, coat the battery with varnish, preferably more than once, leaving intervals between dryings. This master class is completely finished, look at the photo, how beautiful it turned out.
As you may have noticed, decoupage on metal, like decoupage of a battery, is a very entertaining activity. Especially when it comes to transforming interior items. Using a master class that shows the decoupage method, you can decorate not only radiators, but also furniture and doors. Watch videos showing decoupage lessons for beginners. It is not necessary to immediately take the labor-intensive option. It is enough to try this style on some small object to understand how this technique works. Craftswomen who have used the decoupage method more than once will no longer be able to switch to other types of needlework and exchange them too. Since such a hobby can turn into a stable monthly income, which also brings pleasure. You should carefully learn the entire technique of applying a decoupage pattern and love what you do.
How to decoupage a battery
Here we will look at decoupage of a cast iron radiator; to decorate batteries from other materials, some stages of preparatory and main work are not required. Before you start decorating a cast iron radiator, you should purchase and prepare all the necessary materials and carry out preparatory work.
To decoupage a heating radiator, the following materials are required:
- special paper for decoupage with an ornament or design;
- foam sponge and dish brush;
- water;
- sandpaper;
- solvent;
- dry rags, rags;
- white matte enamel;
- colored acrylic paints;
- polyvinyl acetate glue (PVA);
- heat-resistant clear varnish;
- 3-4 brushes of different sizes.
Materials for decoupage
First you need to wash the battery with warm water and soap, carefully cleaning hard-to-reach places. It is best to do this with a sponge, and clean the depressions and corners with a brush. After the radiator is completely dry, you need to sand its surface with sandpaper. There is no need to remove all the old paint; it is enough to treat the areas where the paint is peeling off. After finishing sanding, you should thoroughly wipe the surface with a dry cloth so that no particles of old paint, rust or other contaminants remain, then remove grease stains using a solvent.
The last stage of preparatory work is painting with white matte enamel, which is thermally resistant and does not form bubbles when heated. The enamel must be matte, since the surface of the battery should not shine before decoration. After painting, the heating device dries within 24 hours.
Decoupage process
The simplest technique with which you can perform decoupage is pasting. It will not require any special artistic talents from you, you just need to do everything carefully and choose materials harmoniously. This method will not take much of your time, but the result will be great.
In decoupage, rice paper or simple napkins with a printed pattern are used. The paper parameters are 34x100 cm. This is not enough to cover all the edges. You will have to join several sheets with your own hands or complete the pattern with a brush. If you doubt your artistic abilities, choose paintings where the upper and lower elements are extremely simple: sky, grass, etc.
Measure the width of the heating radiator section, draw a pattern on paper and cut it into strips of the required size. Paper strips are glued using the simplest PVA. Make sure there are no bubbles left. When the glue dries, you can finish painting the pattern with acrylic paints in places where there is not enough paper.
You can use ordinary table napkins for decoupage. In this case, only the top layer is glued to the battery. It is very thin, so working with it requires special care. It’s better to practice on a small area, because in 90% of beginners, the napkins tear during the gluing process.
In order for the paper to hold well and not fall off the battery, it must be secured with two layers of varnish. Choose a coating that can withstand heating up to 150 degrees. If you want to achieve an interesting effect, use craquelure varnish. After drying, it will become covered with tiny cracks, like in old paintings.
Helpful Tips:
- If you apply several layers of wipes, do this only after the glue has completely dried. Otherwise, the paper will warp and you will have to redo everything.
- If you made a mistake and noticed it already when everything was dry, don’t be upset. Paint over the defect with white acrylic paint, and then glue on a new layer of paper.
- Too sharp transitions of color or fragments can be softened by carefully painting them with paint to match, lightly tapping with a brush. You can use a sponge for these purposes.
Do-it-yourself decoupage of heating radiators is not only a quick and inexpensive way to refresh a boring interior, but also a fun activity that the whole family can do.
Decoration stages
Before you start decoupaging the battery, you need to prepare its surface.
First, thoroughly flush the radiator. It is especially worthwhile to work hard when cleaning sections of cast iron batteries.
Secondly, you should sand the radiator with coarse sandpaper to smooth out any existing irregularities and remove the old paint.
And thirdly, paint the battery with heat-resistant light enamel. It is not recommended to use nitro paint, because... it swells when heated.
Then, when the paint is completely dry, you can proceed directly to decoupage.
Drawing
You can first draw a sketch on paper, this will make it easier for you to work later.
Prepare pieces of decoupage paper. You need to do this in the following way: you take the picture you like and tear off the edges of the paper so that you only have a fragment in your hands that you will paste.
This is done not only for better adhesion of the pieces of paper to each other, but also to mask the boundaries of the decoupage fragments. The transitions are almost imperceptible, and one pattern can smoothly transition into another.
You should first try on the prepared fragments on the sections themselves.
To decoupage radiators, use PVA glue diluted with water in a 1:1 ratio. It glues various types of materials well and is easy to use. Special glue is sold in craft stores, but using it for decoupage on batteries is not economically profitable.
We apply a piece of napkin to the radiator fin, apply glue from above to the center of the design. Using smoothing movements of the brush, distribute the PVA over the entire surface evenly from the center to the edge.
If desired, you can paint some details with acrylic paint and glue voluminous plastic decorations.
Recommendations from experts
And finally, let’s reveal a few secrets. Do not apply many layers of napkins on top of each other without drying in between; a thick layer of paper may warp.
If you have a bad part and you notice it after drying, don’t be upset. Just paint over this part with white paint, let it dry, and then cover it with a new piece on top.
If you are generally satisfied with the result, but there are sharp transitions between the fragments, paint them with paint to match with light tapping movements of an end brush or using a sponge.
The decoupage of the battery will last much longer if it is secured with interior varnish.
We eliminate flaws
If the surface is decorated with small torn fragments, from which it is necessary to obtain a single whole, straighten the edges of the fragments with a brush or fingers.
If there is color unevenness somewhere, dilute the paint of the desired shade and paint over the translucent base. When the surface is no longer very wet, but has not yet dried, you can use thin brushes and acrylic paints to draw in the details, add brightness and clarity.
The next step is to decorate the edges of the product. There are different approaches here. In some places you have to trim the edges evenly, painting the sides, in others you can wrap the napkin on the back side and glue it there. In general, this is also a whole science.
Getting it to the finish line is an equally creative process.
After this, you can leave the product to dry. To speed up the process, you can use a hair dryer, but you need to keep it at a considerable distance, move it all the time and make sure that it dries evenly. If after drying you see that there is a fold on the glued napkin, you can still fix it. Take fine-grained sandpaper and sand it. We act gently so as not to damage the drawing around.
What is decoupage
Decoupage is a special technique for decorating a wide variety of human objects, which consists of pasting with multi-colored paper with various ornaments and designs and then covering with varnish. Decoupage for decorating objects began to be used in medieval Europe, first in Germany and France, when decorating furniture with paper with inlays and designs in oriental style became fashionable. Then this hobby spread throughout Europe and for several centuries interior items, accessories and even clothes were decorated using this technique.
Decoupage cast iron battery
What is the essence of decoupage technique?
Decoupage is a technique of transferring drawings from colored paper to any surface: wood, ceramics, metal, etc. In this way you can decorate anything, from dishes to pieces of furniture. The technology itself is several hundred years old. The fashion for such decoration arose in the Middle Ages in France and does not fade to this day. Some craftsmen even decorate clothes in this way.
People usually try to update old furniture or decorate unsightly interior items with decoupage elements. Many people are especially dissatisfied with old cast iron radiators. They cannot be hidden behind furniture, as it can block access to warm air. Painting doesn't help the situation either. White color makes you bored. Craftsmen found a way out of this situation and turned ordinary radiators into a work of art, decorating them with beautiful and stylish designs.
Options and criteria for selecting images
If you use ordinary table napkins for decoupage, then the choice of designs is very extensive. These can be patterns, drawn images, ornaments and geometric shapes. Special paper for creativity is produced more in the classics: flowers, landscapes, etc.
When choosing a material for decoupaging batteries with napkins, take into account the interior and design of the room. The color and pattern should be in harmony and not dissonant with the theme of the room. For example, for a nursery they choose bright colors, cartoon characters, butterflies, flowers, etc. The restrained classics of the living room are emphasized by calm colors.
In addition to being compatible with the overall style, images can act as a disguise. A well-chosen pattern can hide surface unevenness, paint chips, cracks, and rust. Also, with bright colors you can make the radiator the central element of the room.
If you spend a little time and look for napkins with patterns similar to wallpaper, they will seem to merge with the decor and create a single concept with it. This approach is recommended for small rooms with low ceilings.
If the room area is sufficient, there are practically no restrictions in the choice of images. By showing your imagination and choosing napkins with a landscape, you can concentrate your attention on the batteries and take your eyes off other things.
In order not to correct mistakes while working, it is better to make preliminary sketches on a sheet of paper and compose the general appearance of the finished painting. This will make the process of applying decoupage easier.
Battery decor
There is an interesting and fairly simple option on how to make a heating radiator beautiful. This is a battery decoupage. And here you don’t need talent - you just need accuracy and the right selection of materials.
Modern creative people can use their golden hands to turn even the most ordinary and unremarkable thing into a beautiful and original addition to the interior.
Editorial “So Simple!” I have prepared for you a simple and accessible master class on how to turn a heating radiator into a stylish art object for your home using the decoupage technique.
You will need
- sandpaper
- matte white enamel
- patterned rice paper/napkin
- PVA glue
- brushes
- acrylic paints
- heat-resistant varnish
Progress
Wash the battery using detergents. Then take sandpaper and remove all rough areas. The battery must be absolutely smooth. Wash the battery again with detergent and dry with a towel.
Prepare napkins with the image you like. It is better to purchase large napkins so that you don’t have to complete the image, as it happens that there are not enough napkins to cover the entire length of the battery.
To prepare the battery for decoupage, you need to apply white paint to it.
Please note that the paint will take at least a day to dry! After the paint has dried, you can glue the design. Pre-cut the napkin so that each section of the battery has its own part of the pattern.
Apply PVA glue to the napkin strips.
Smooth out the pattern with a brush, then apply glue to those parts of the battery for which there were not enough napkins.
To ensure that the work retains its original appearance for a long time, cover it with heat-resistant varnish in two layers.
Instead of rice paper, you can use napkins with a pattern, of which we will only need the top layer. We have prepared a small selection of ideas for inspiration for you.
The best solutions for the kitchen
The design of kitchens, not as strict as is customary for living rooms, gives free rein to imagination. In addition to the above-described ways to hide heating radiators, in the rooms where culinary masterpieces are created, designer delights are also created to decorate heating radiators. The radiator and the pipe connecting it to the heat source can be painted in the same color as the walls, decorated using the decoupage technique, or these two methods can be combined.
A battery painted to match the walls will be less conspicuous
An even greater effect can be achieved if you paint the battery to match the wallpaper
The battery can be displayed as part of an artistic composition
Many ideas are available on the Internet. Taking them as a basis, you can create a masterpiece on your own and without much labor or time, decorating the external elements of the heating system with an elegant or cheerful design. Battery decoupage involves transferring a design from a carrier onto the metal surface of a radiator. When decorated using the decoupage technique, batteries can be decorated using ready-made designs made on thin paper (both rice paper and ordinary decorative napkins are suitable). There are a lot of design options: flowers, wood decoration, geometric designs.
Rainbow battery
Khokhloma painting on a heating radiator
If you have artistic abilities, then you can do without ready-made solutions and apply paint directly to the surface. For such work you will need heat-resistant paints and varnish. The latter is necessary for those who decide to decoupage the battery themselves. For decoupage you will also need glue; regular PVA will do.
